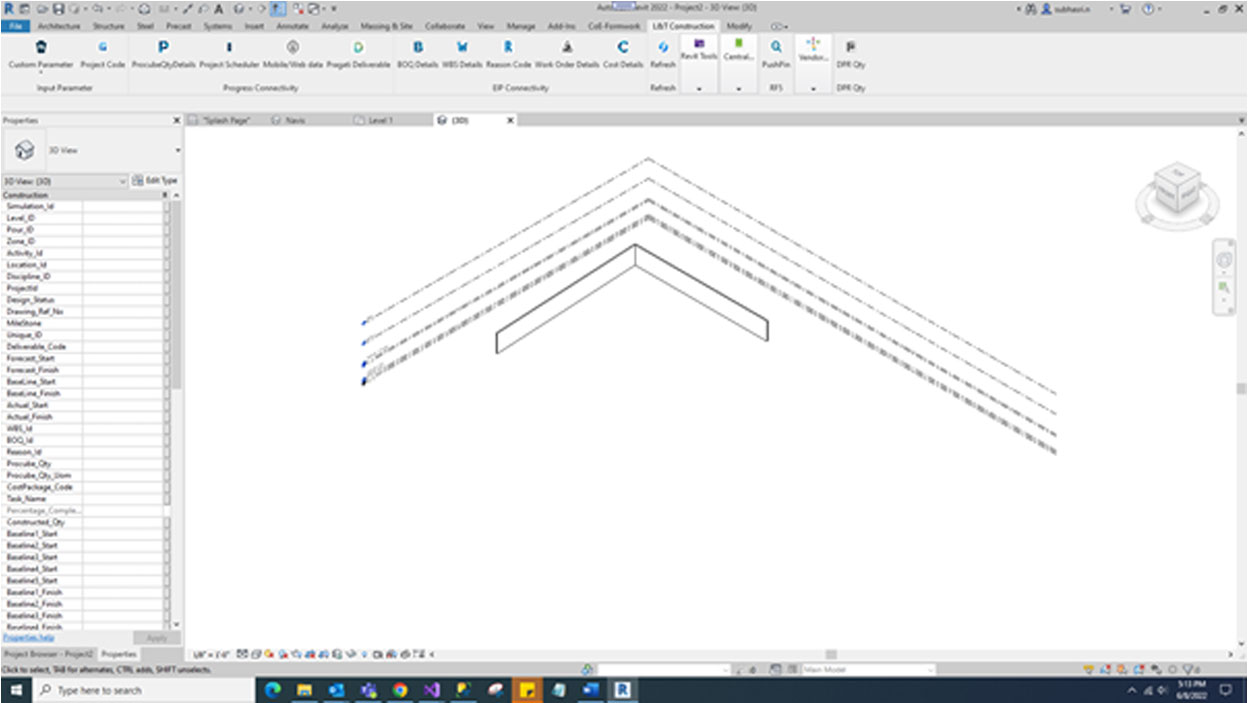
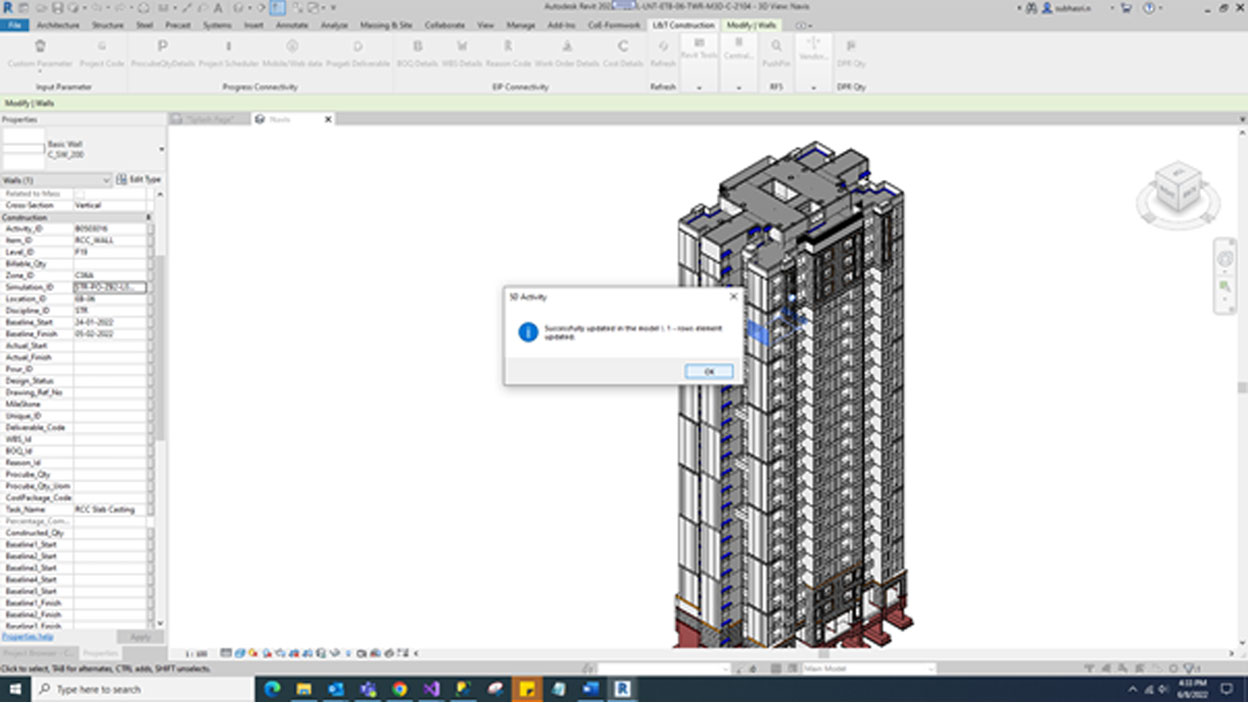
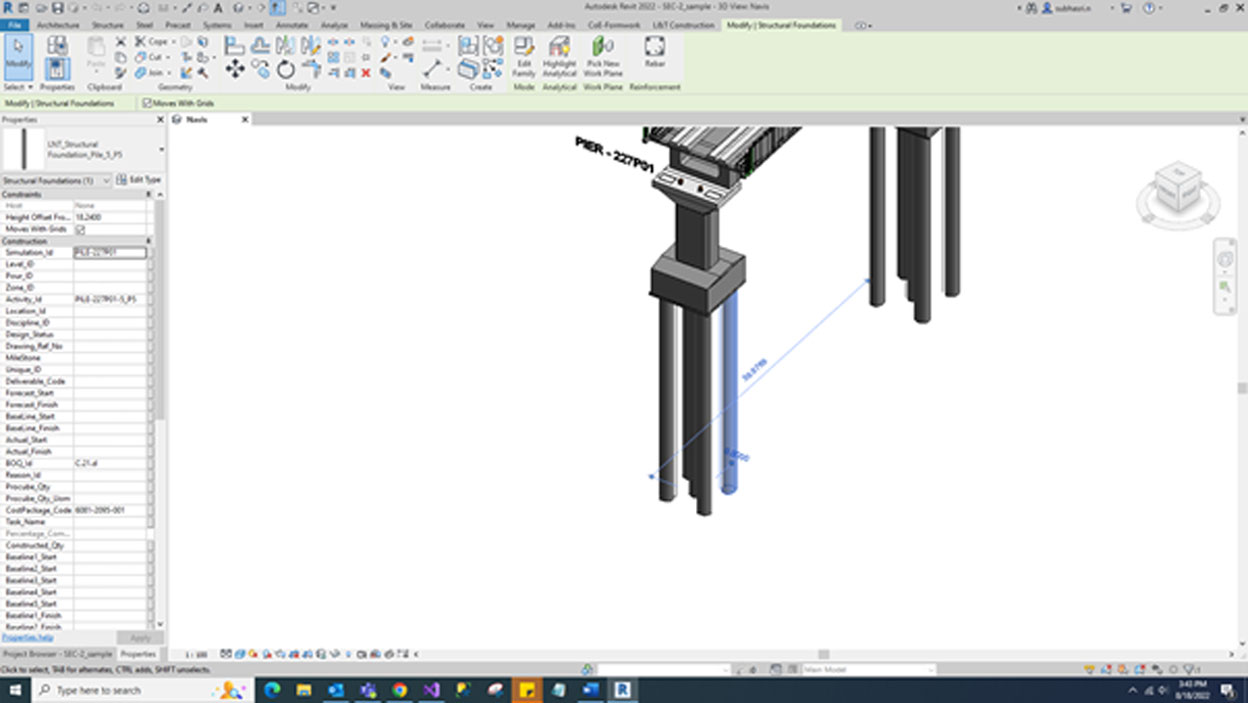
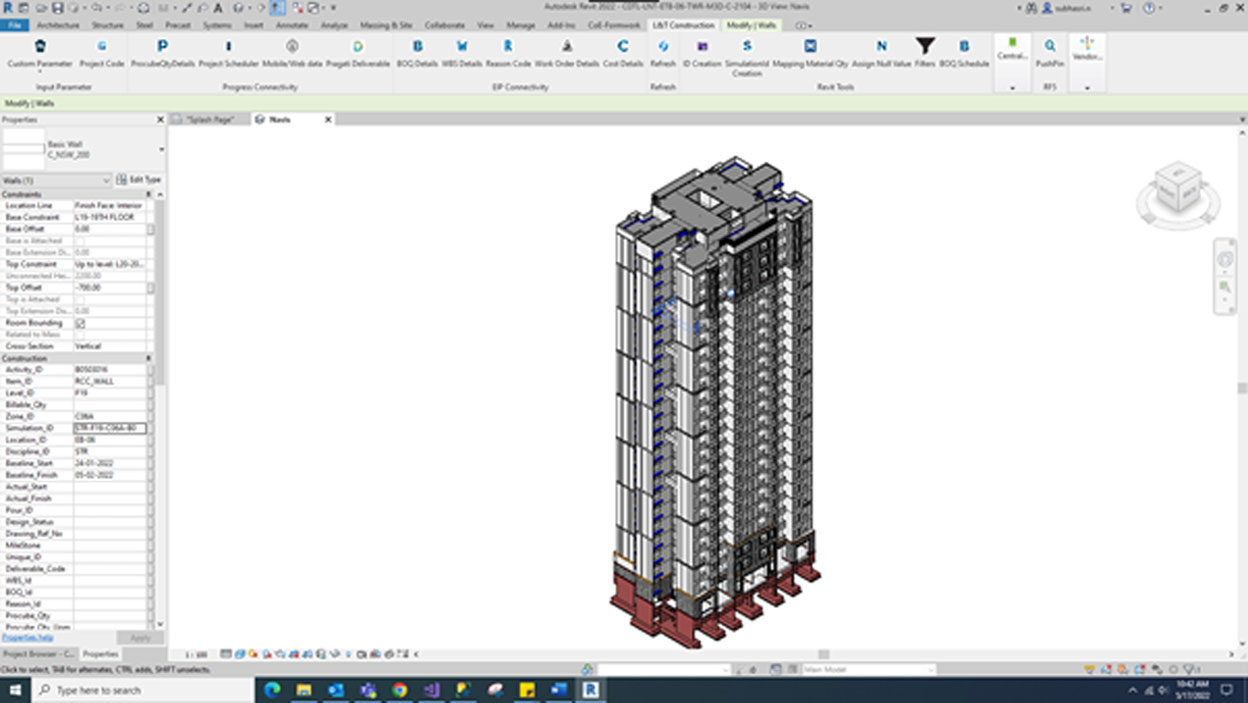
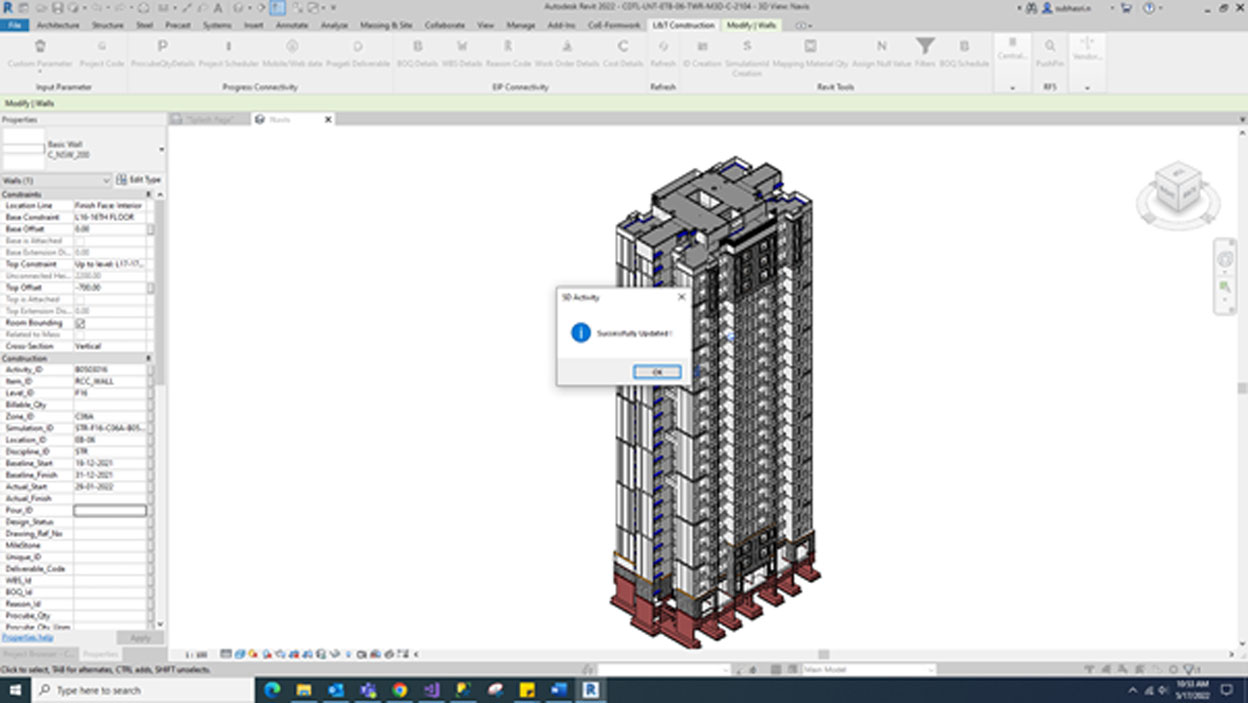
Click 3D button and relevant parameter will be updated successfully.
Click 3D button and relevant parameter will be updated successfully.
Click 4D button and relevant parameter will be updated successfully.
Click 5D button and relevant parameter will be updated successfully.

Click Classification button and relevant parameter will be updated successfully.
Click Warranty button and relevant parameter will be updated successfully.

Click Pragati button and relevant parameter will be updated successfully.
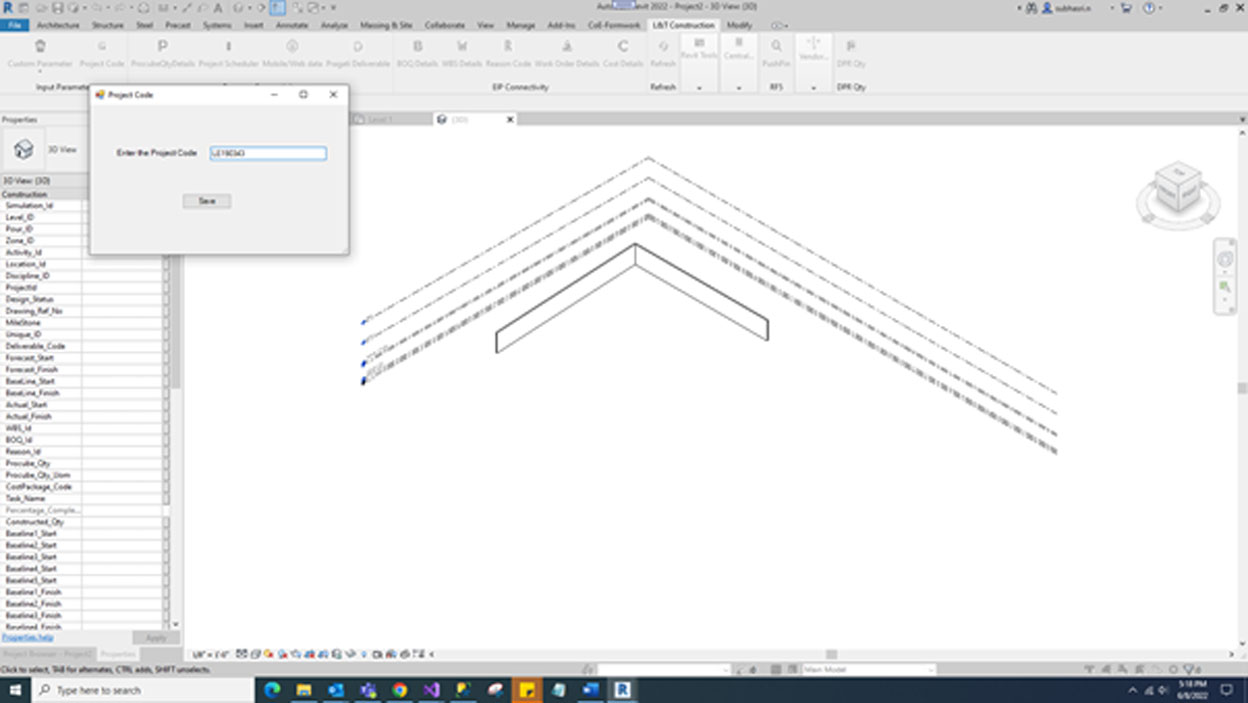
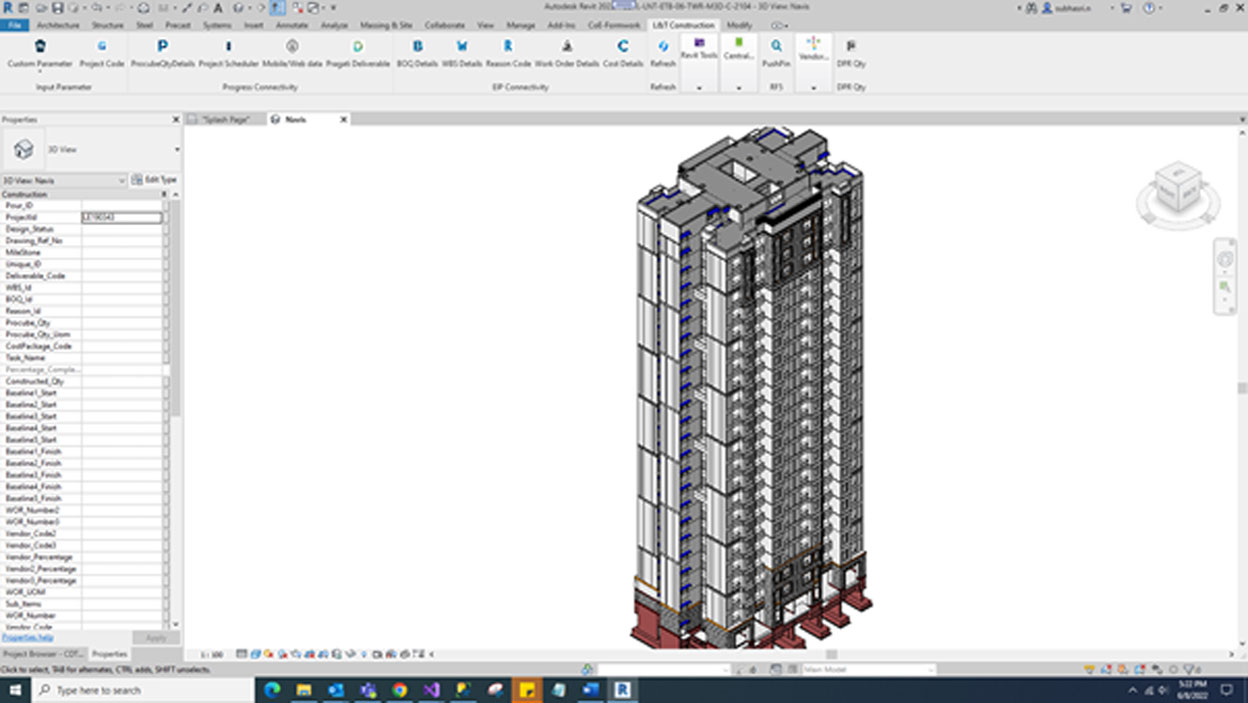
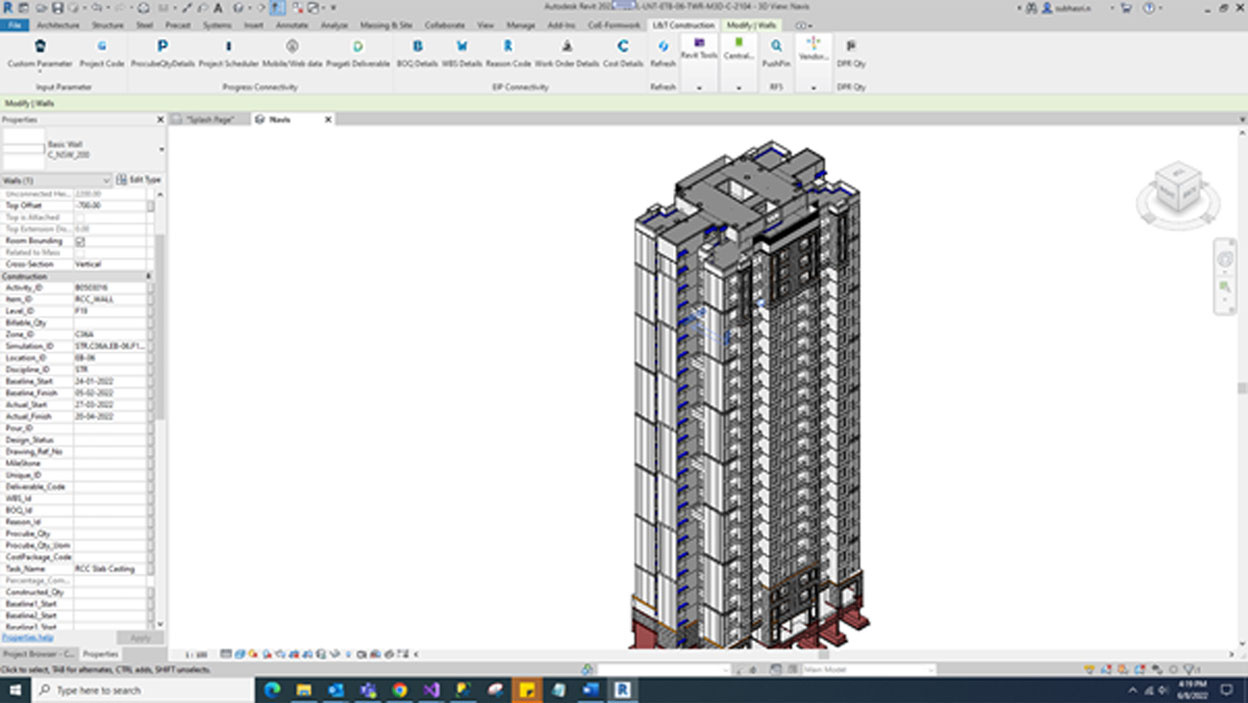
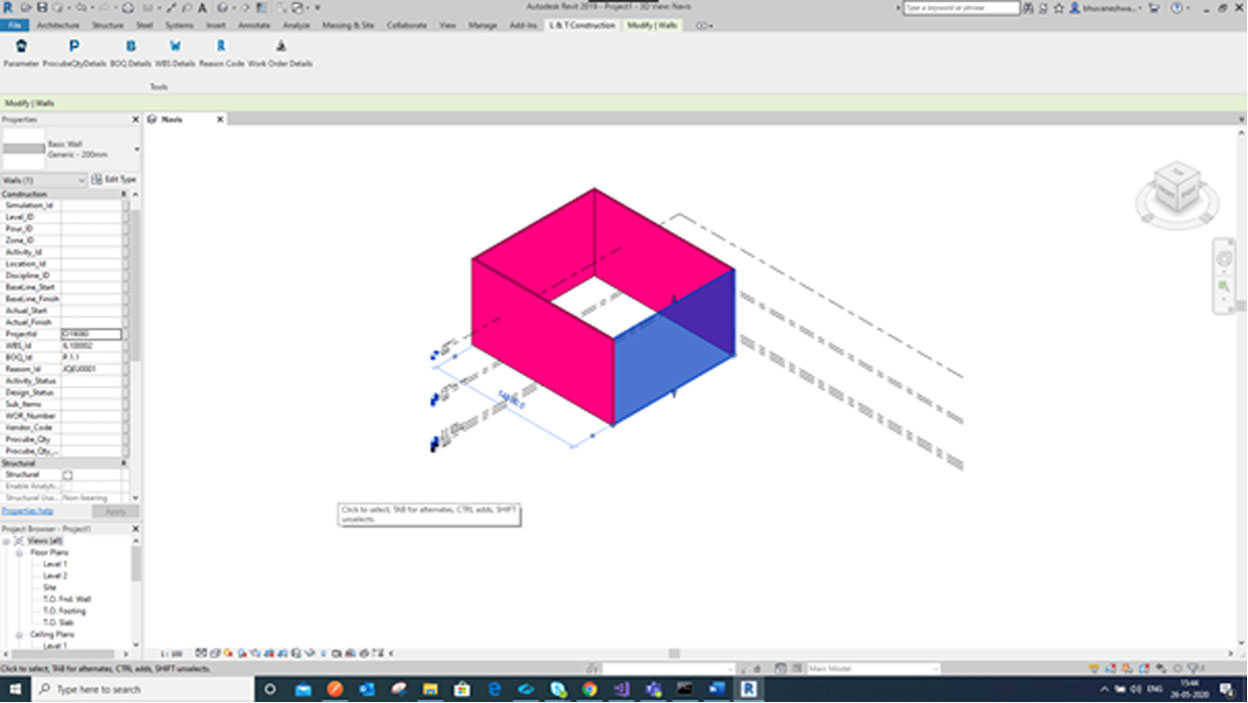
Click Project Code button and enter the relevant project code.
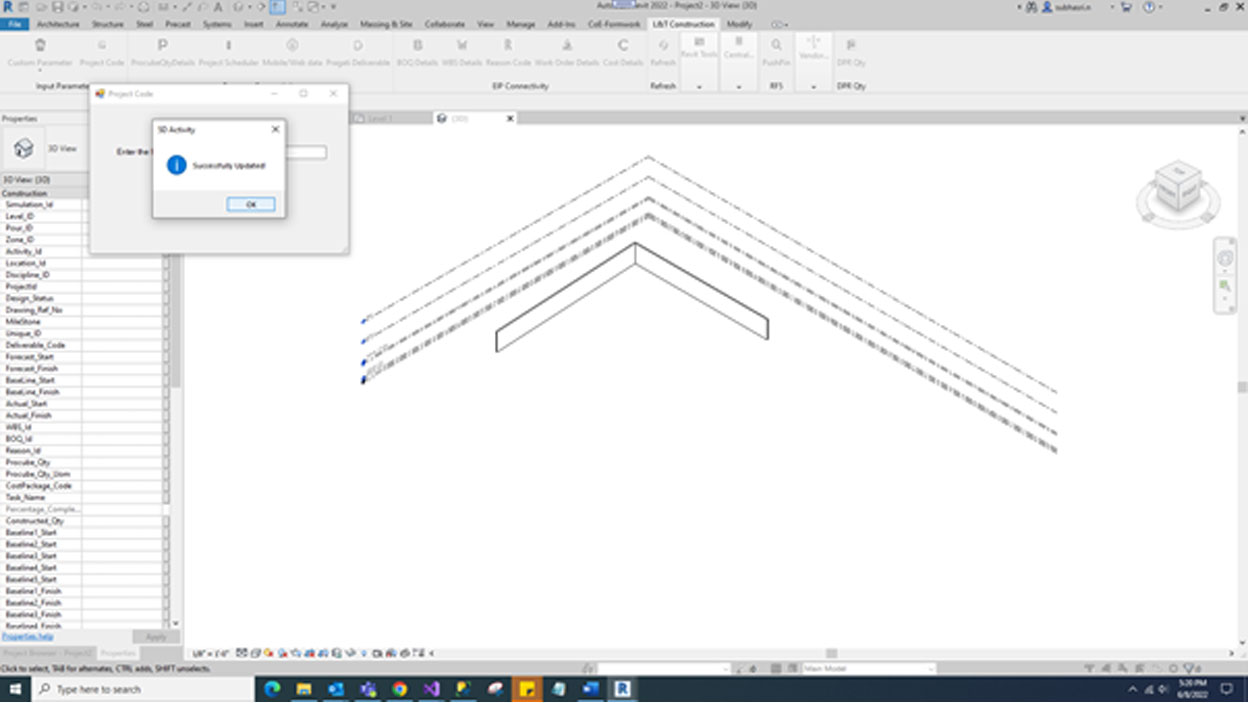
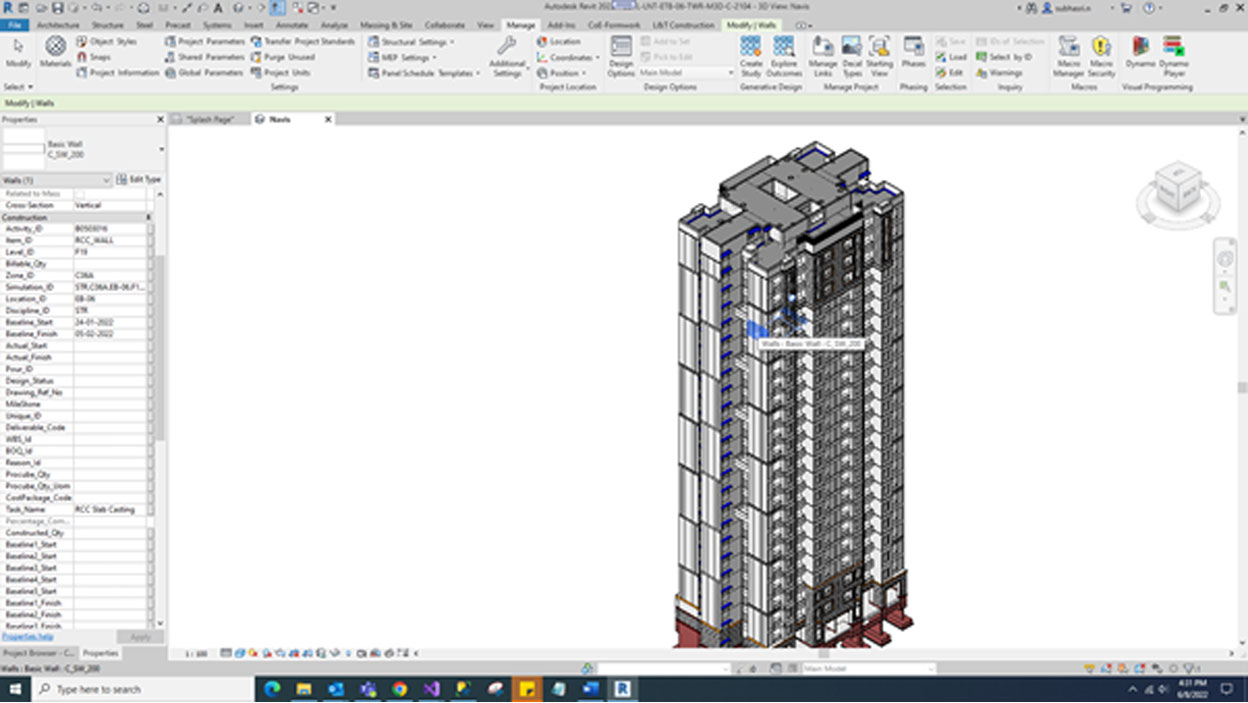
Click Save button and the project code will be successfully updated.
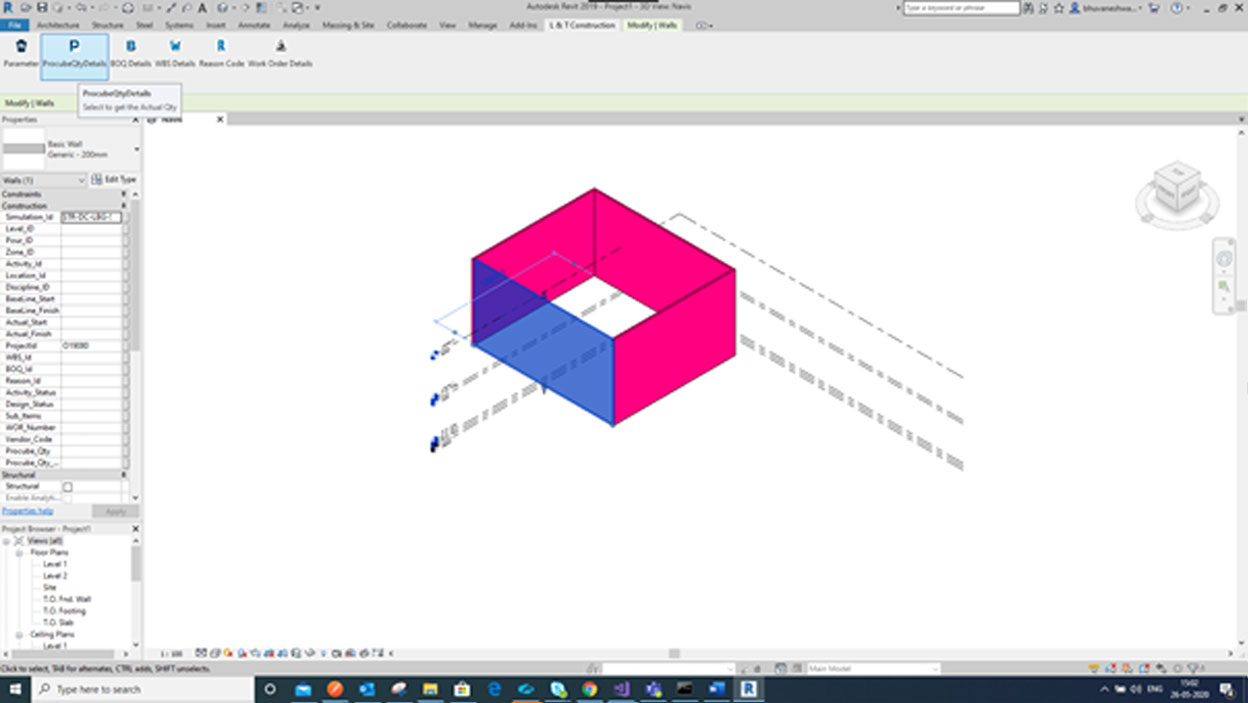
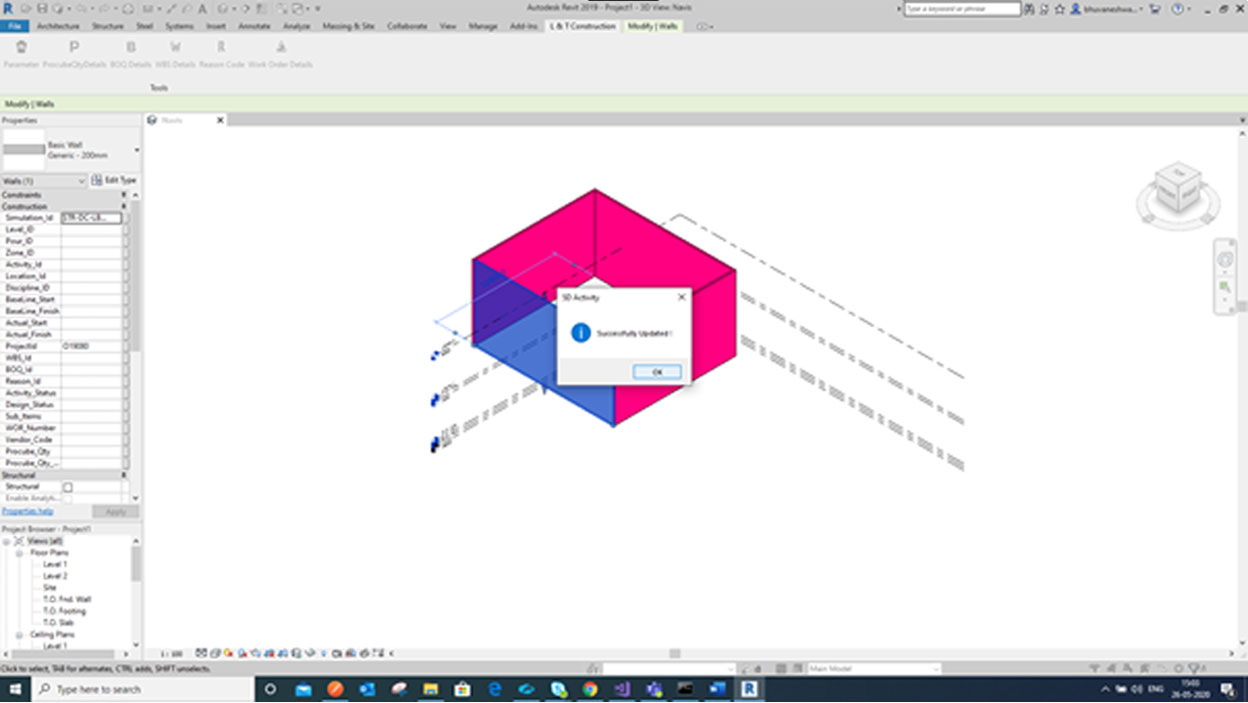
Select the model and update ProjectId and Simulation_Id. Then Select the ProcubeQtyDetails Button and give OK to get Procube_Qty and Procube_Qty_Uom.

Select the model. Click Project Scheduler button and this button will update all rows elements successfully.
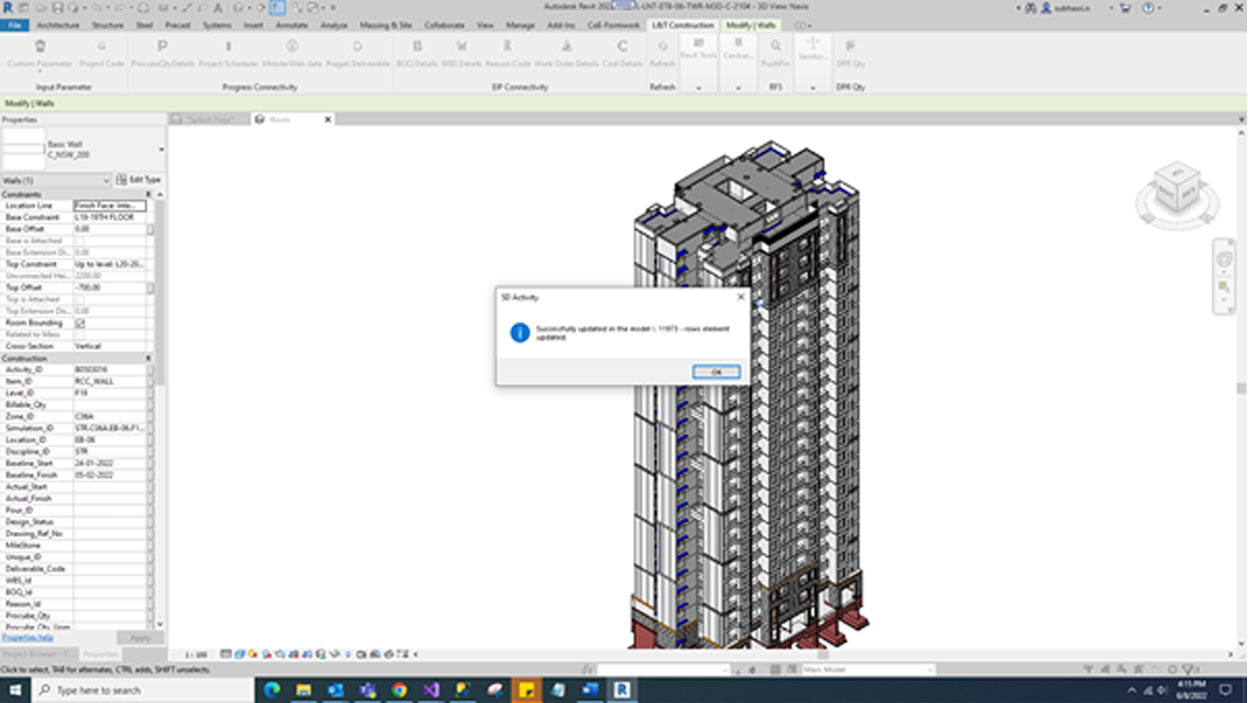
Updated selected model data [Baseline Start, Baseline Finish, Actual Date Start, Actual Date Finish, etc..] based on elements.
Select the model. Click Mobile/Web data button and this button will update the Constructed Quantity, Actual Start and Actual Finish based on Element Id and Simulation Id. Once match the Element Id and Simulation Id based on model after those relevant parameters only updated successfully.

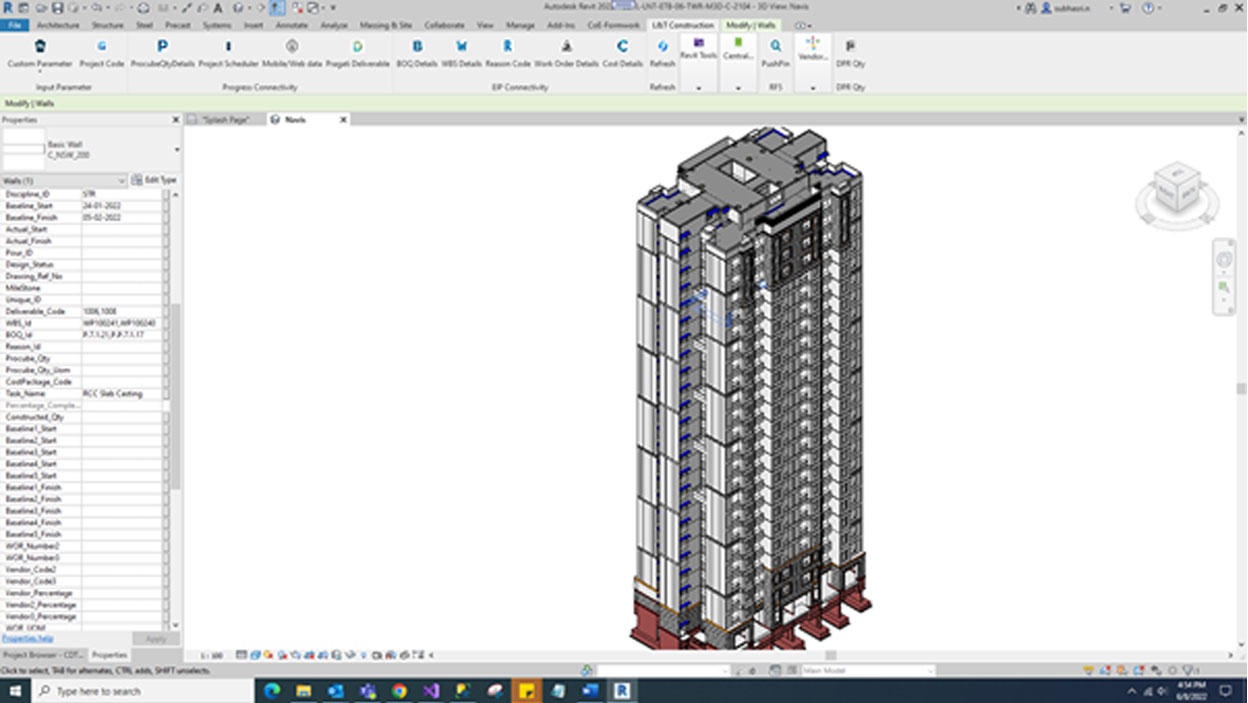
Select the model. Click the Pragati Deliverable button and this button will display the Deliverable Code, Deliverable Description, BOQ Code & Description, WBS Code & Description, IL Code from the grid content.
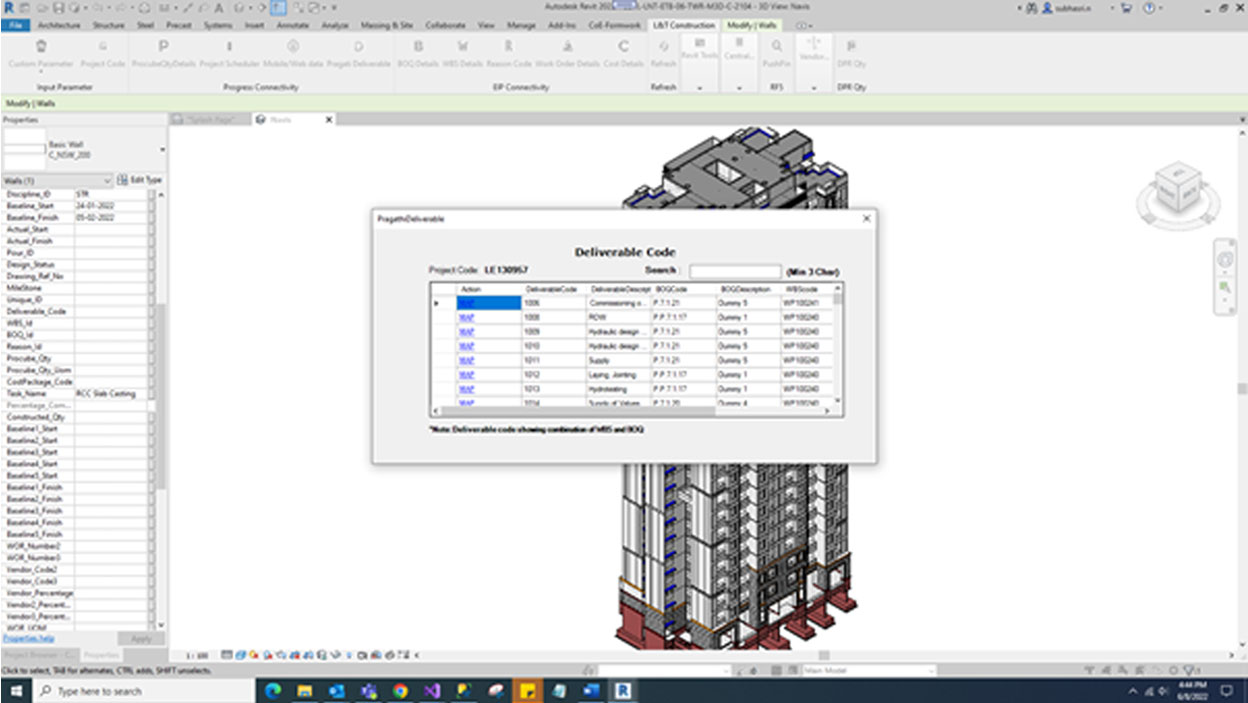
If click ‘MAP’ link will show alert message and click ‘YES’ the Deliverable Code, BOQ Code and WBS Code parameters updated to relevant element.
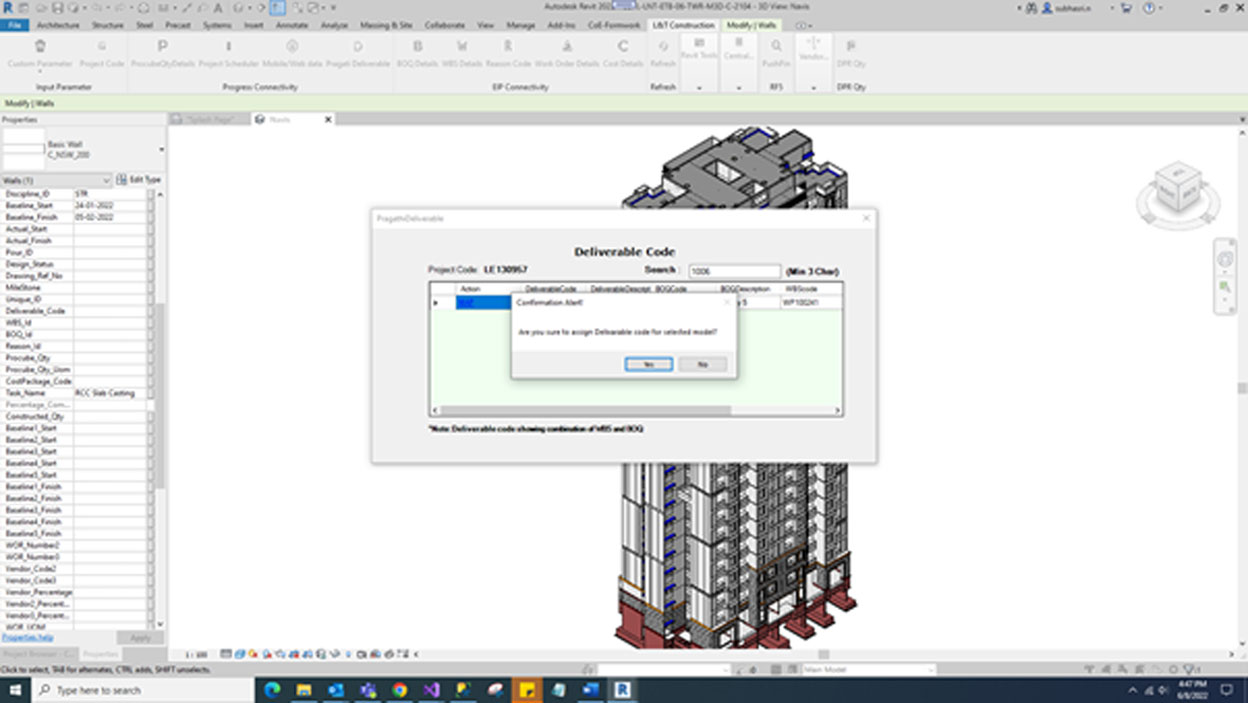

Same element we will update more than one Deliverable Code, BOQ Code and WBS Code.

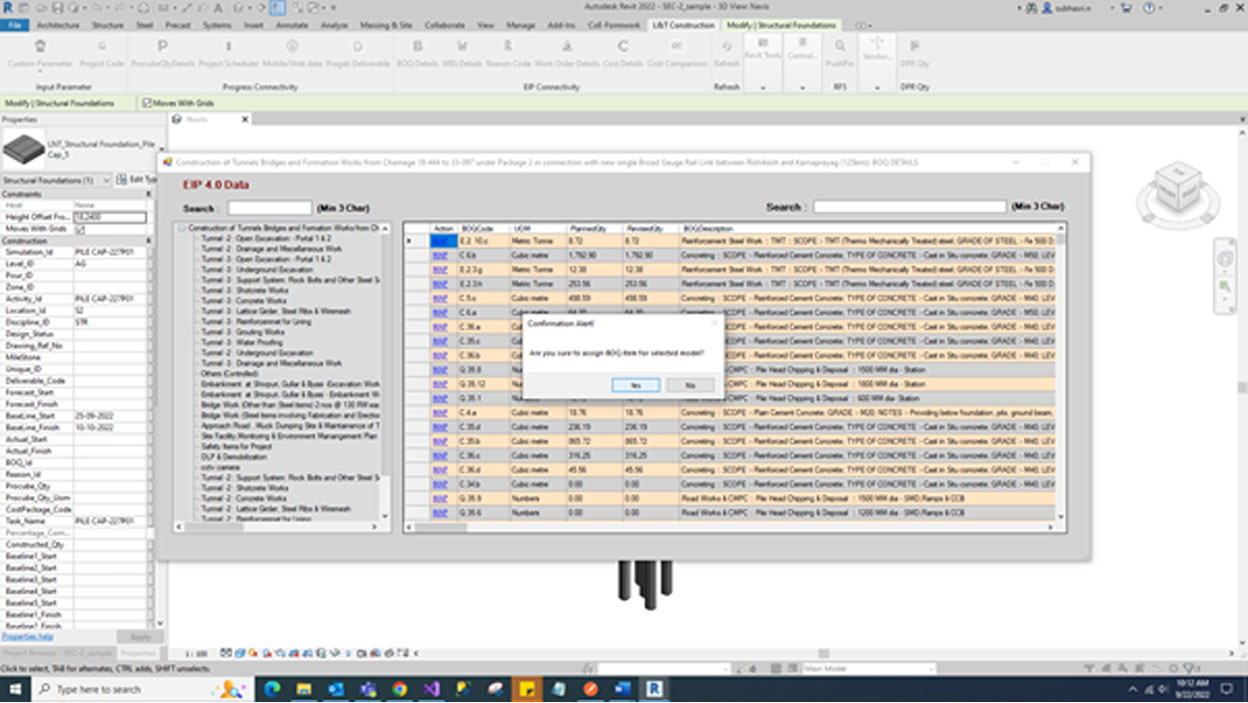
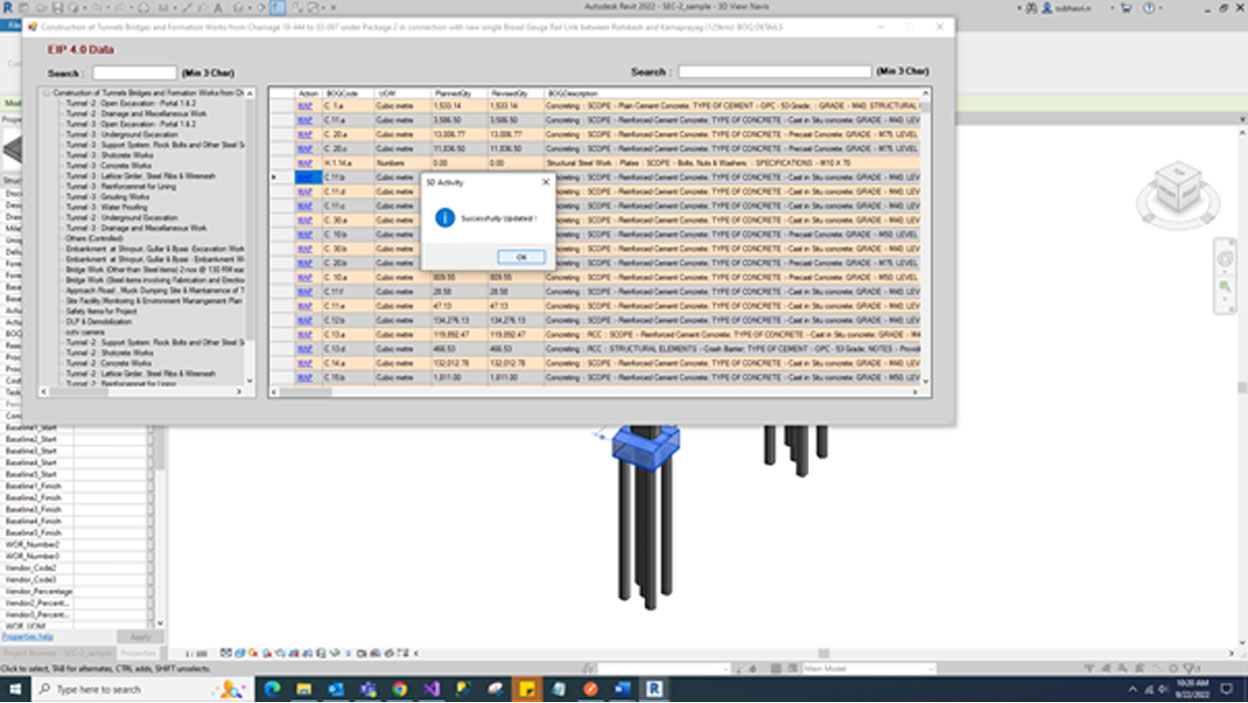
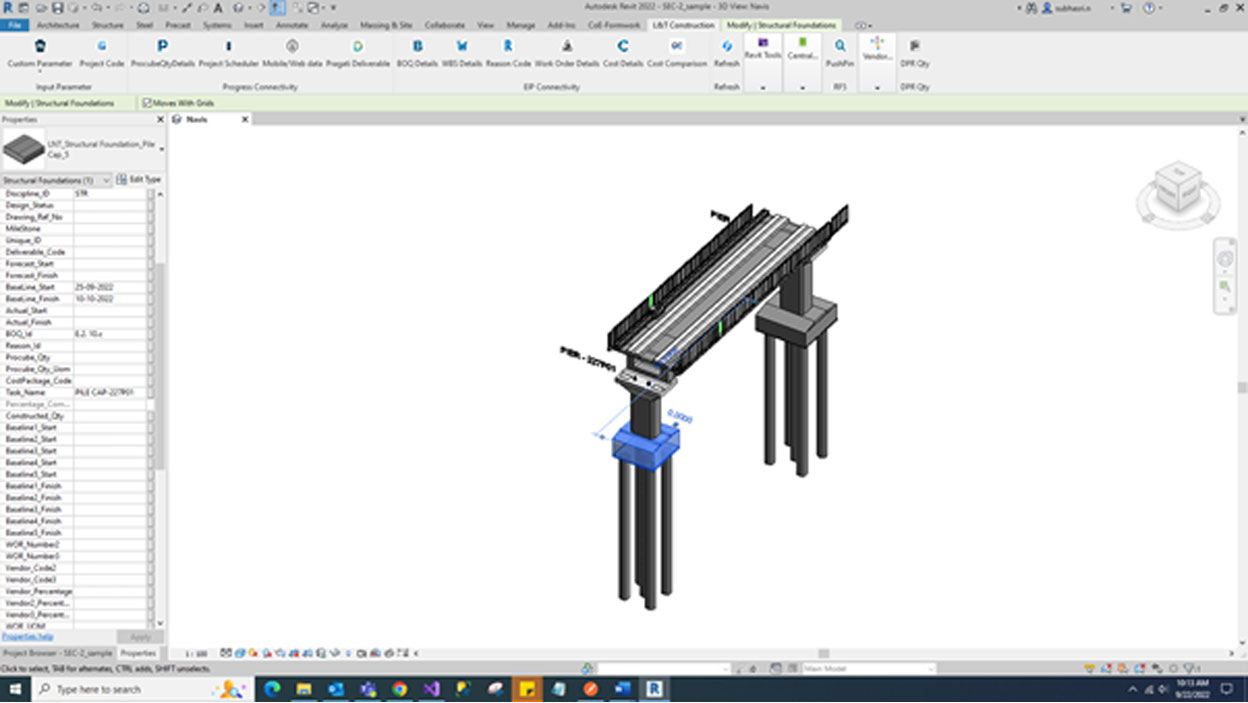
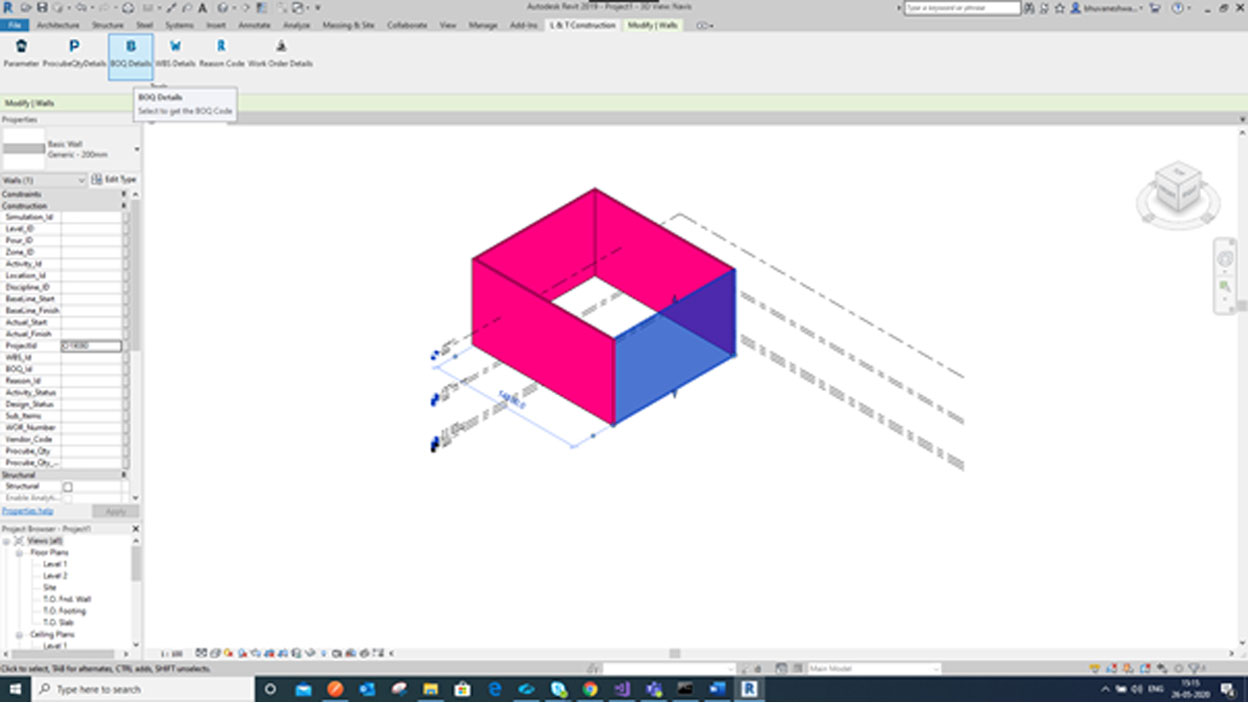
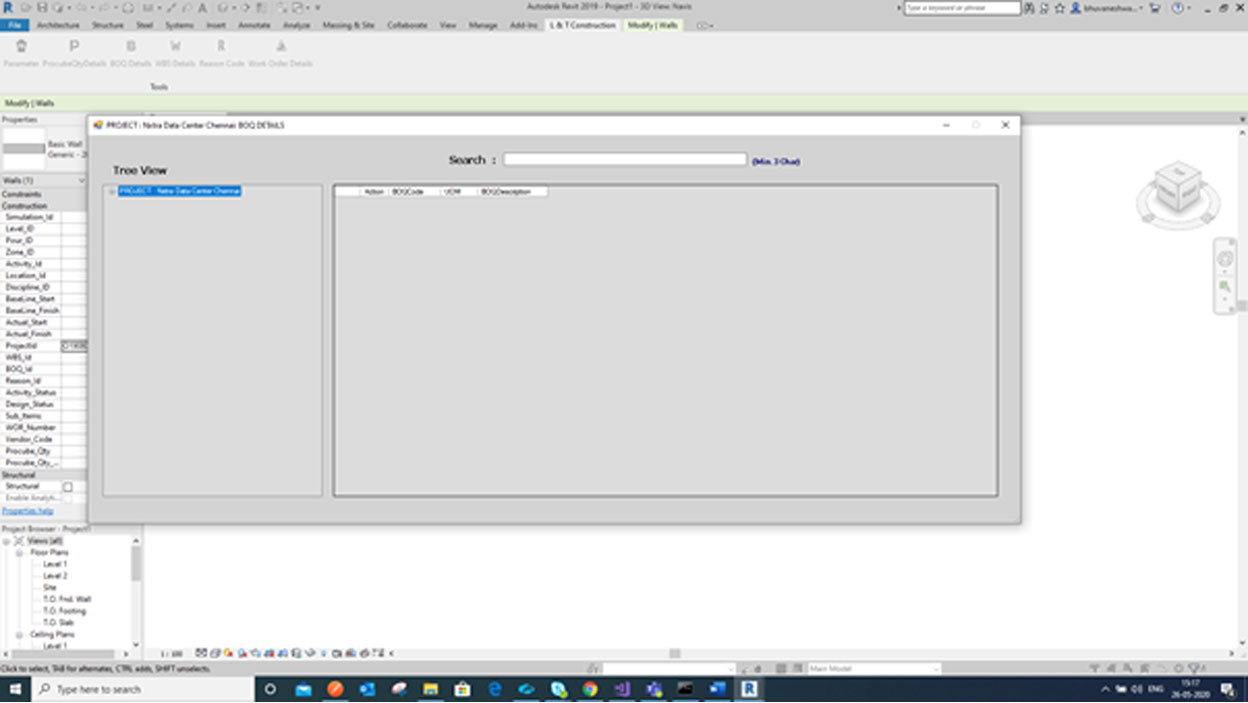
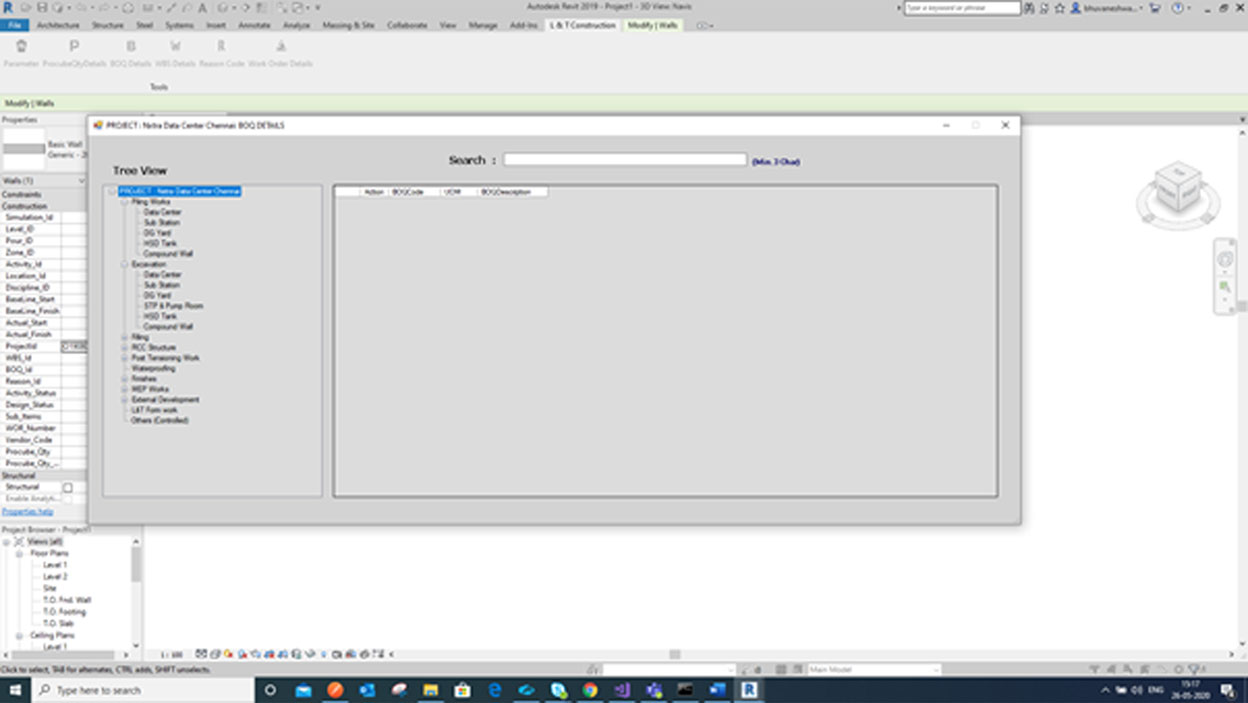
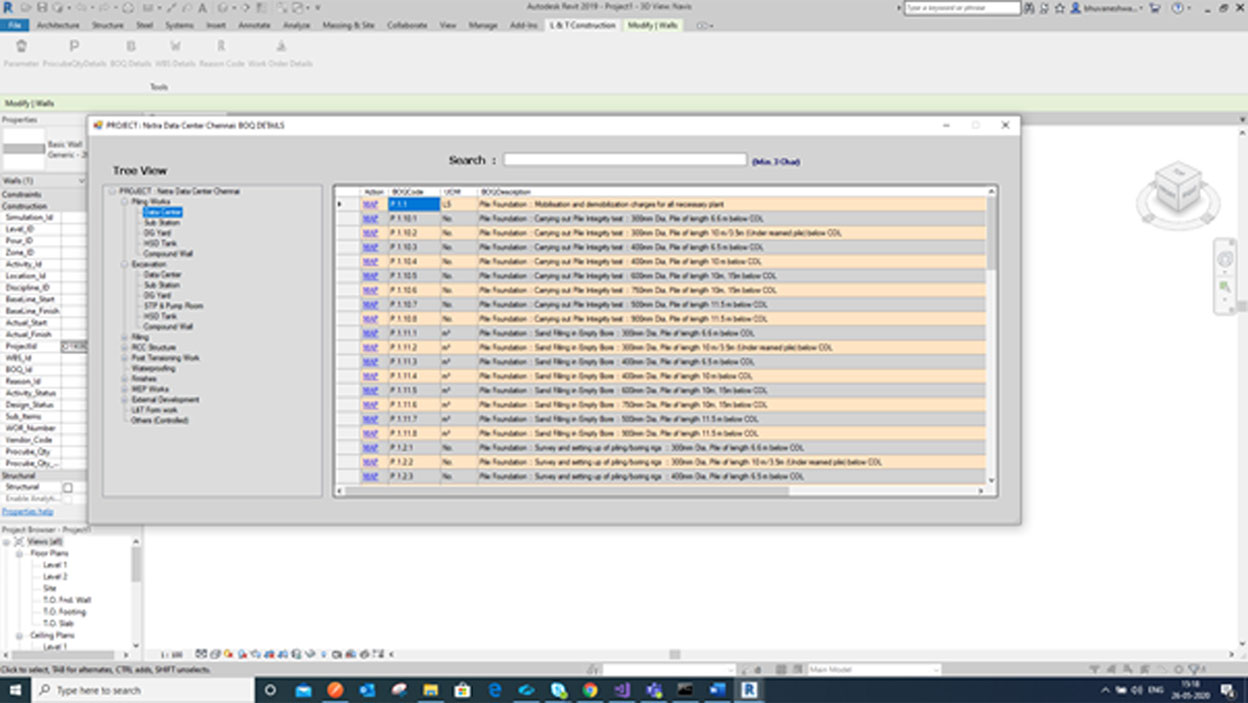
Select the model and update ProjectId. Then Select the BOQ Details Button. This Button will display tree structure of the project.

If we select the tree structure will get the respective BOQ Code, UOM, Planned Quantity, Revised Quantity and BOQ Description.
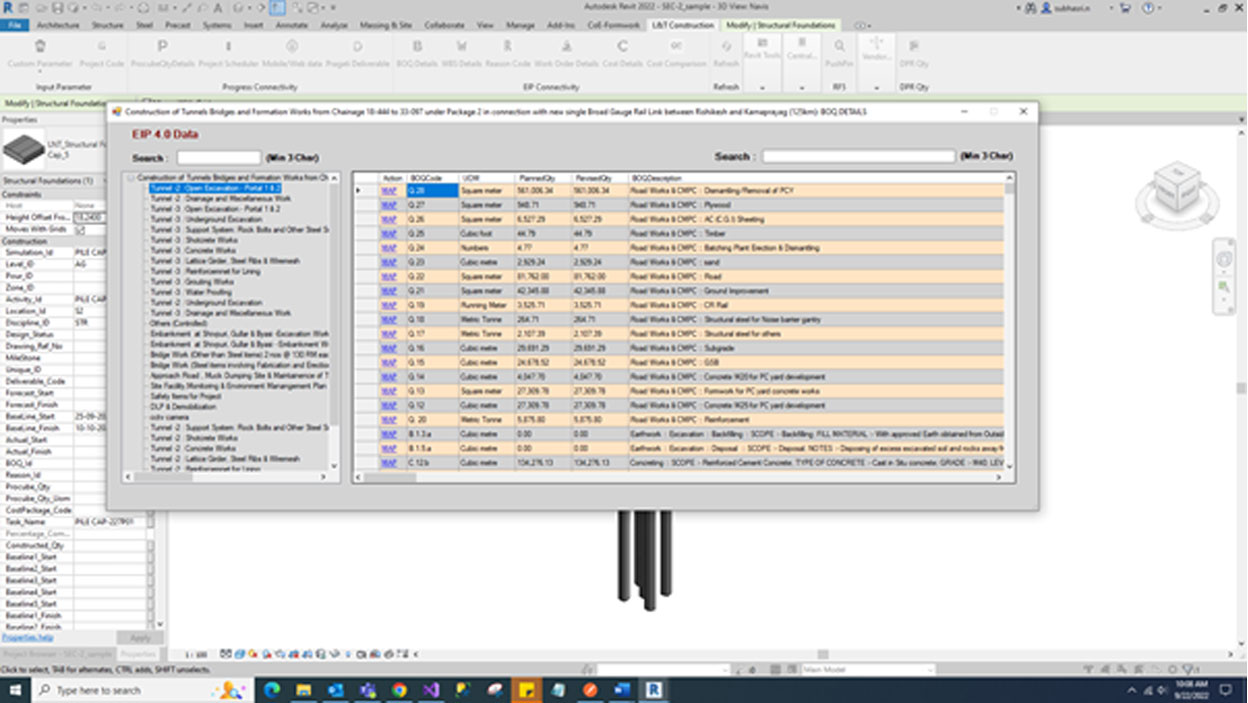
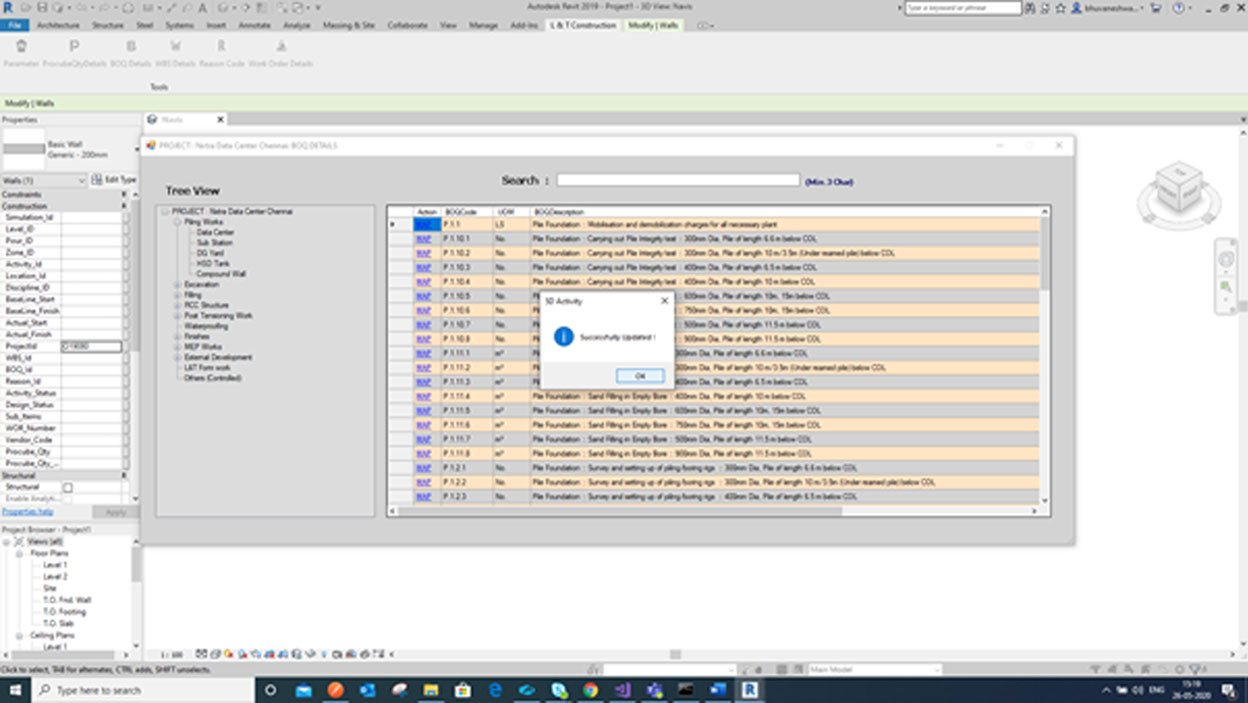
If we click MAP link the BOQ Code will be updated in relevant parameter.
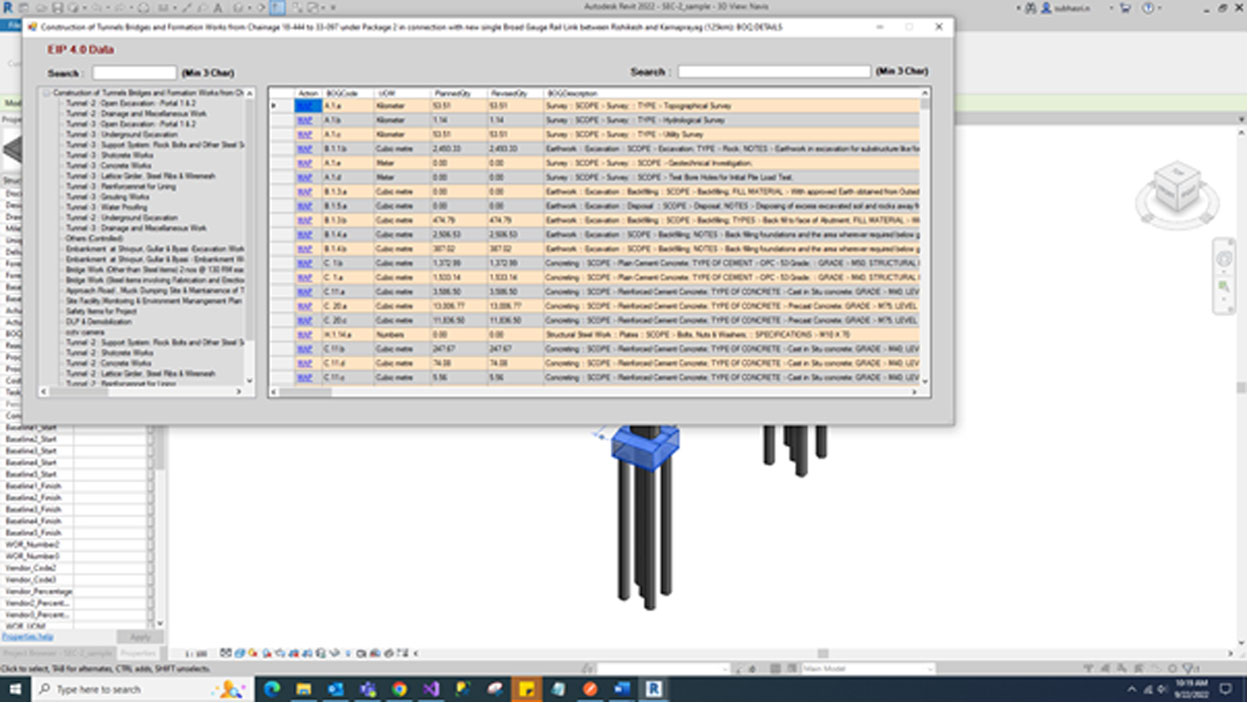
Click ‘YES’ button updated relevant parameters.
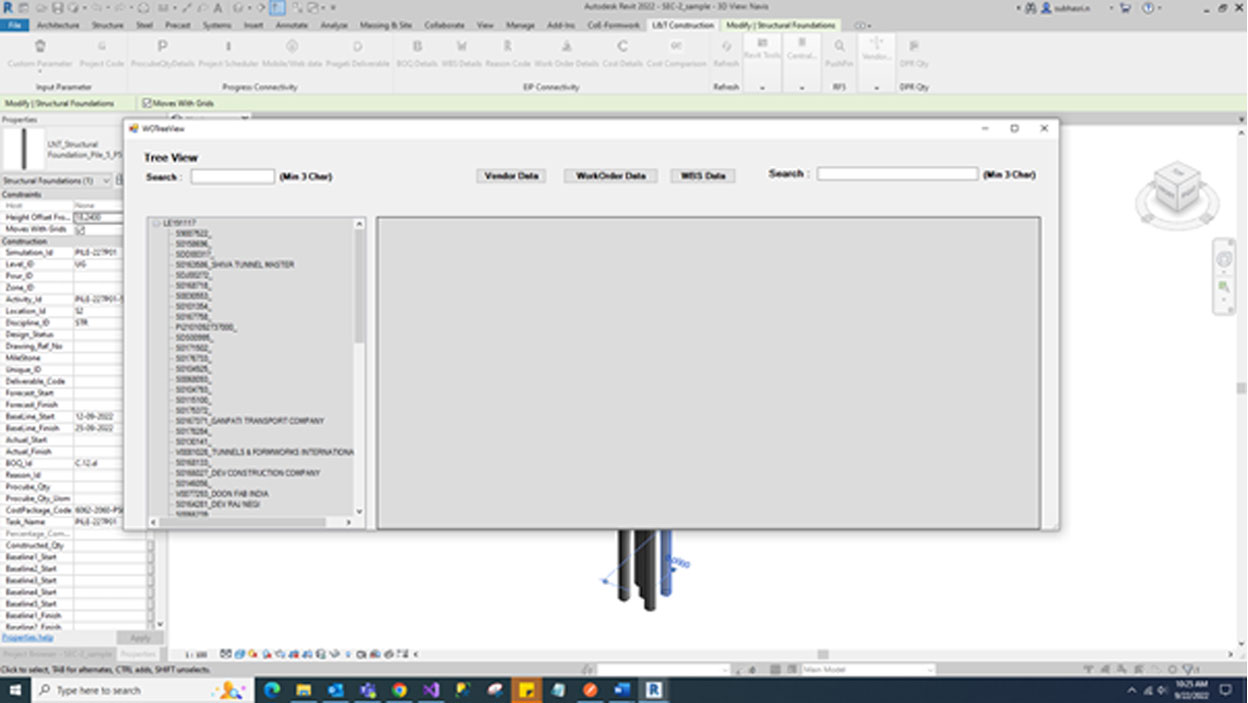
Select the Model, if the ProjectId is available then do not need to update the ProjectId Parameter. Then Select the WBS Details Button. This Button will display tree structure of the project. If we select the tree structure will get the respective WBS Code, WBS Description. The Main Scope of this Button is to Map the WBS code in WBS_Id Parameter for the Selected Model this option provided under the Action Column then select the MAP LINK. It will display a Confirmation Alert to map the WBS Code give YES and give OK. Close the Tree Structure window to see the result. (Refer the Below Screenshot)


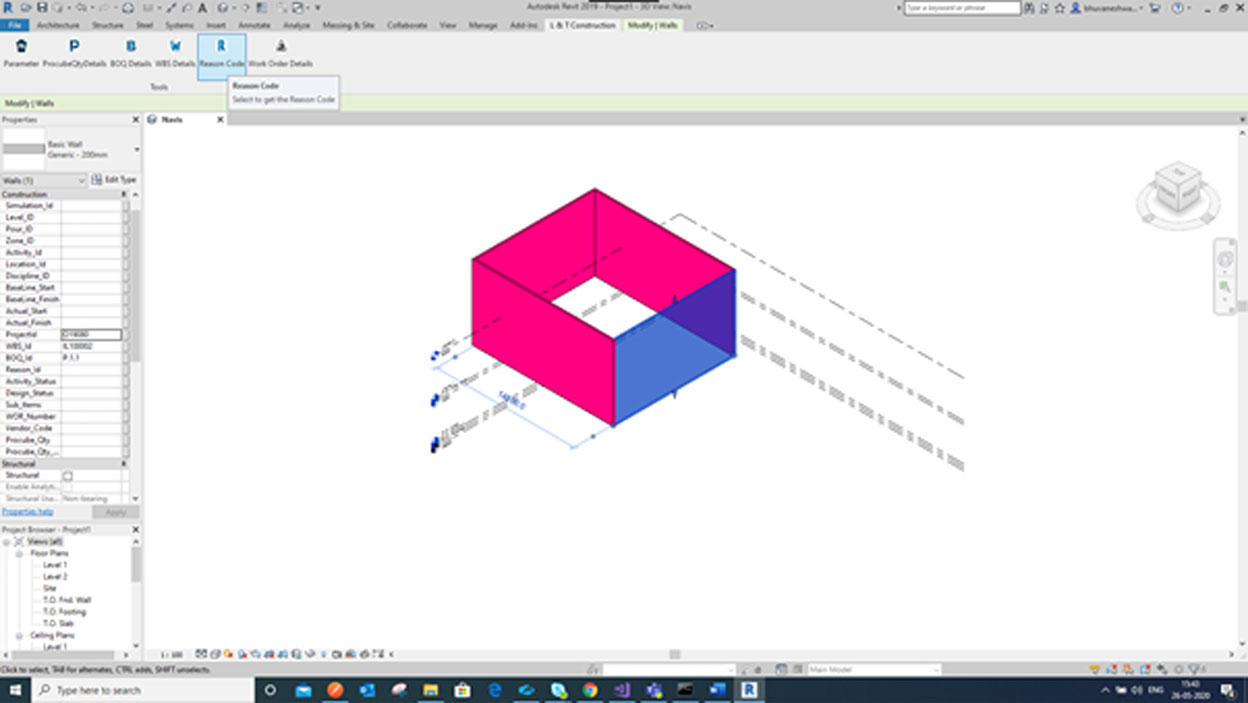
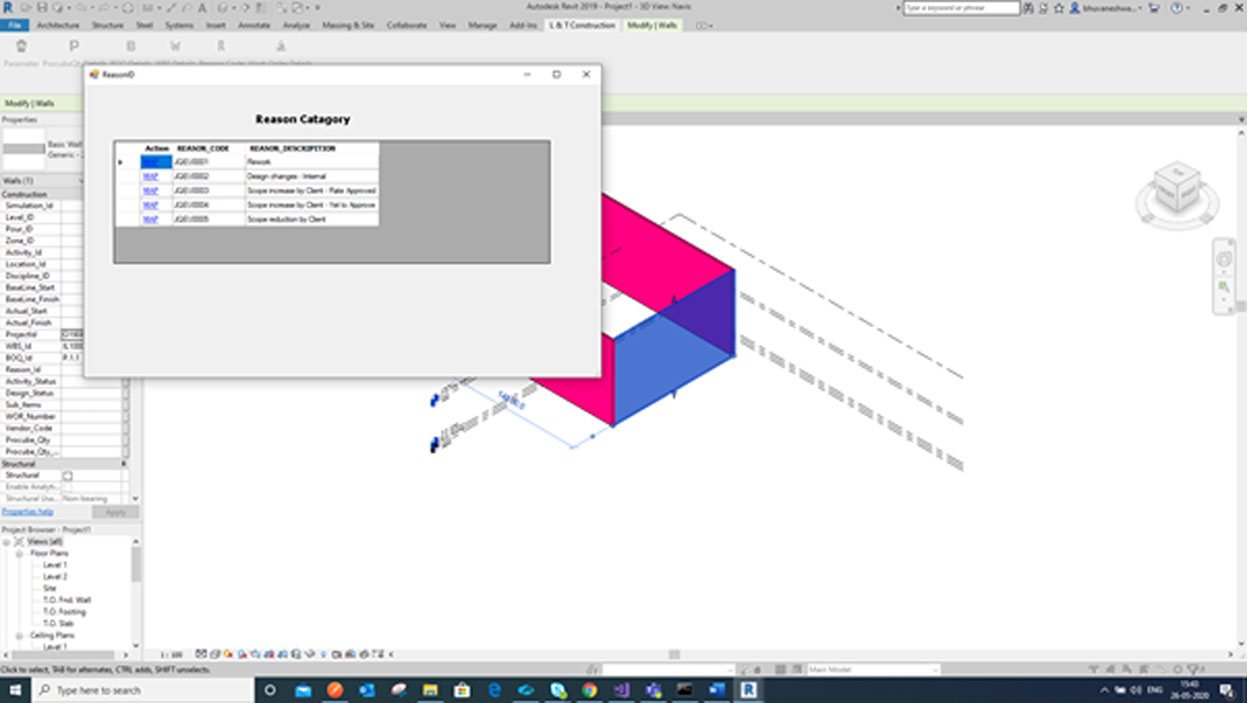
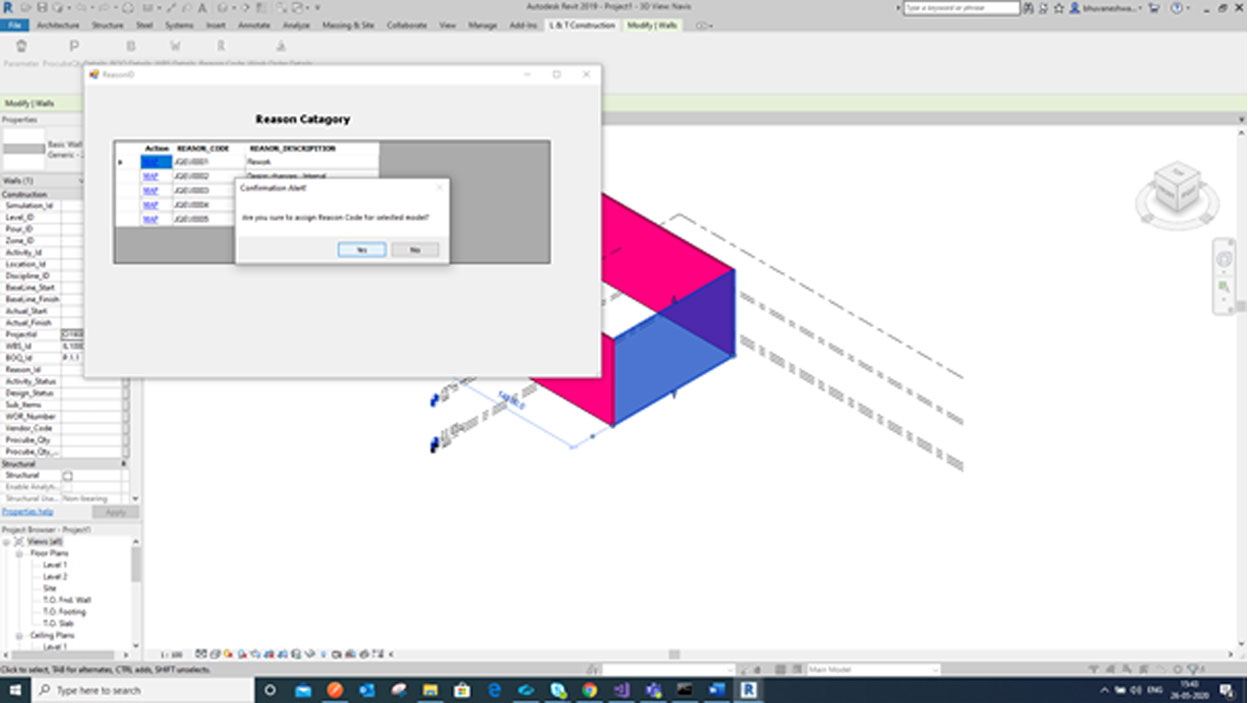
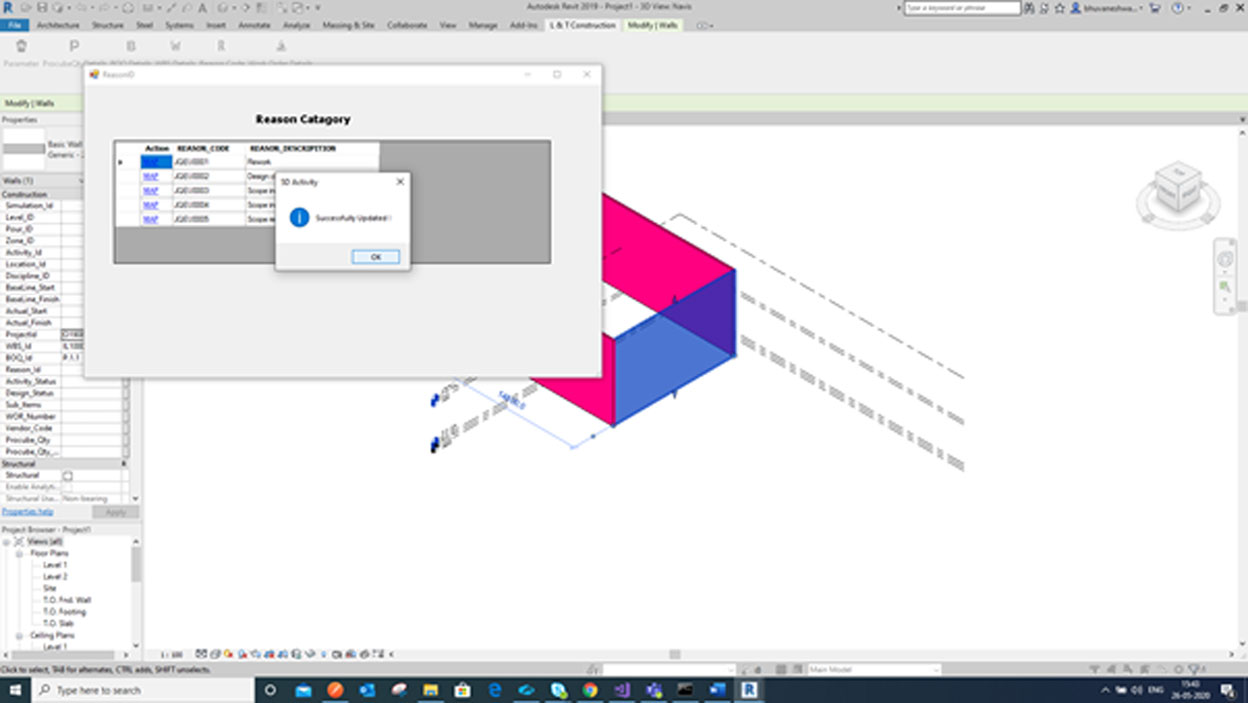
Select the Model, if the ProjectId is available then do not need to update the ProjectId Parameter. Then Select the Reason Code Button. The Reason Code Button will display Reason Category-REASON_CODE and REASON_DESCRIPITION we can select Reason code for the selected Model to update in the Reason_Id Parameter this option is provided under the Action Column then select the MAP LINK. It will display a Confirmation Alertto map the Reason Code giveYES and giveOK.Close the Tree Structure window to see the result. (Refer to the Below Screenshot)
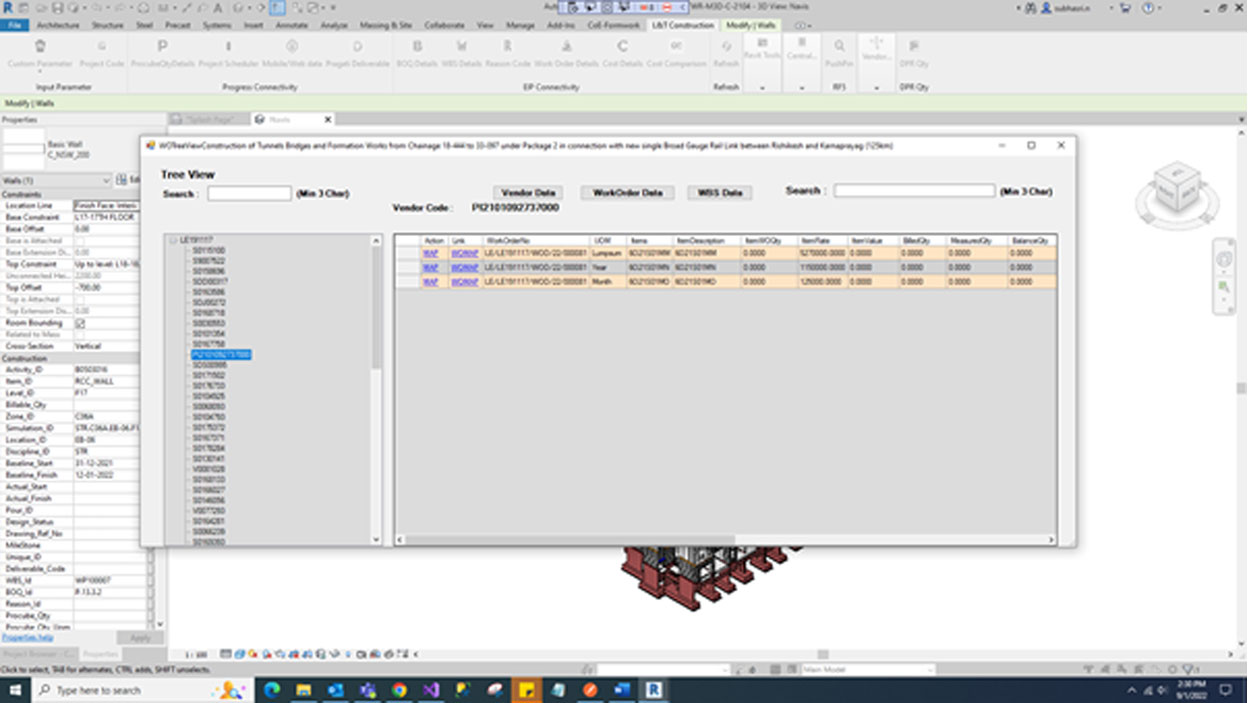
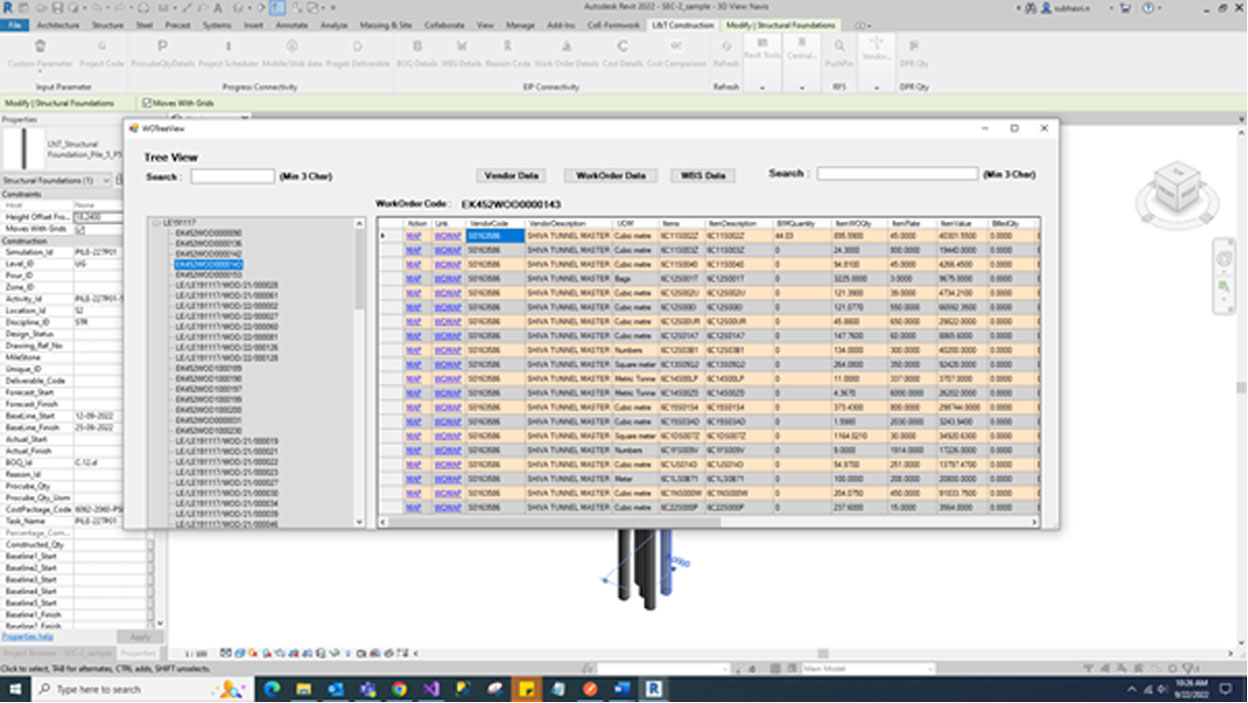
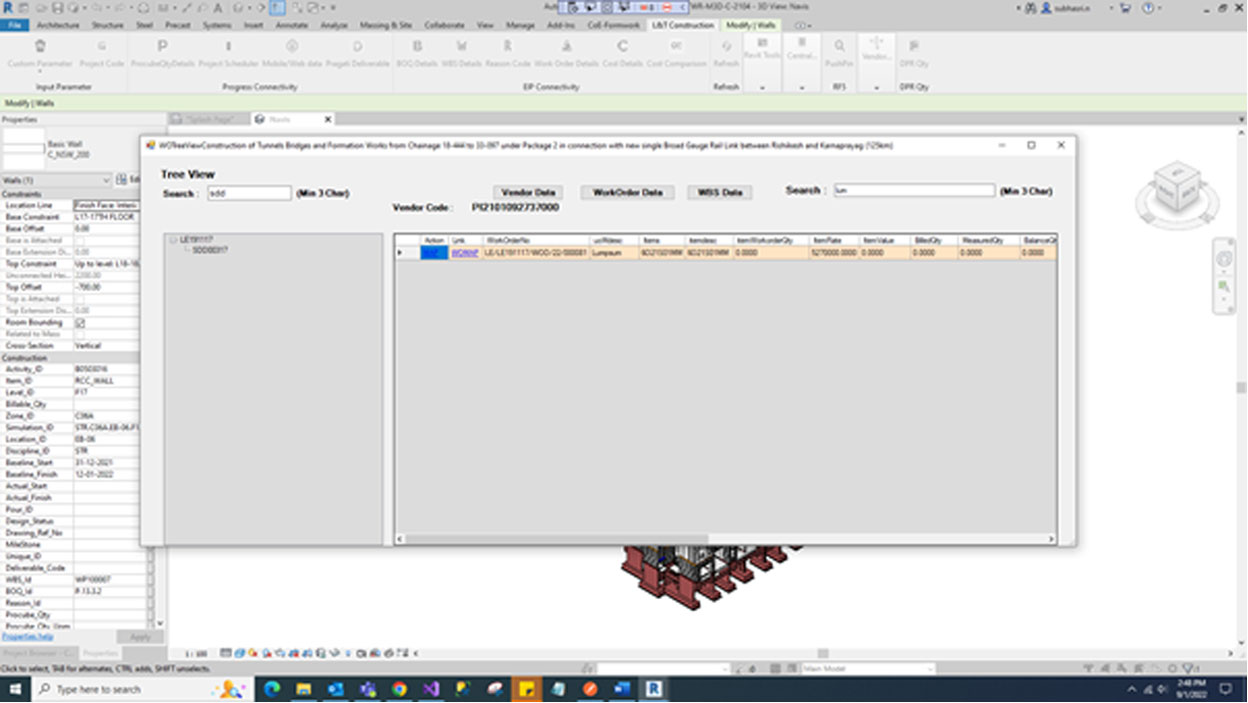
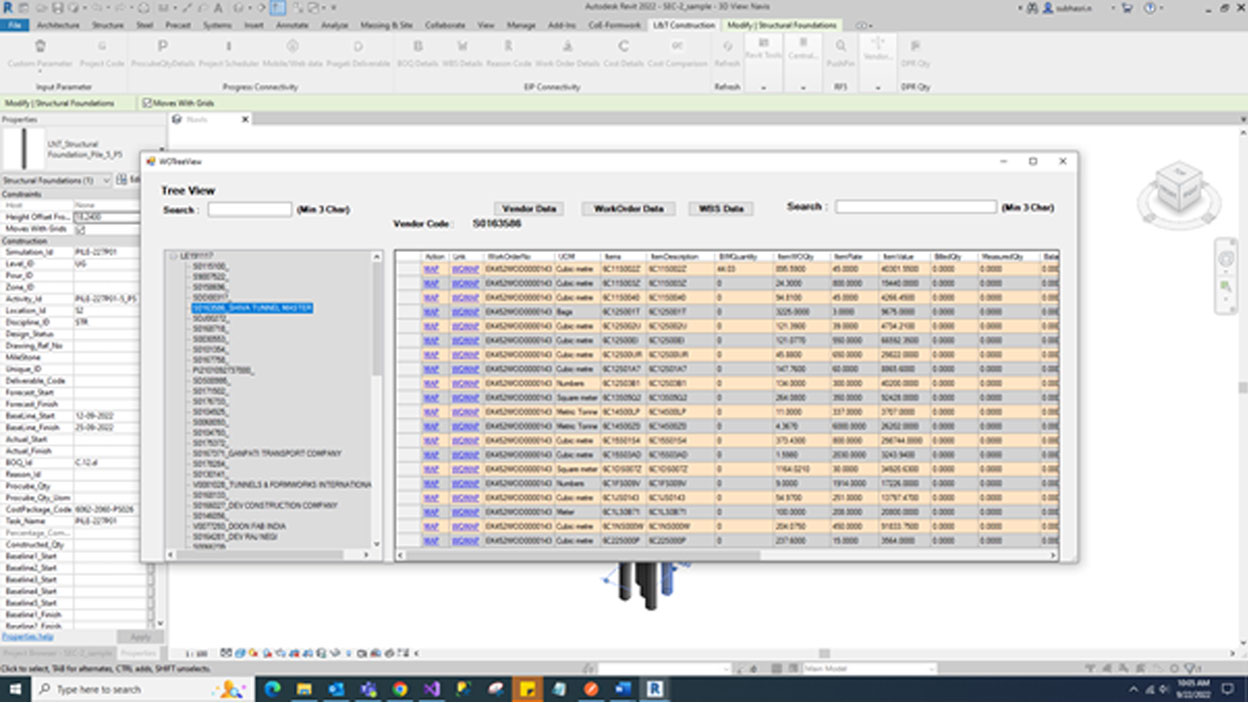
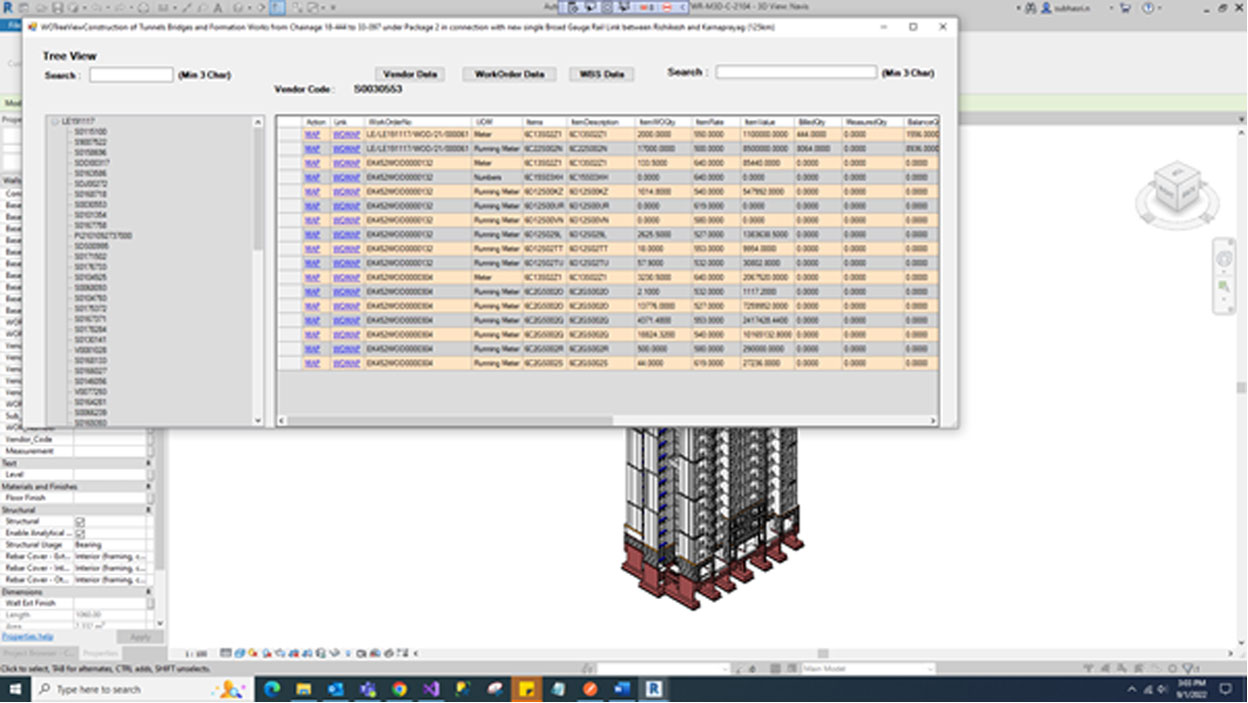
Select the model. Click the Work Order Details button. Work Order Details divided into three ways.
a. Data based on Vendor Code
b. Data based on Work Order Code
c. Data based on WBS Code
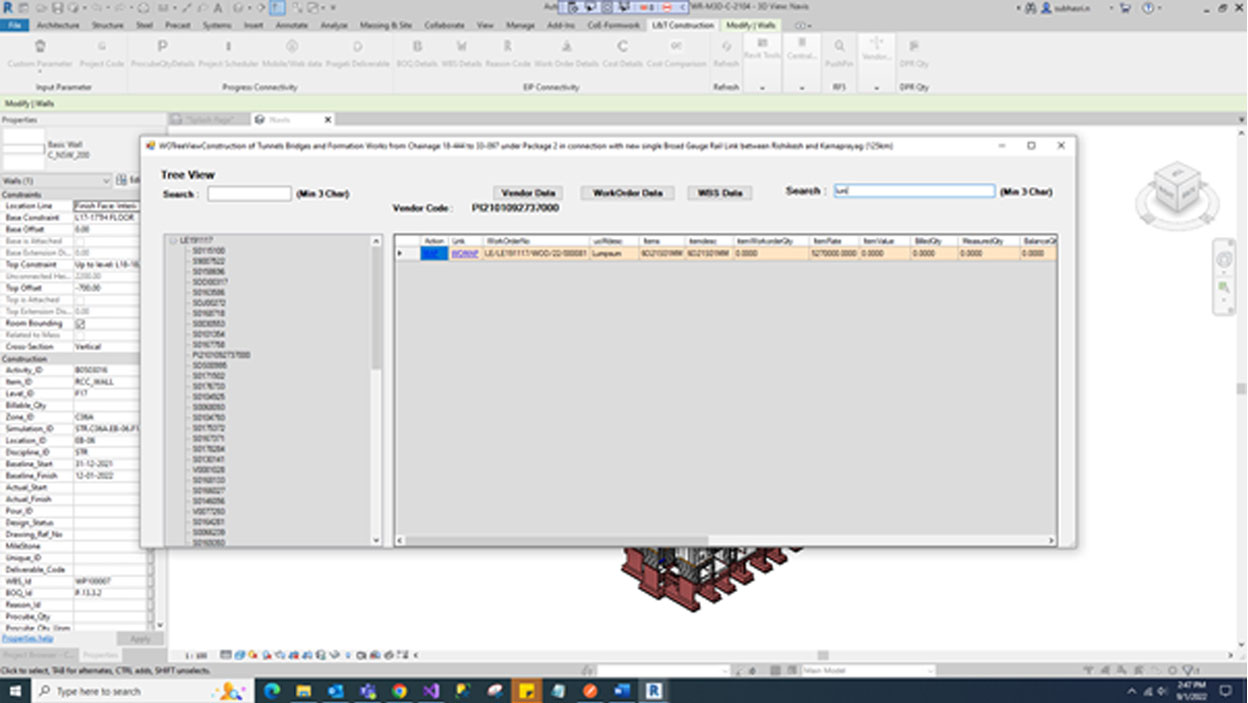
This button will display the tree structure of data based on vendor code and vendor description.
If we select the vendor code tree structure data will get the respective Work Order No., UOM, Items, Item Description, Item WO Qty, Item Rate, Item Value, Billed Qty, Measured Qty, Balance Qty, WO Date, WO Amount, WBS Code, CP Code, Asset Code, Item Stage No., Item Stage Description, Item Stage Percentage.
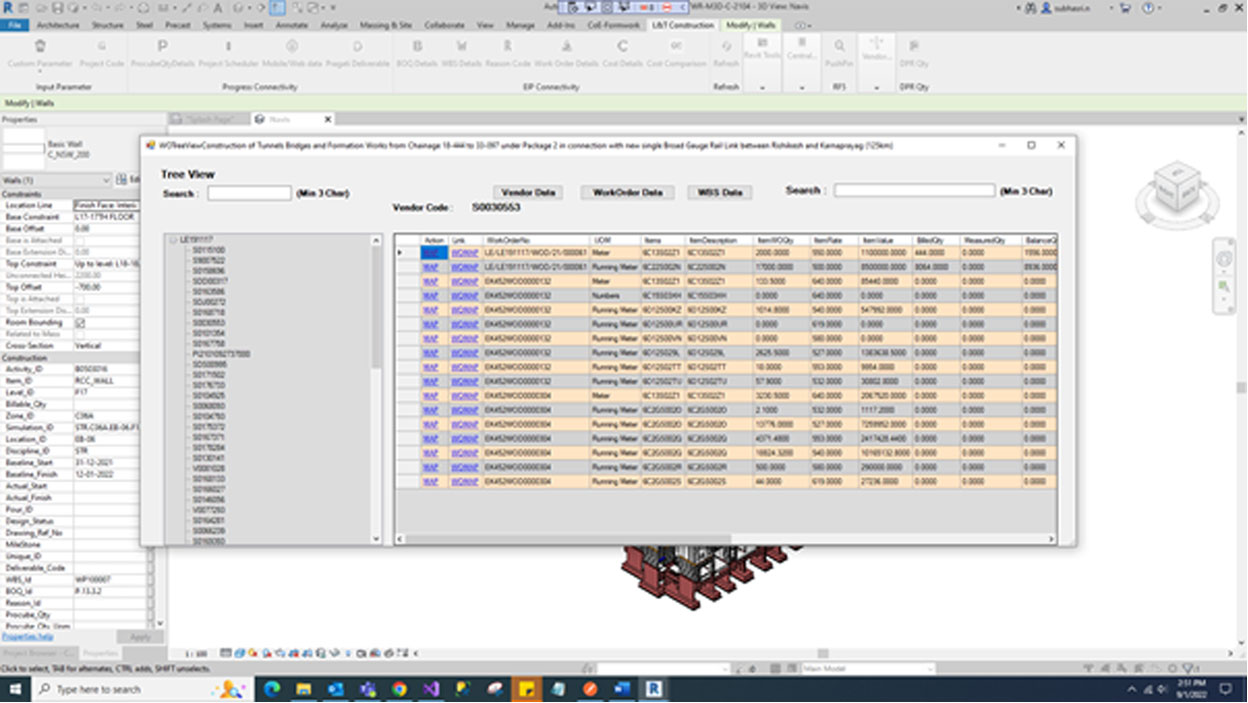
If we click Work Order Data button and this button will display the tree structure of data based on work order code.
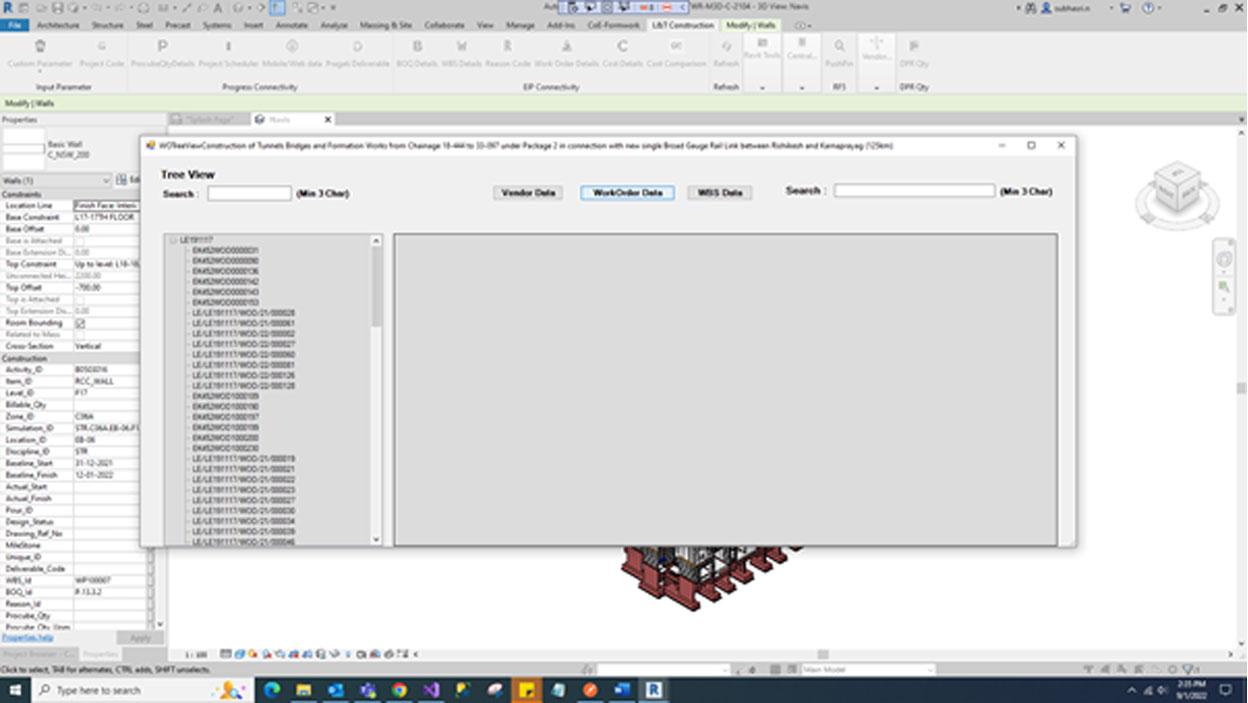
If we select the work order code tree structure data will get the respective Vendor Code, Vendor Description, UOM, Items, Item Description, Item WO Qty, Item Rate, Item Value, Billed Qty, Measured Qty, Balance Qty, WO Date, WO Amount, WBS Code, CP Code, Asset Code, Item Stage No., Item Stage Description, Item Stage Percentage.
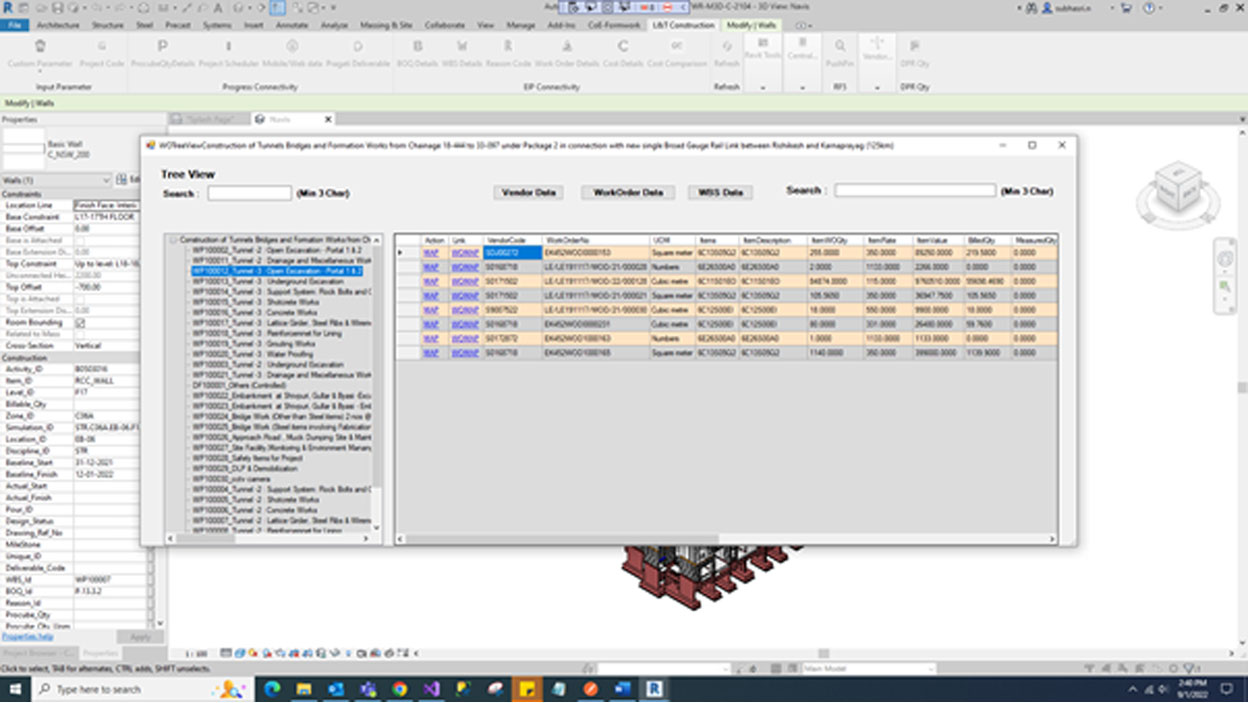
If we click the WBS Data button and this button will display the tree structure of data based on wbs code.
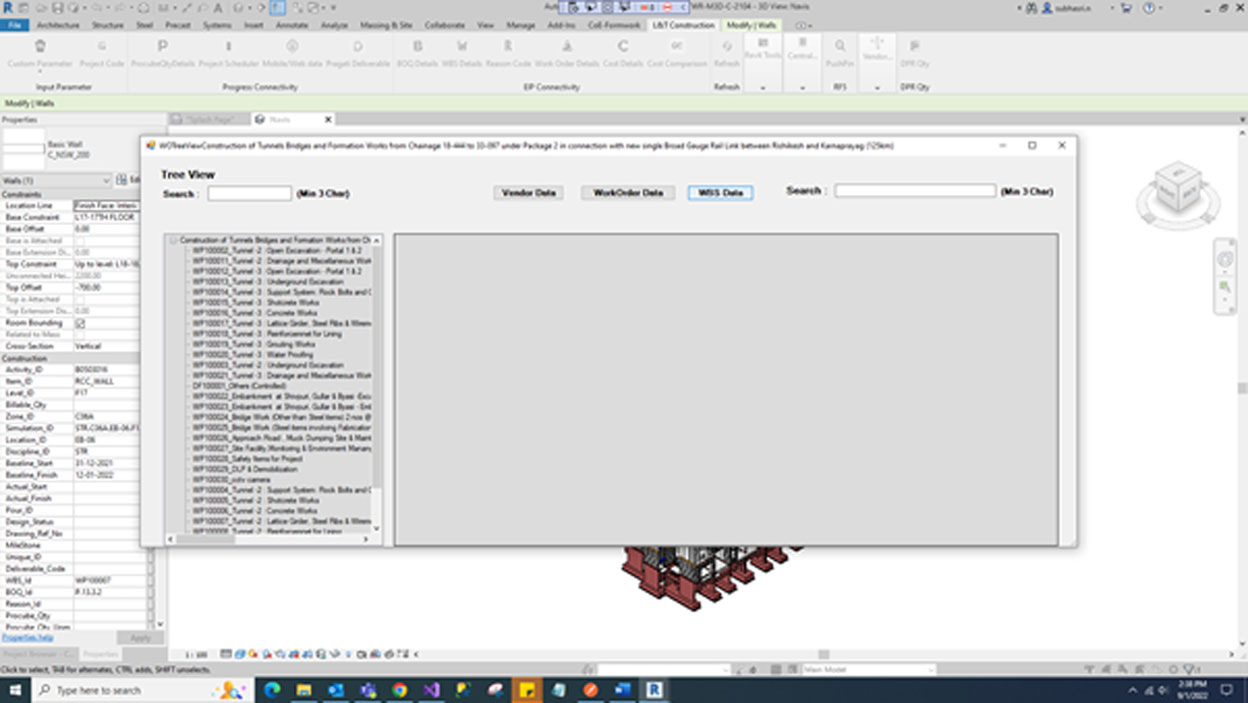
If we select the wbs code tree structure data will get the respective Vendor Code, Vendor Description, Work Order No., UOM, Items, Item Description, Item WO Qty, Item Rate, Item Value, Billed Qty, Measured Qty, Balance Qty, WO Date, WO Amount, WBS Code, CP Code, Asset Code, Item Stage No., Item Stage Description, Item Stage Percentage.
Right side of Search use three letter to find the relevant record of grid data.
Left side of Search use three letters to find the relevant record for tree view data.
If we click MAP link the Work Order No., UOM, Items and Vendor Code will be updated in relevant parameter.
Click ‘YES’ button updated relevant parameters.

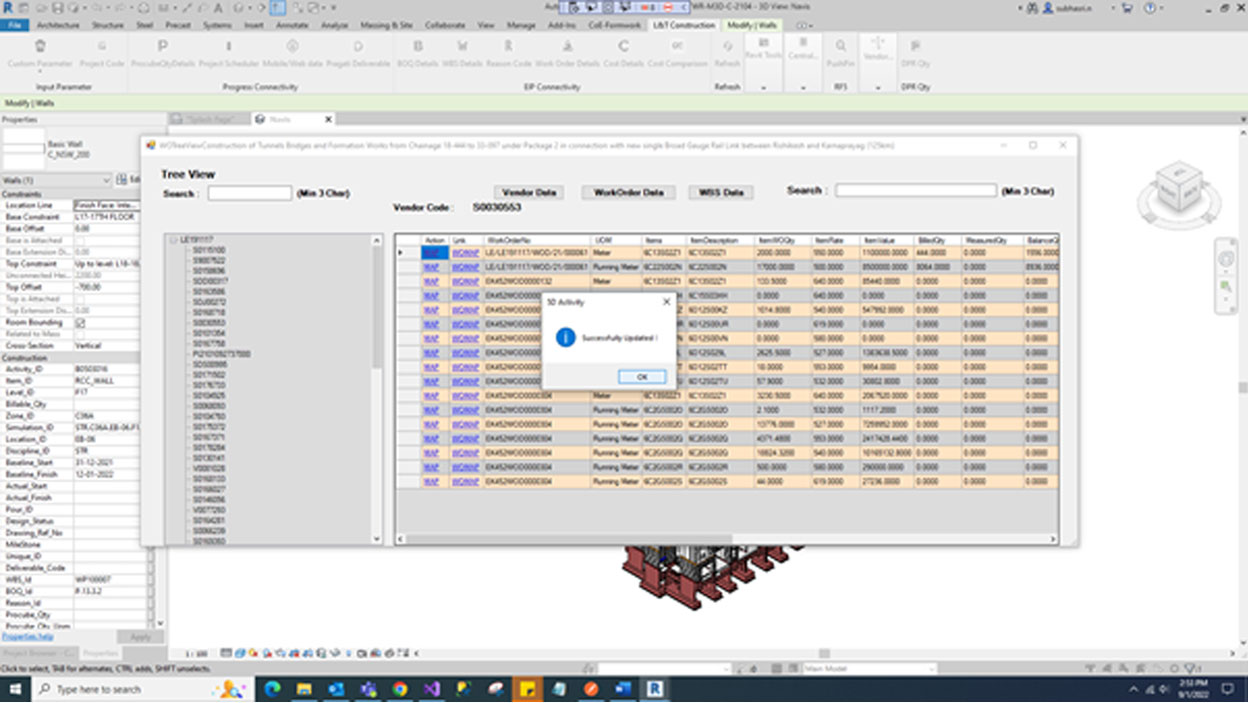
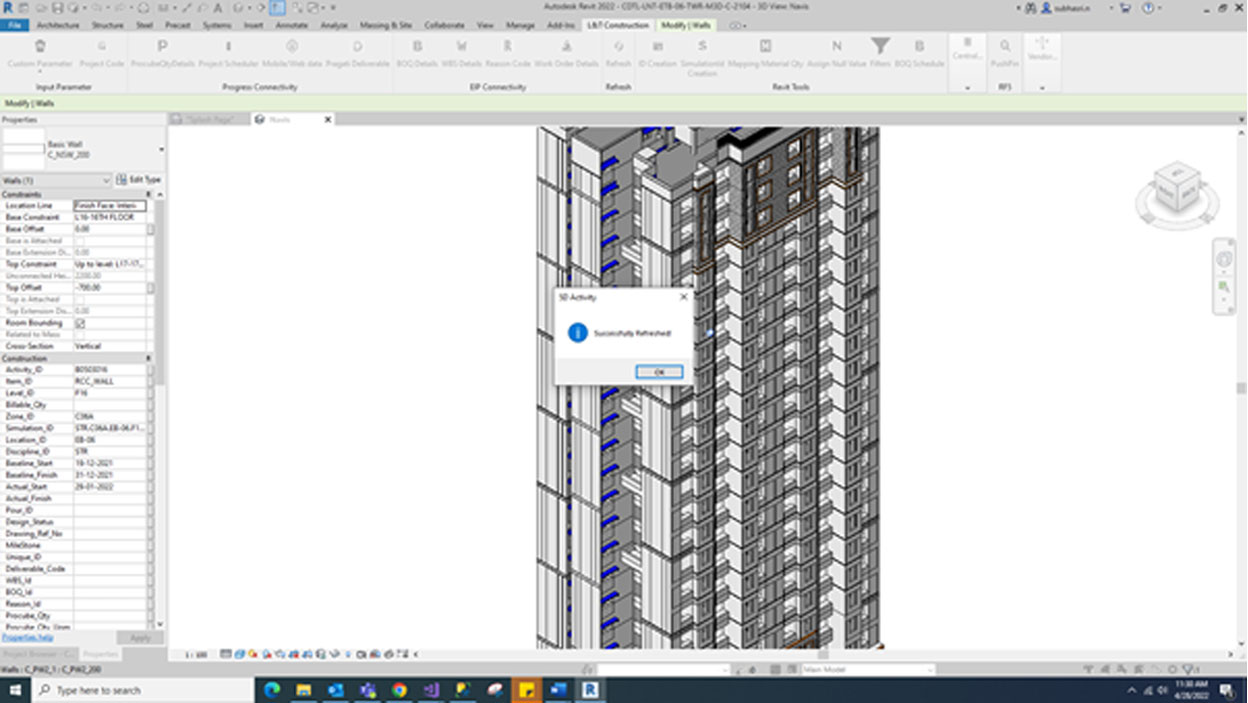
Updated relevant parameters.
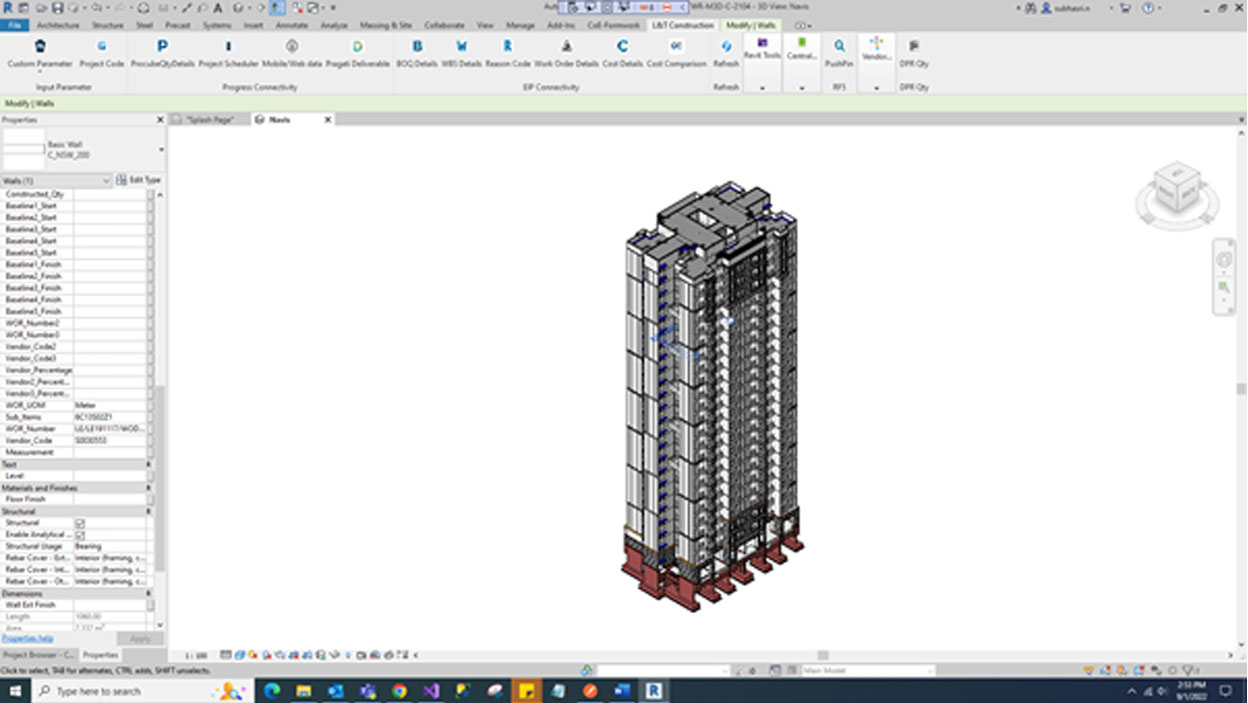
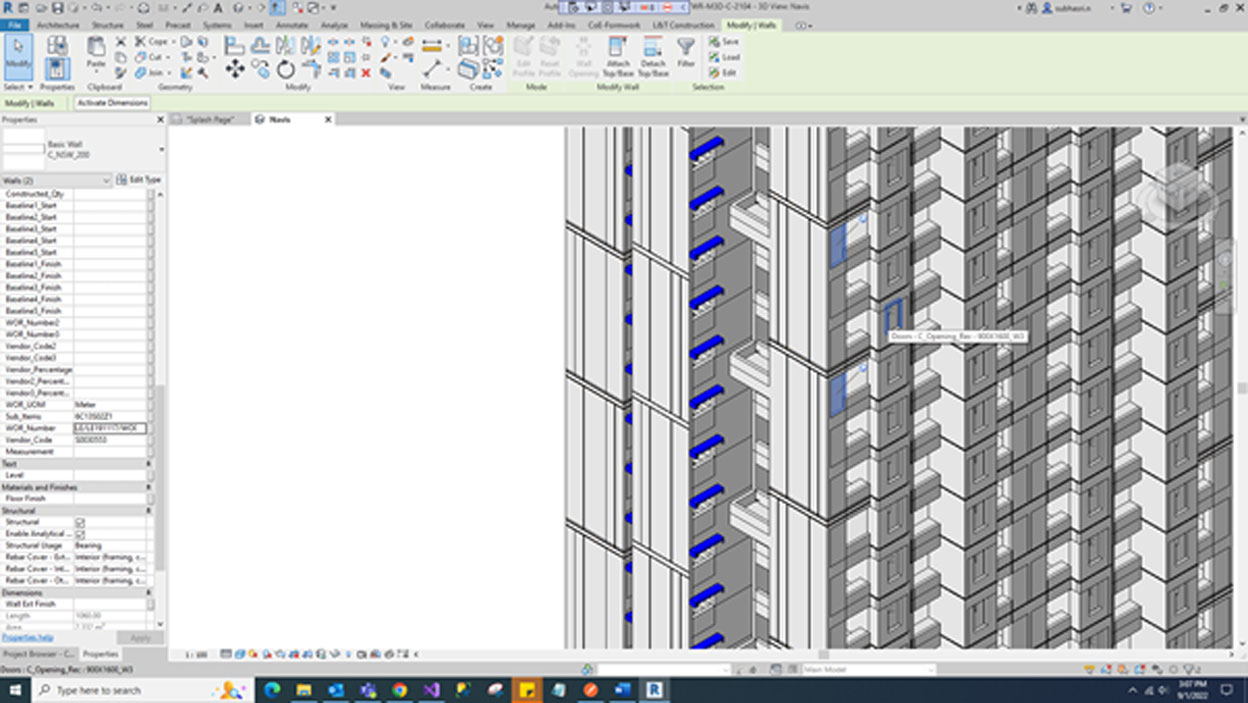
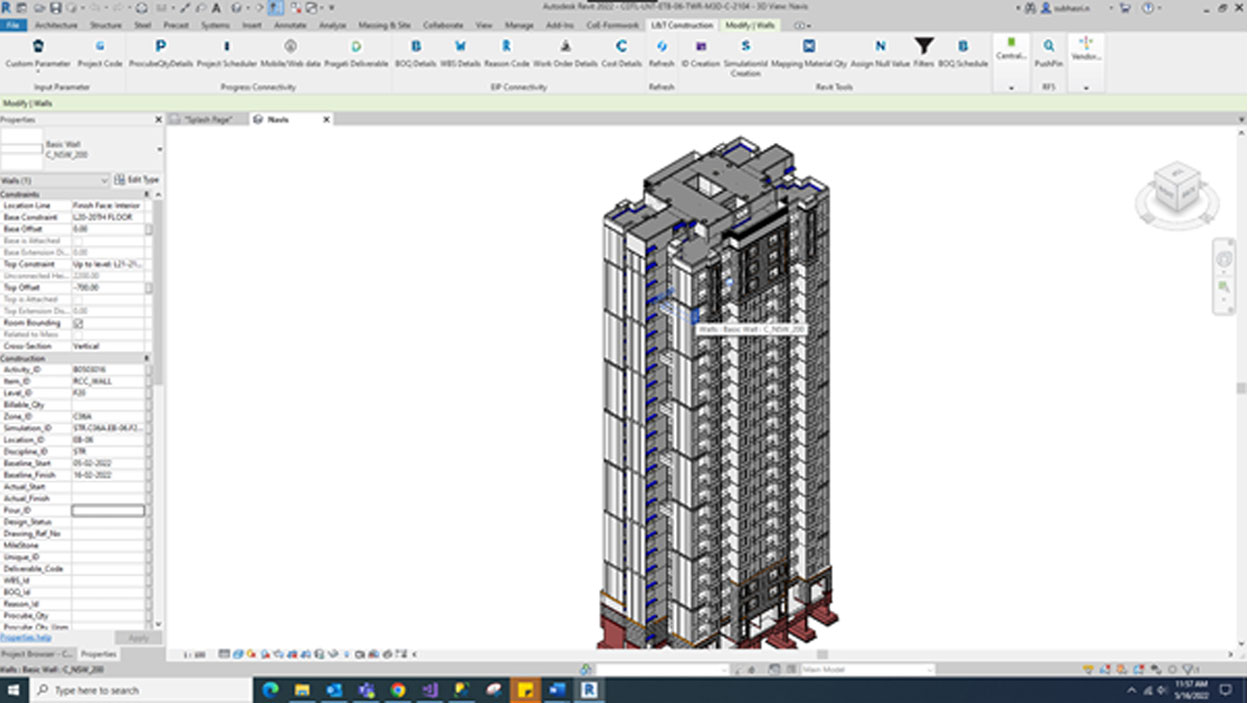
After updated the parameters, BIM Quantity [fetch the quantity based on relevant element] values to show the selected element.
If we click the WOMAP link to show the alert message. If click ’YES’ to highlight the specific element based on Sub-items code and Work Order data for relevant model.

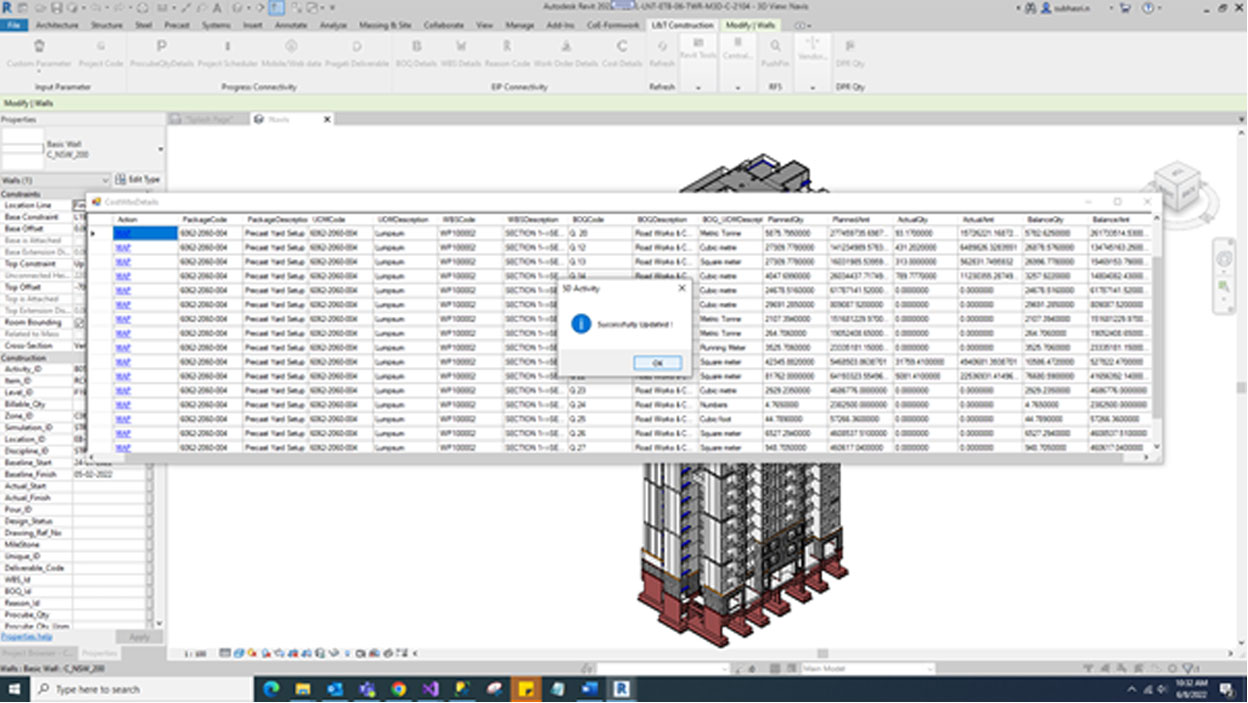
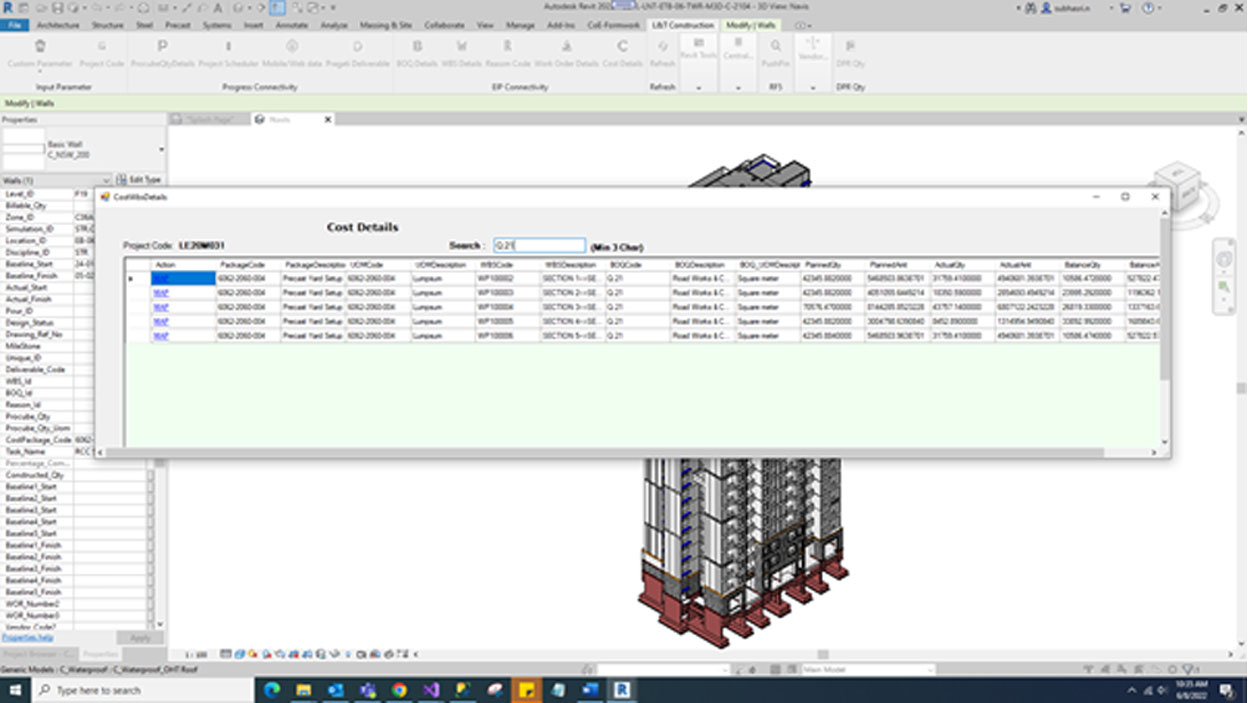
Select the model. Click the Cost Details button and this button will show the Package Code, Package Description, UOM Code, UOM Description, WBS Code, WBS Description, BOQ Code, BOQ Description, Planned Qty, Planned Amount, Actual Qty, Actual Amount, Balance Qty and Balance Amount.
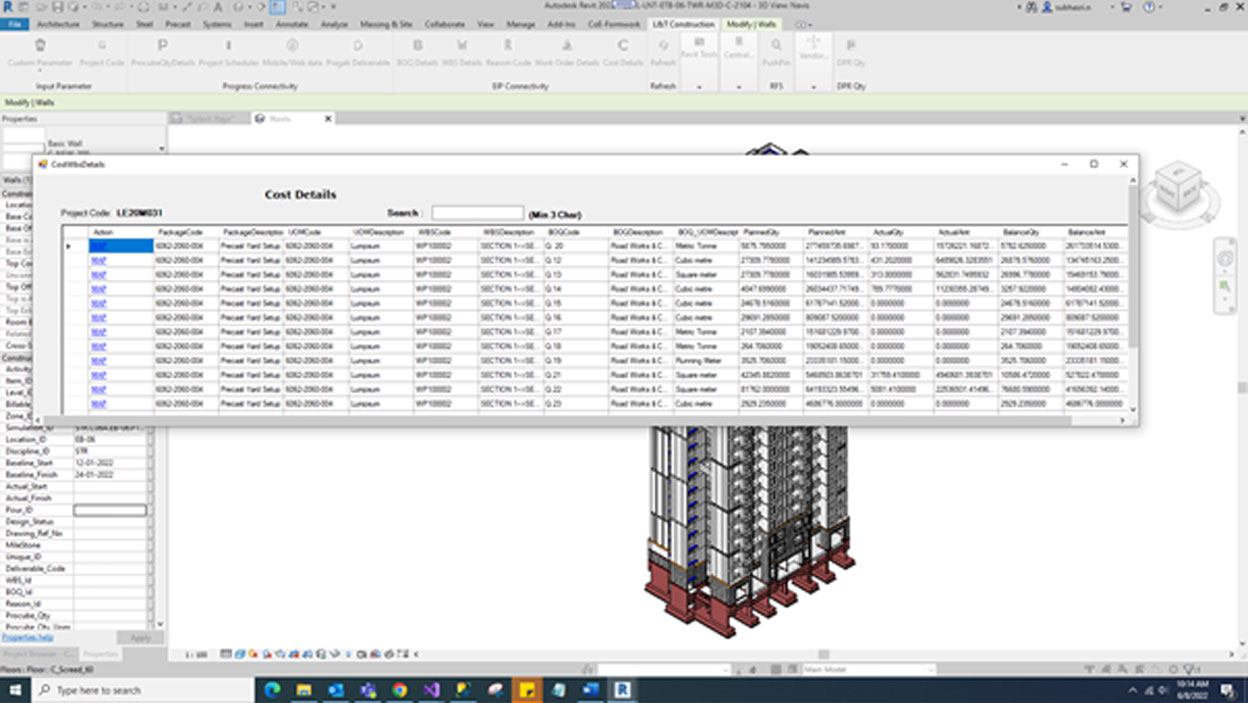
If we click MAP link the cost package cost will be updated in relevant parameter.
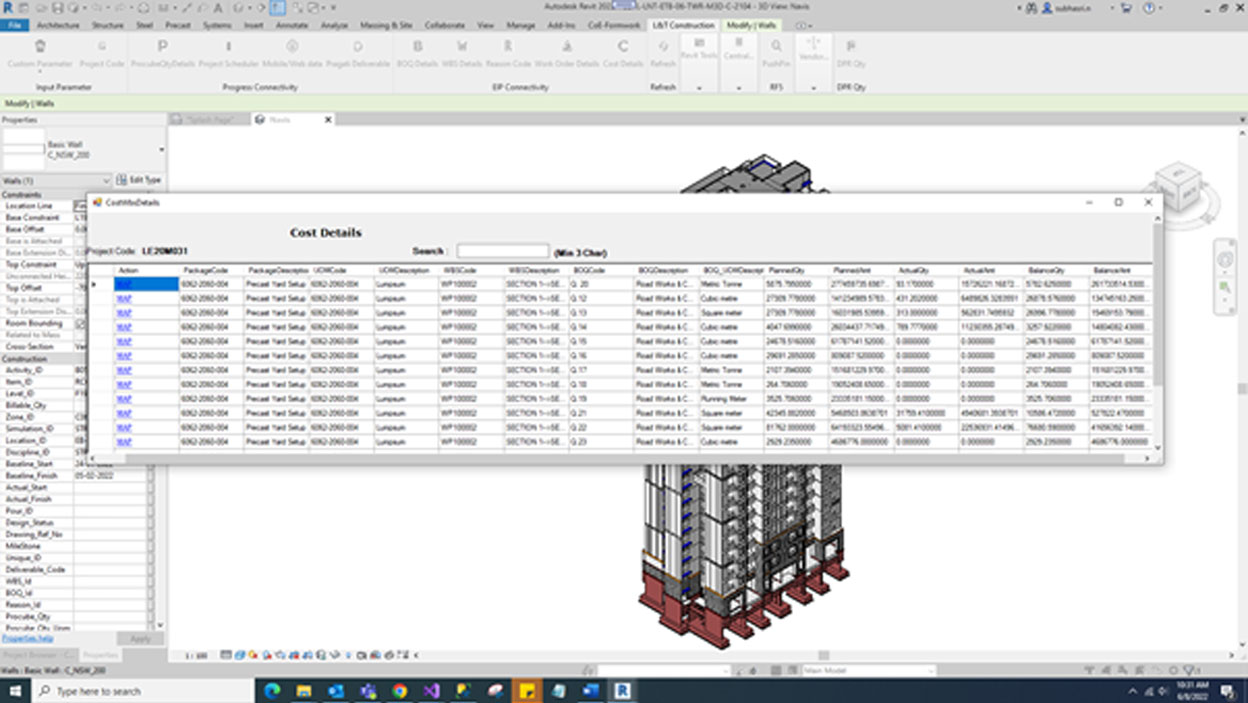
Click ‘YES’ button updated the cost package code

Search use three letter to find the relevant record.
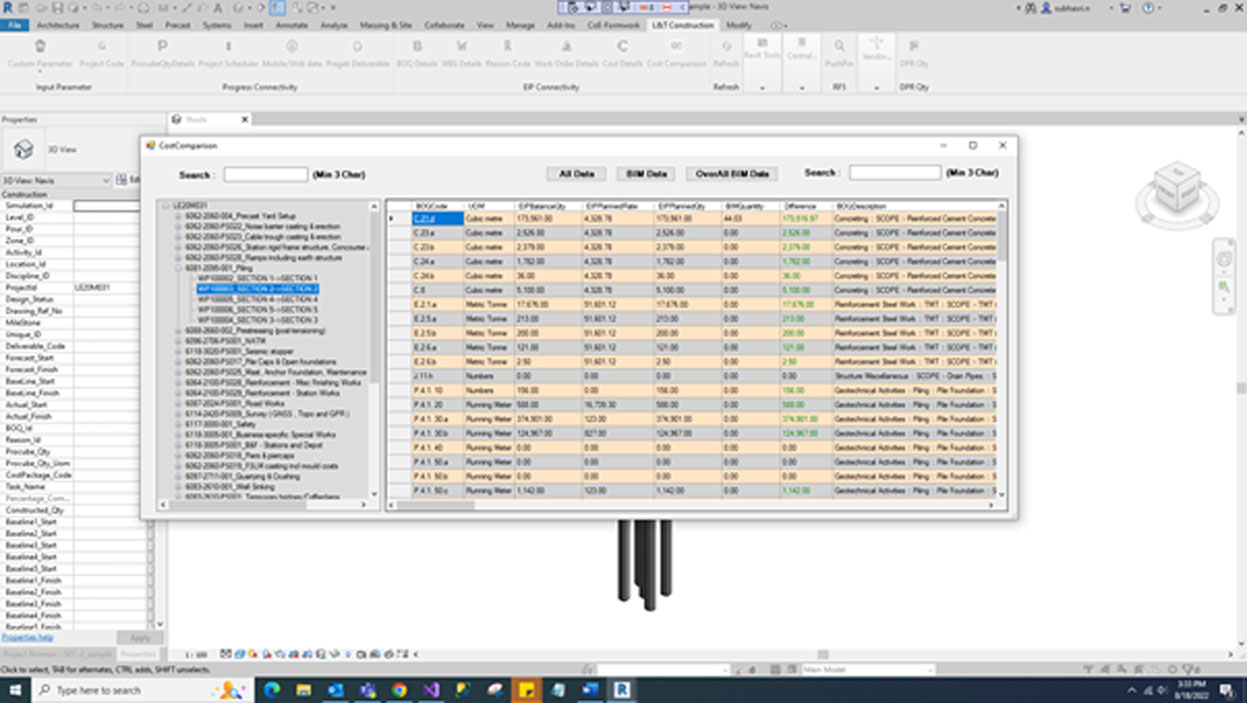
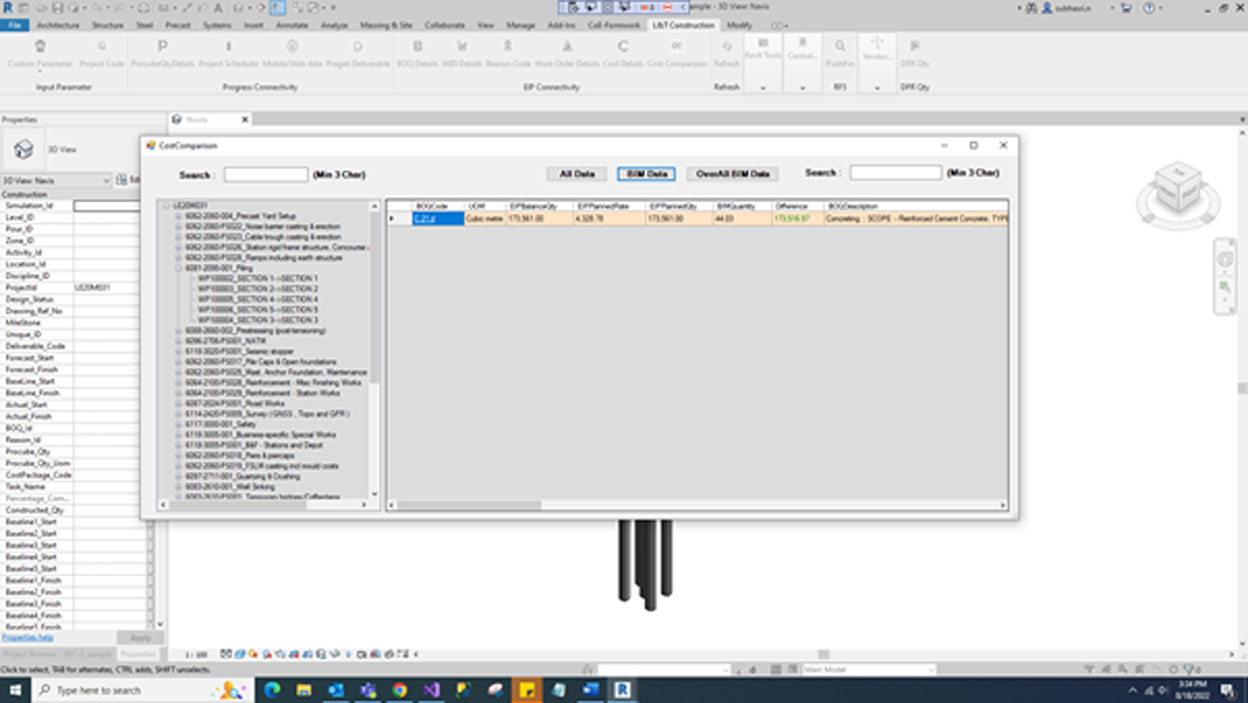
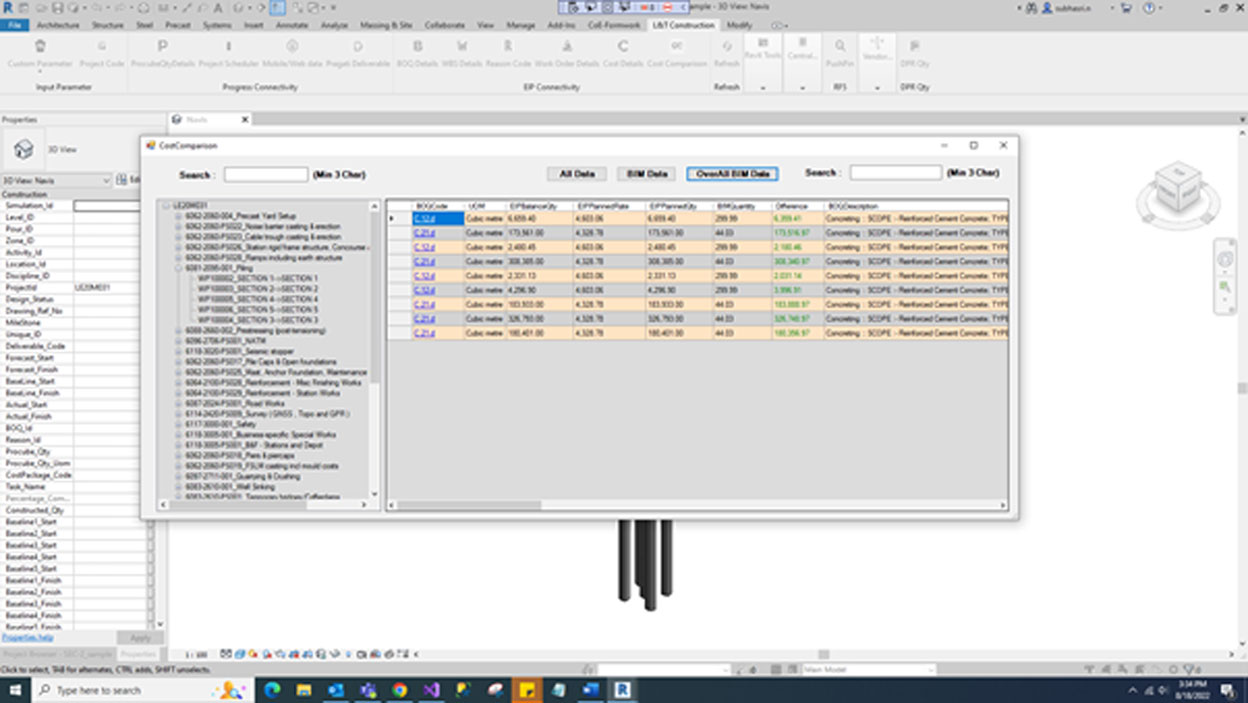
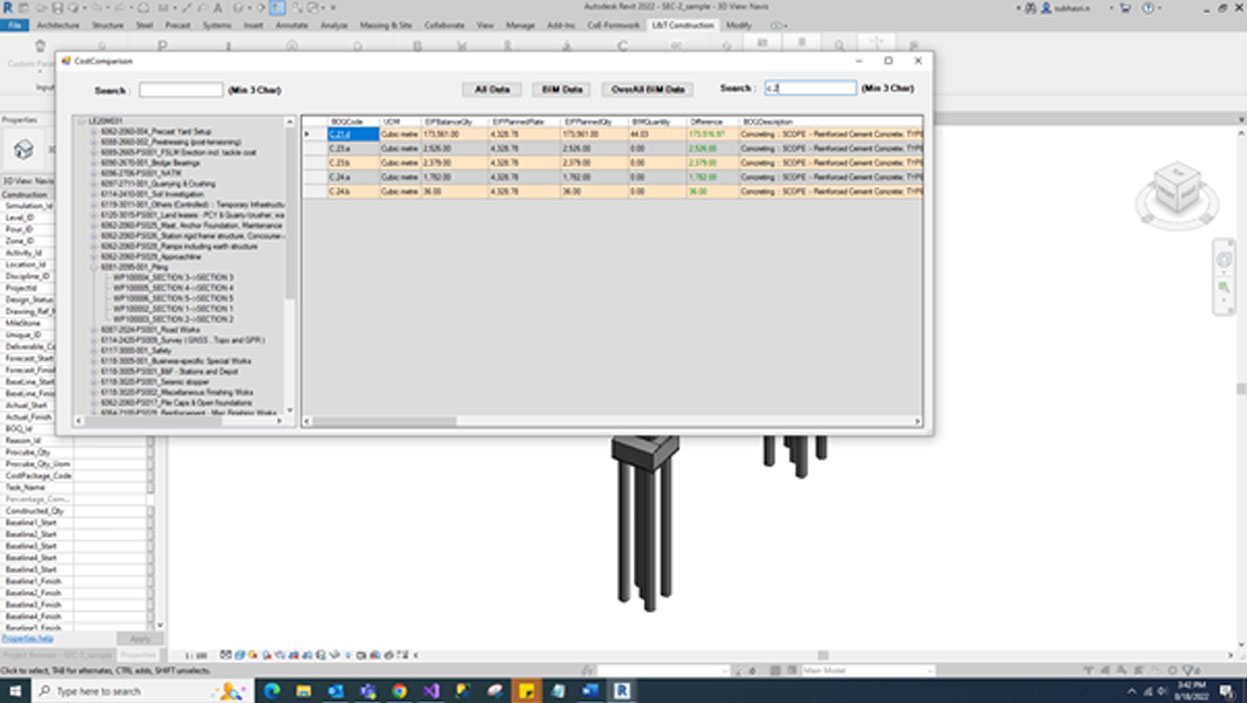
Select the Cost Comparison Button. This Button will display the tree structure of the project, WBS Code and BOQ Code.
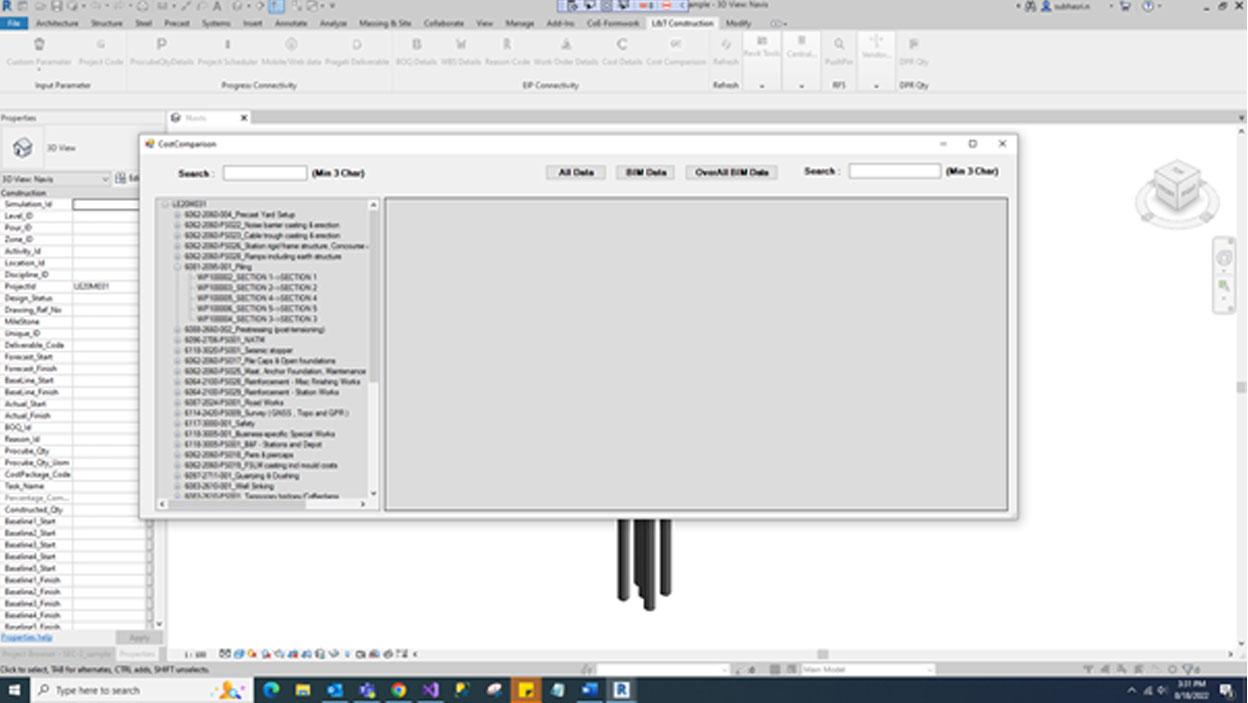
If we select the BOQ Code tree structure data will get the respective BOQ Code, BOQ Description, UOM, EIP Balance Quantity, EIP Planned Rate, EIP Planned Quantity, BIM Quantity [fetch the quantity based on model], Difference[that means EIP Planned Quantity – BIM Quantity]
If click BIM Data button will display the only BIM Quantity data.
If we click ALL Data button will display the all data and this data shows only relevant WBS and BOQ Code data.
If we click Overall BIM Data button will display the overall BIM quantity data.

Search use three letter to find the relevant record from tree structure data. We can easily find the relevant WBS and BOQ code.
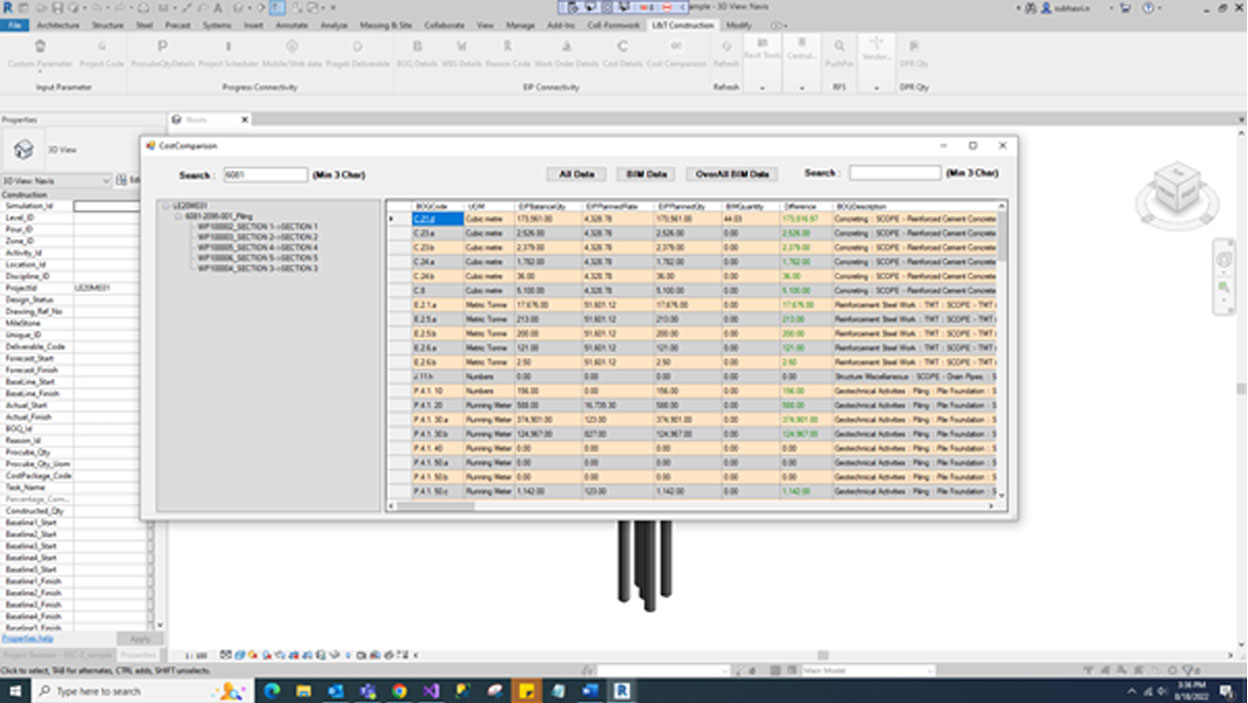
Search use three letter to find the relevant record from grid data.
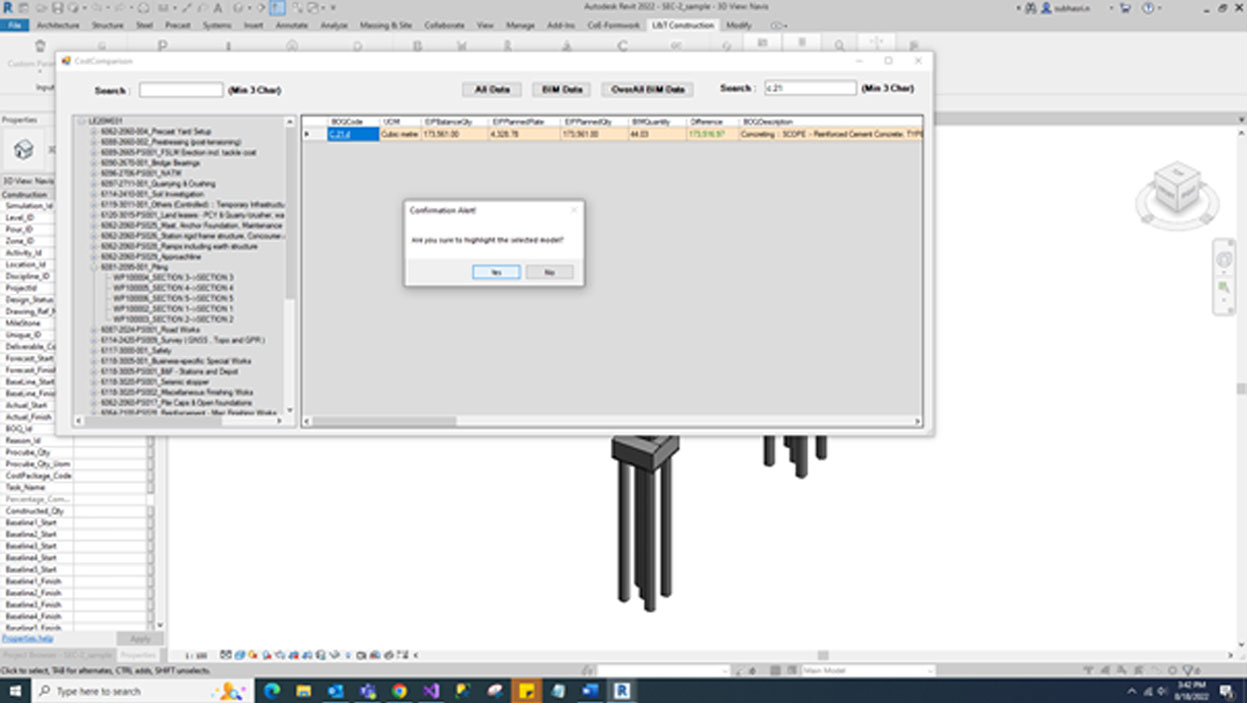
If click BOQ Code link to show the alert message. If click ’YES’ to highlight the specific BOQ element based on relevant model.
Get data from database for all ProcubeQtyDetails, Project Scheduler, Mobile/Web data.
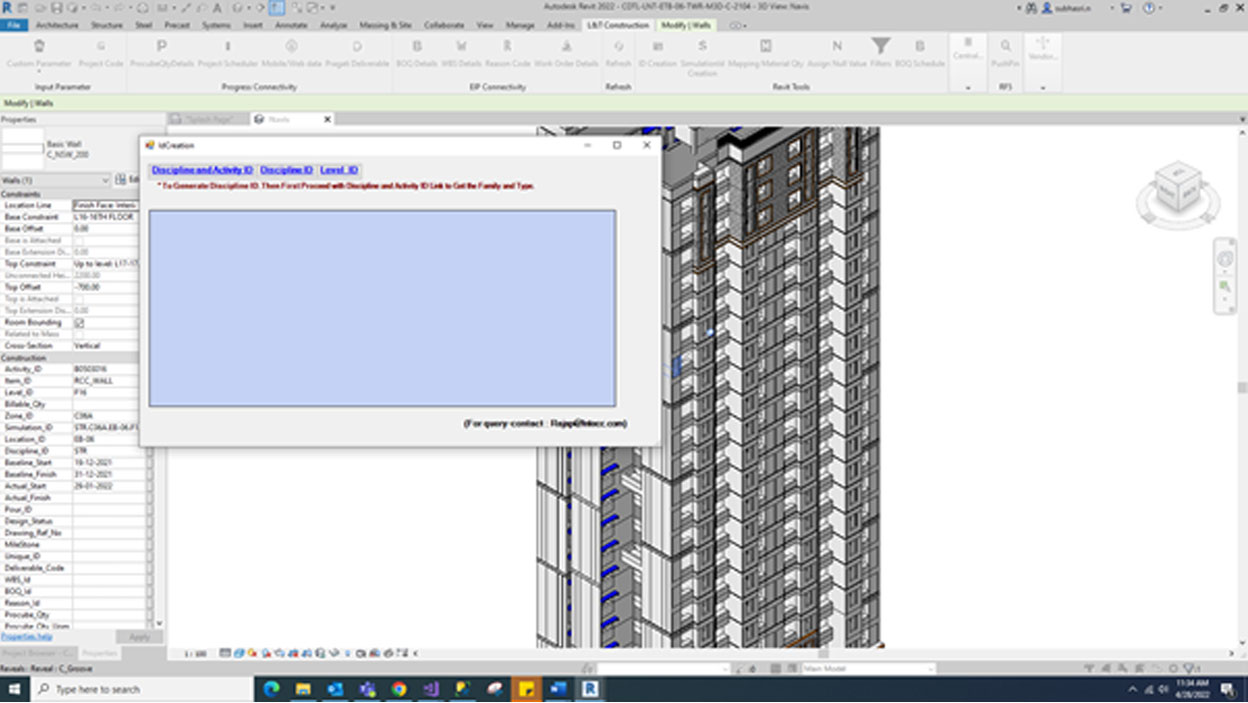
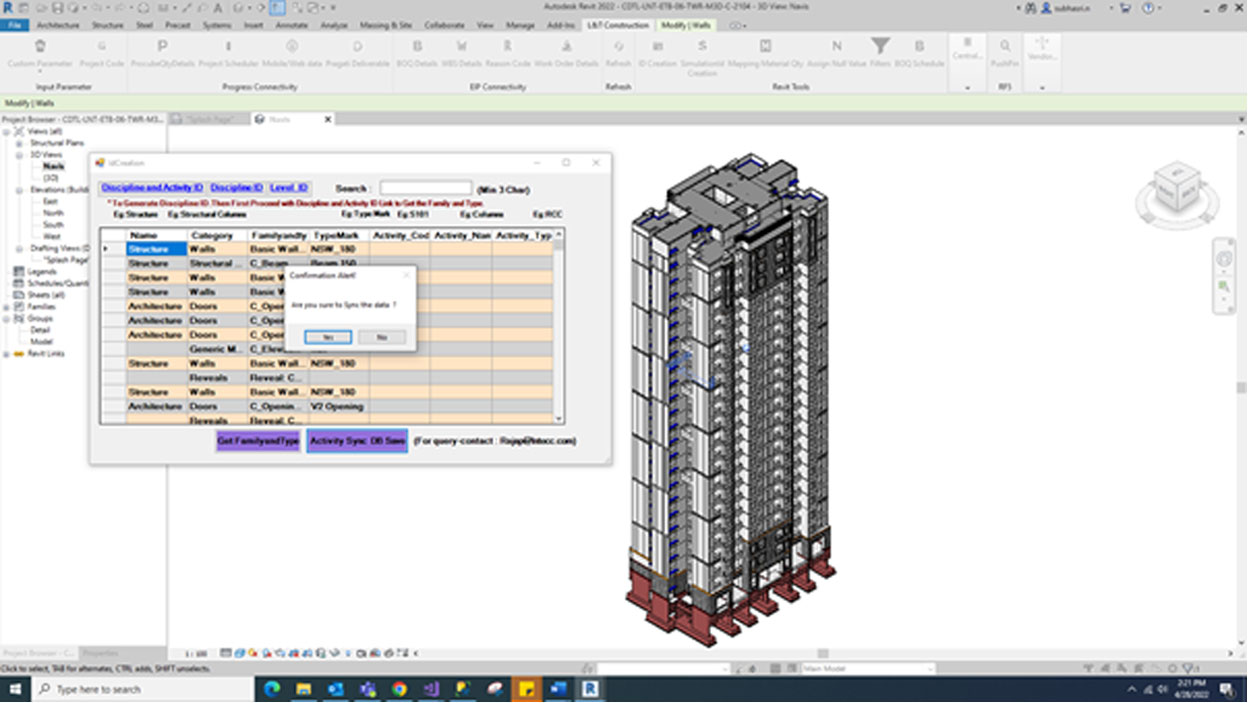
Select the model and Click Discipline and Activity Id link. This link will display the Family and Type details.
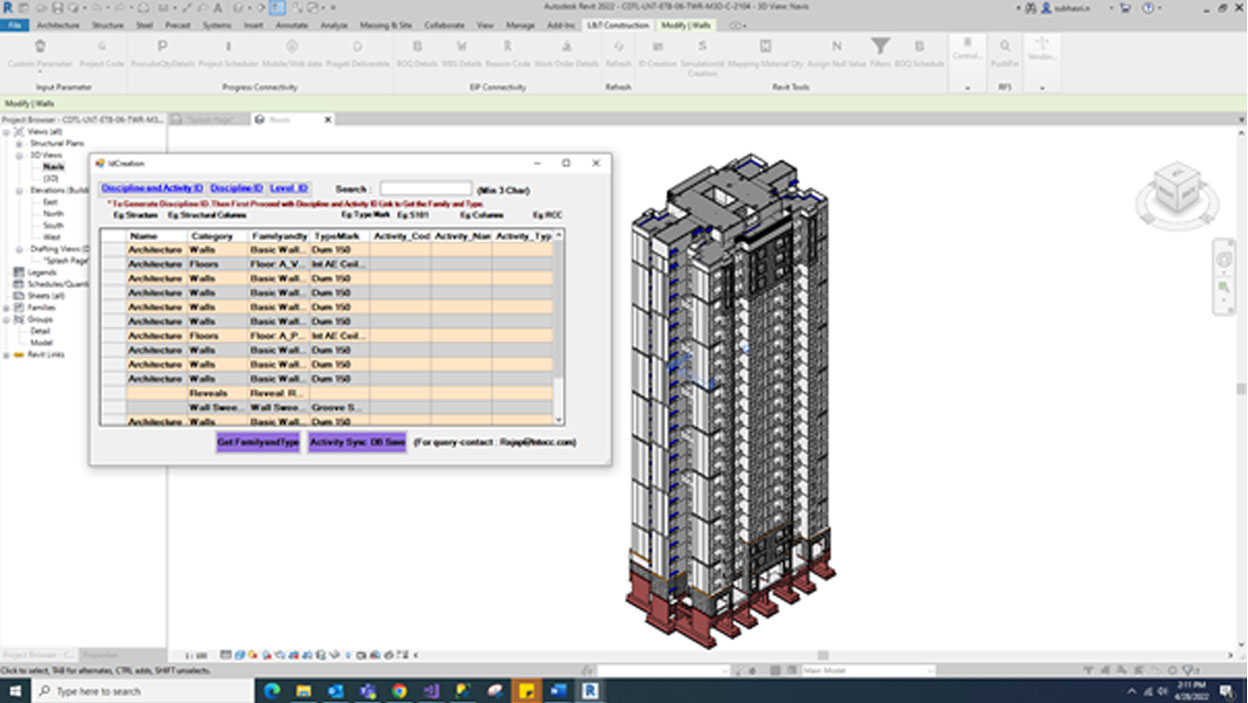
If we select Get FamilyandType button and this button will show the alert message and updated all family and type data’s.

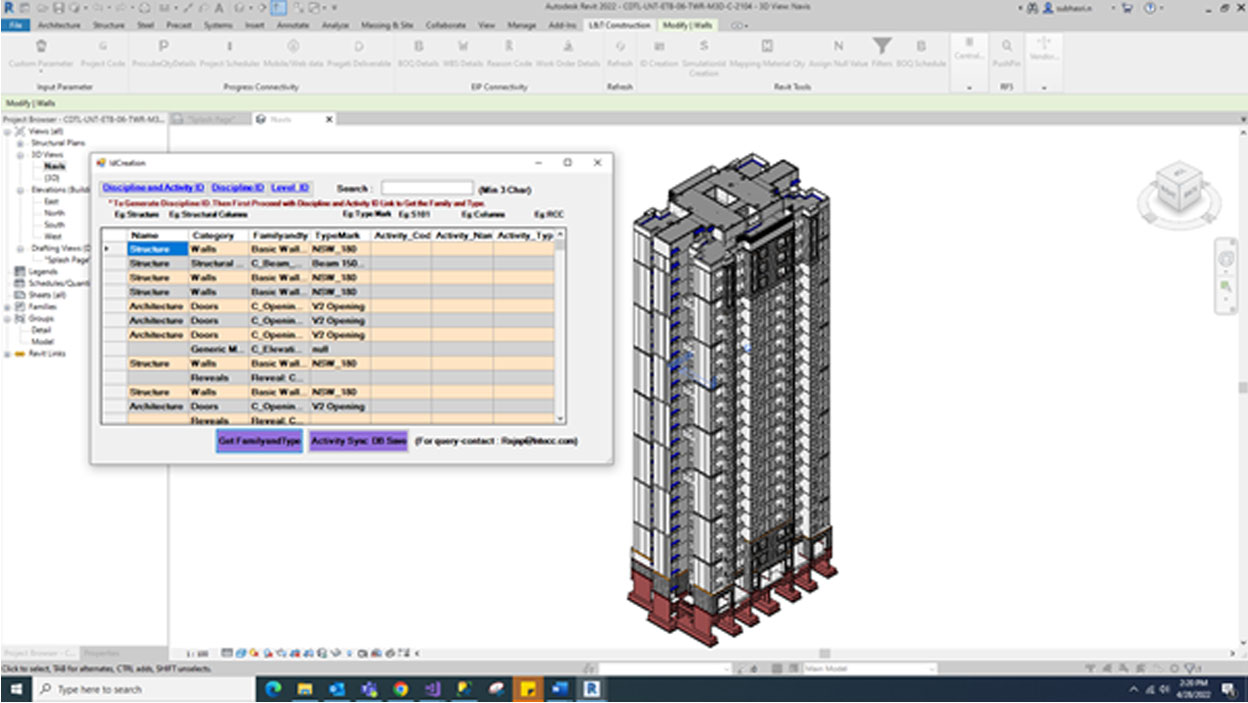
If we select Activity Sync DB Save button and this button display alert message. If clicked ‘Yes’ synchronize the data from DB and Successfully synchronize the data.

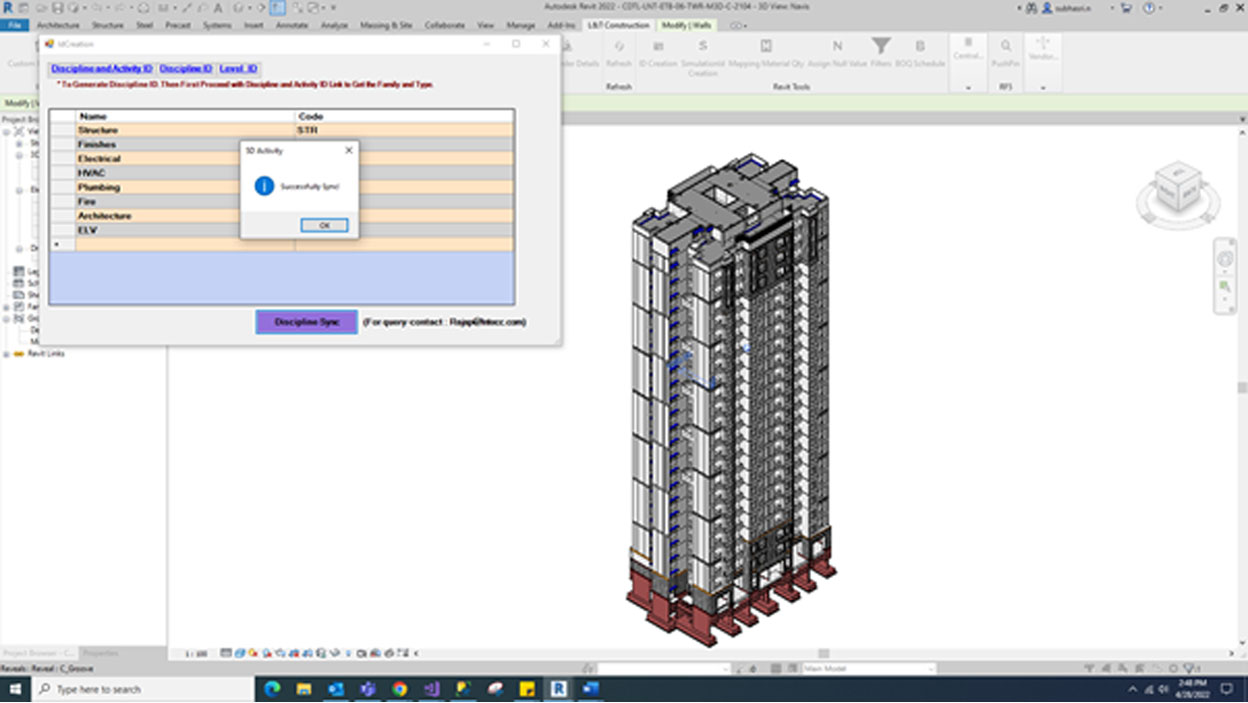
Click Discipline Id link and this link will display the discipline code and name details.
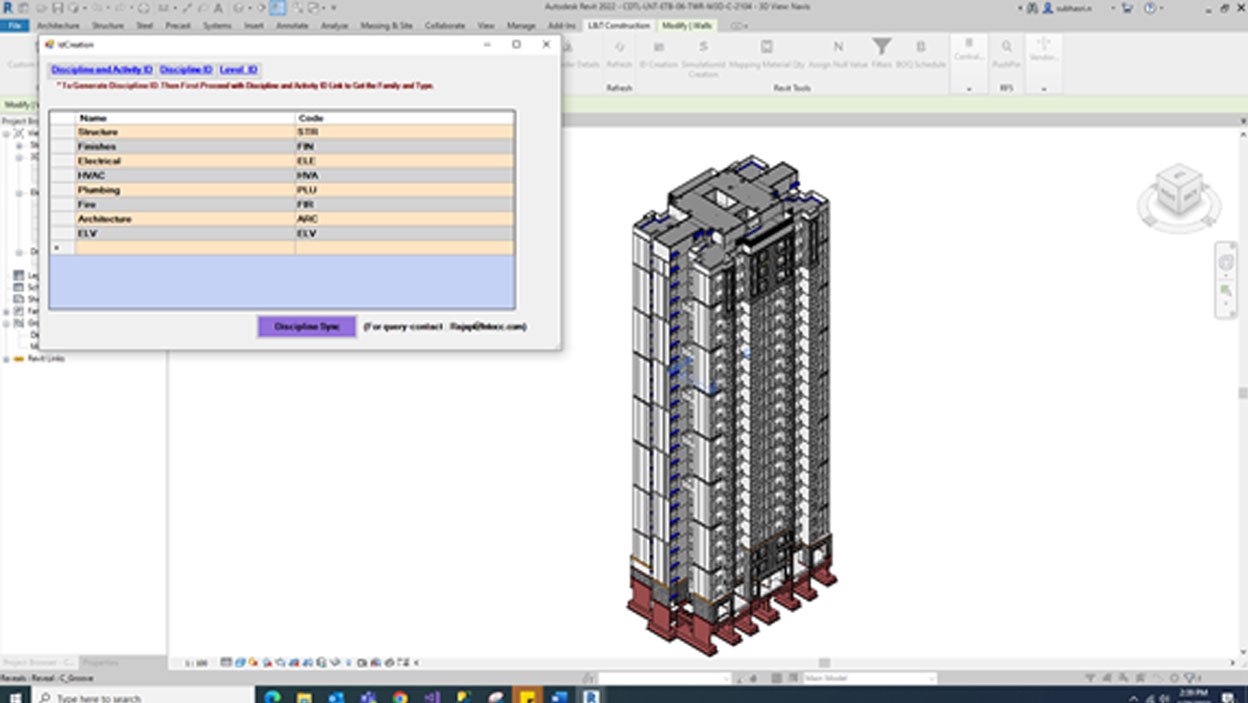
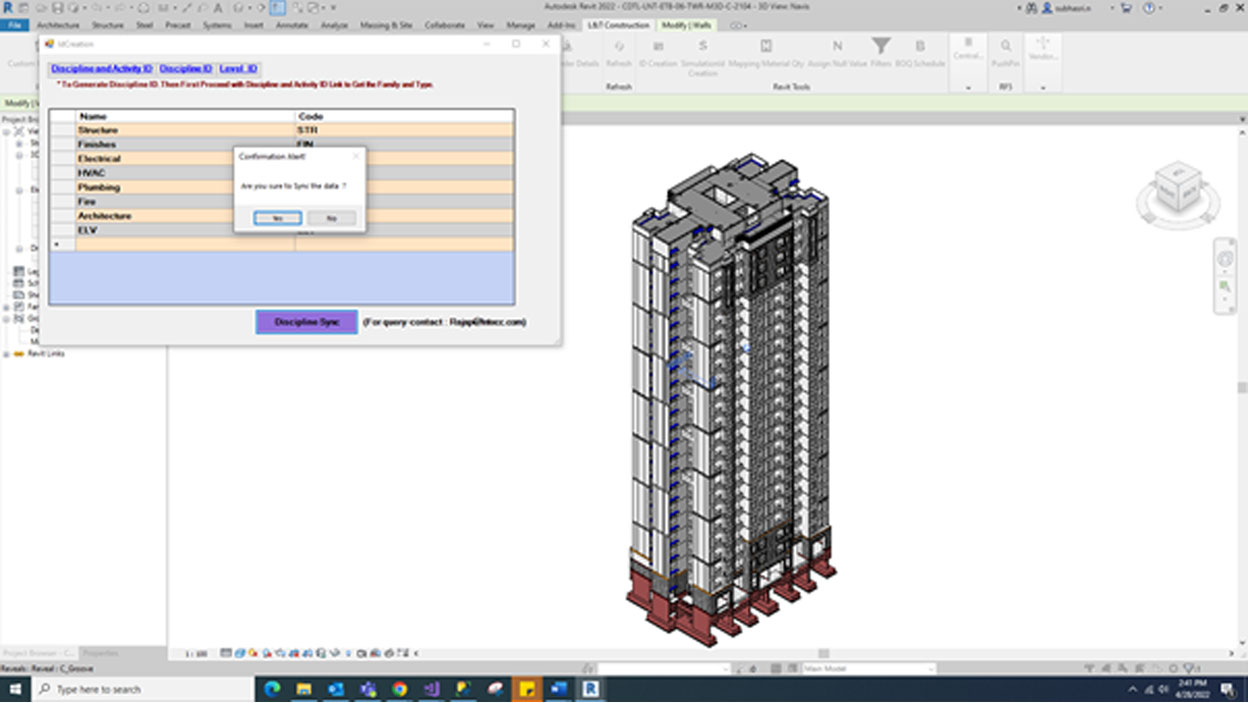
Click the Discipline Sync button and this button will show the alert message. If we click ‘Yes’ synchronize the discipline data from DB.
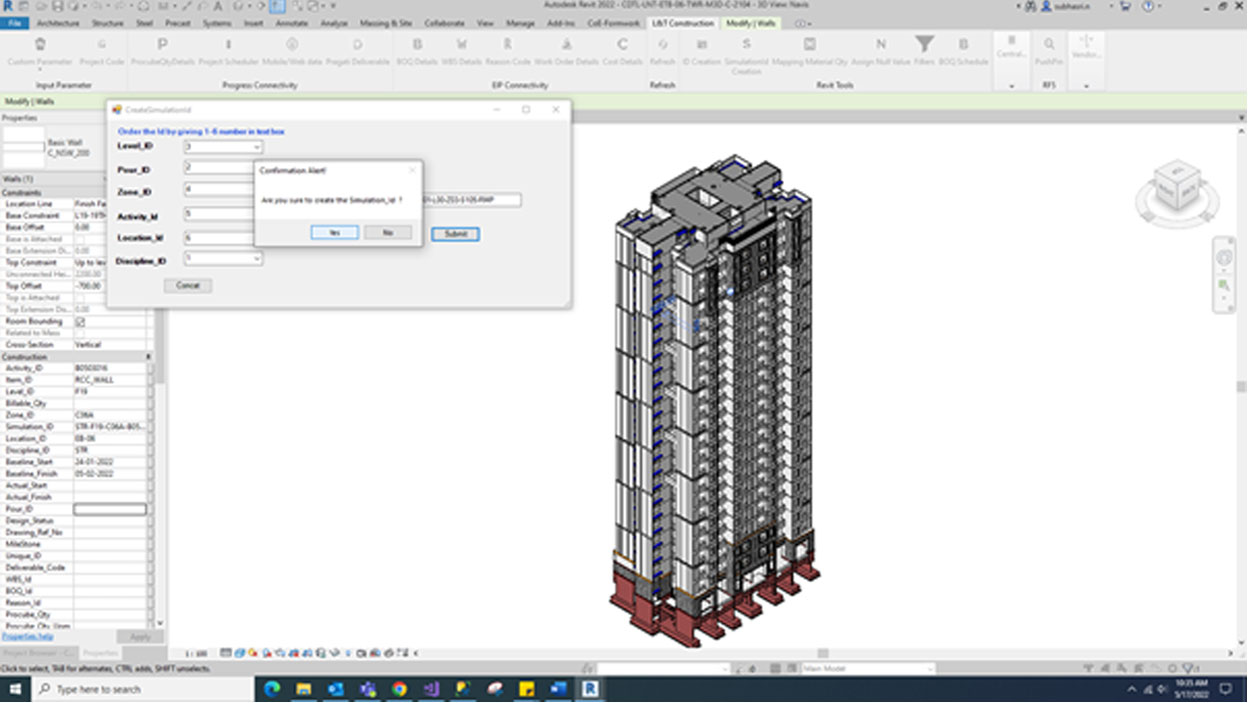
Select the model and Click Simulation Id Creation [Addins]. We will create simulation id based on Level_ID, Pour_ID, Zone_ID, Activity_Id, Location_Id,Discipline_ID.

For e.g.: STR-P01-L00-Z03-S105-RMP [Order the simulation id giving number (1-6) in text box]. STR is the Discipline ID, P01 is the Pour ID, L00 is the Level ID, Z03 is the Zone ID, S105 is the Activity ID, RMP is the Location ID. If we click concat button and created Simulation_id in related text box.
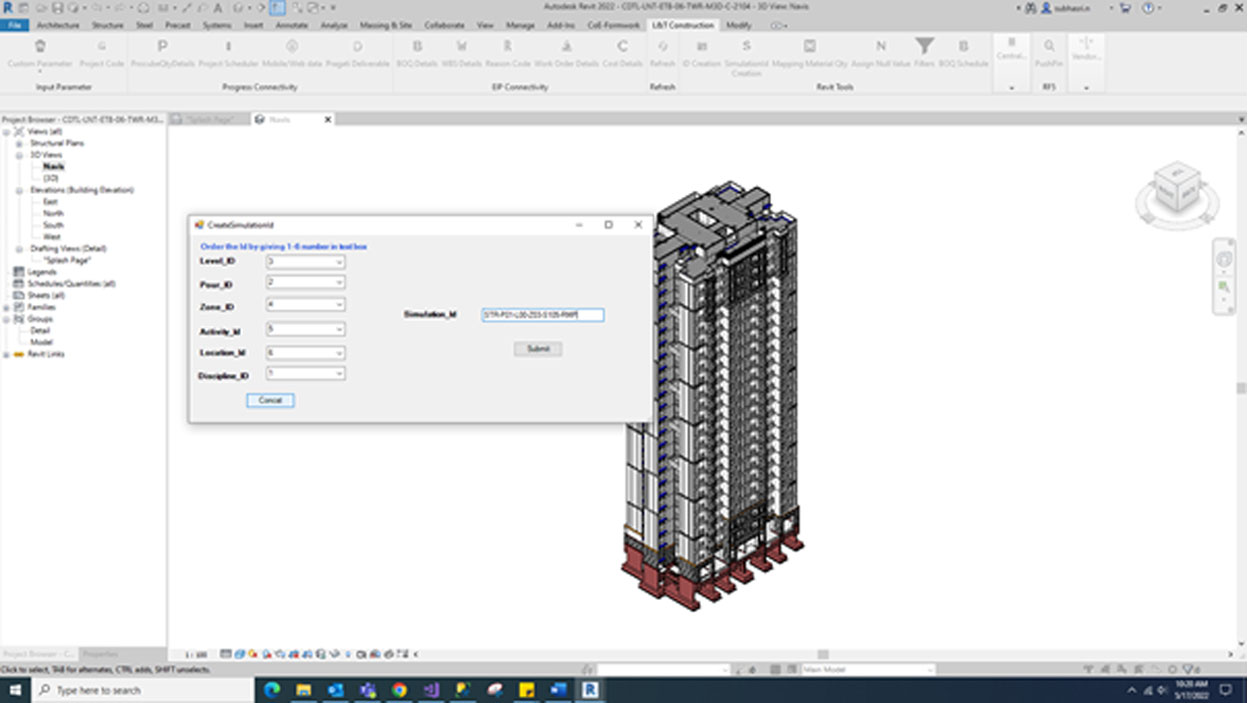
Finally, click submit button and this button will show the alert message. If we click ‘Yes’ simulation id to be created in respective parameter
Select the model. If we click mapping material qty and all the material qty successfully updated based on selected model.
Select the model. If we click mapping material qty and all the material qty successfully updated based on selected model.

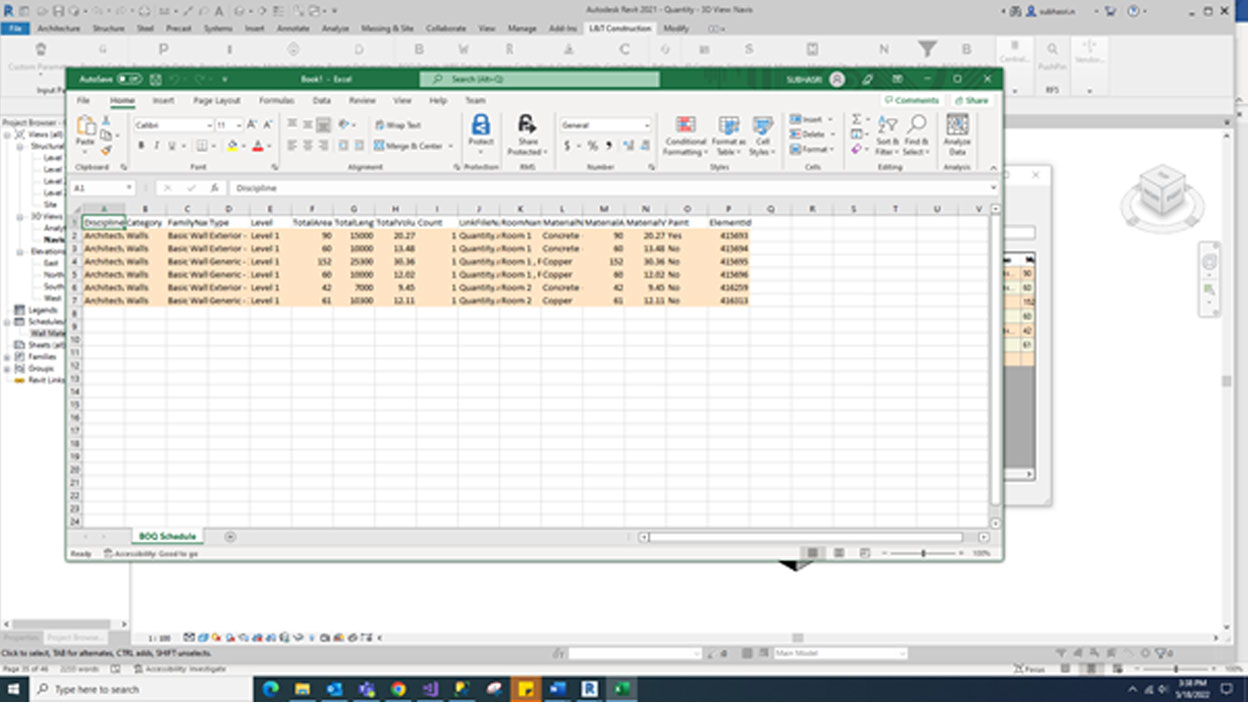
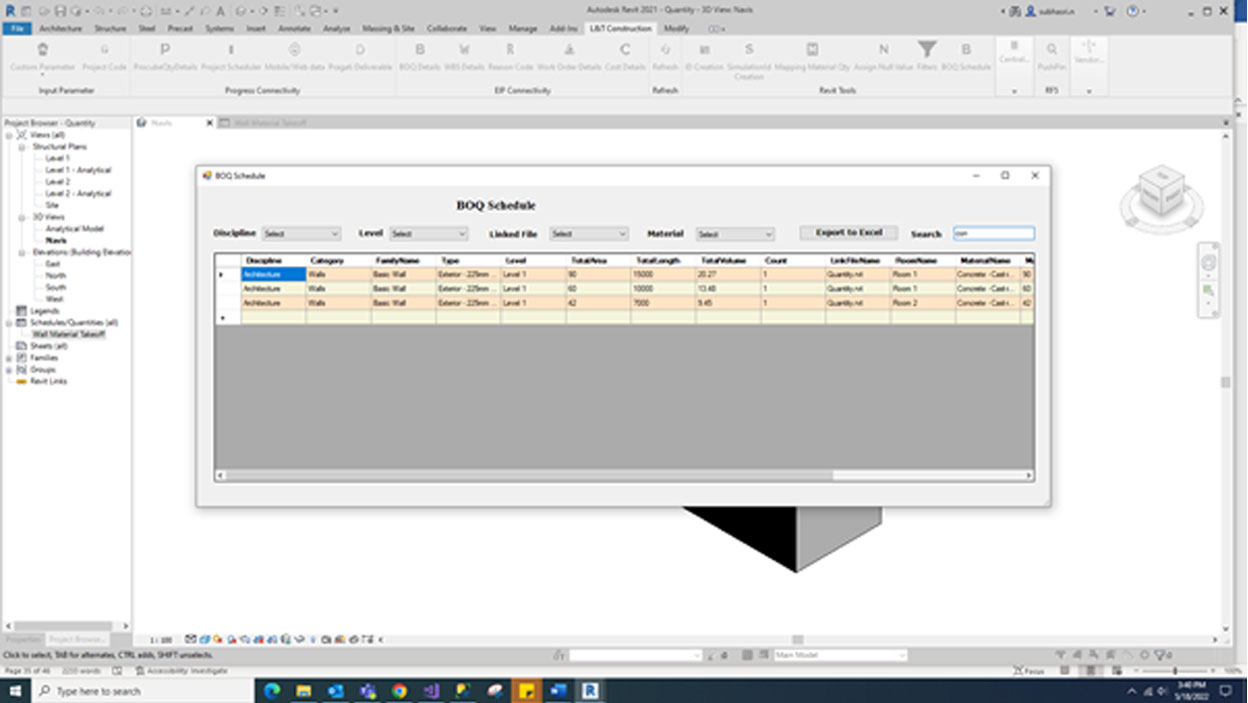
Select the model and Go to central component and find the BOQ schedule -> in the BOQ we can view the Discipline name, Category, Family Type, Level, Total area & Volume & count, Linked File Name, Room Name & Number, Material Name, Material Area & Volume, Wall paint based on material and Element Id.
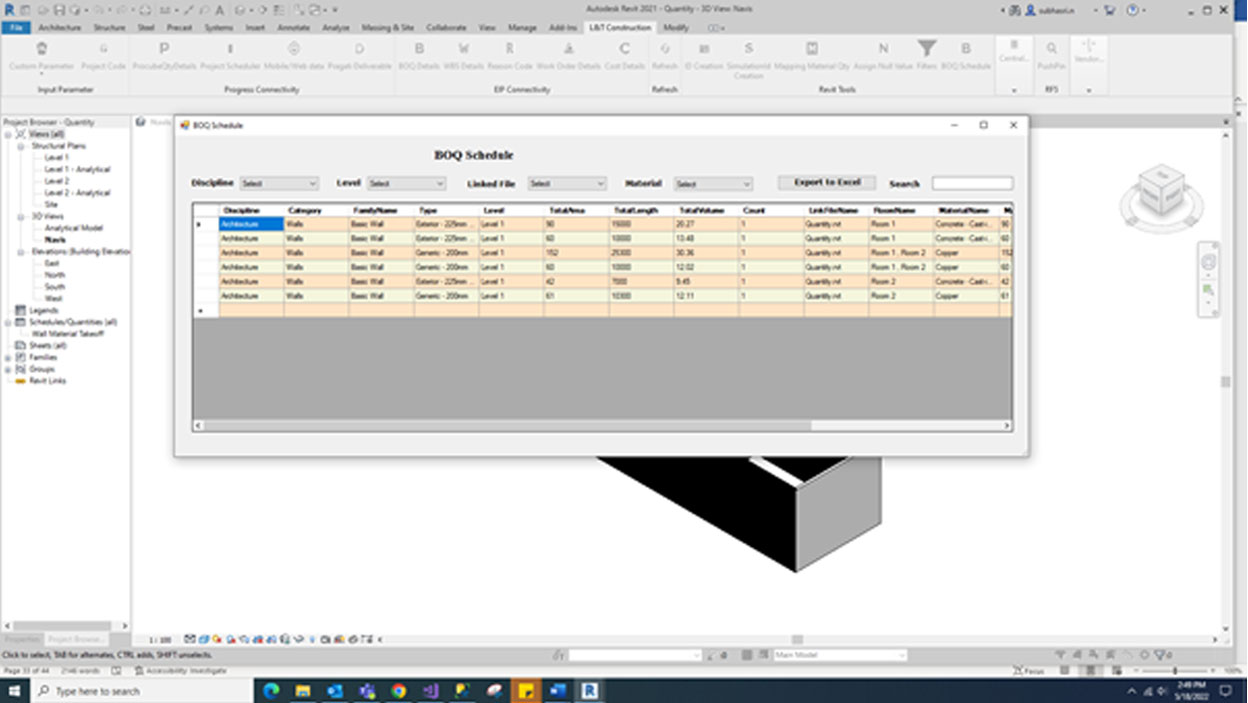
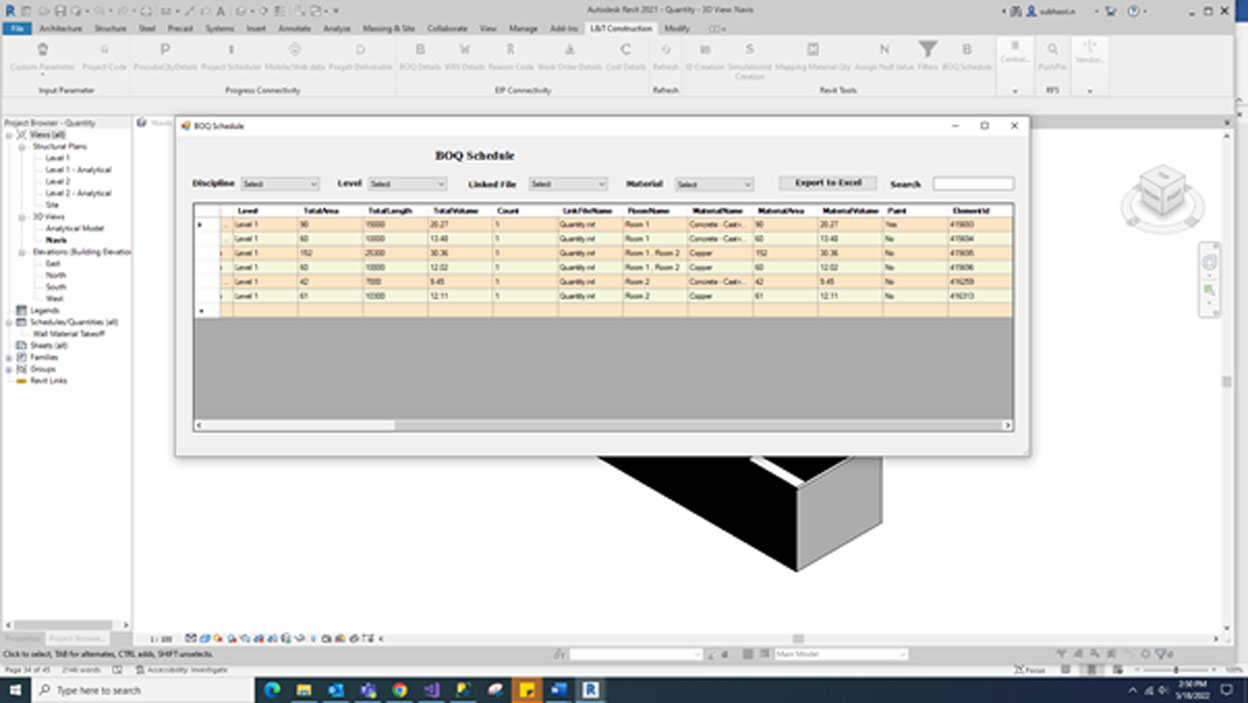
We use drop down for Discipline, Level, Link File Name and Material Name to fetch record.
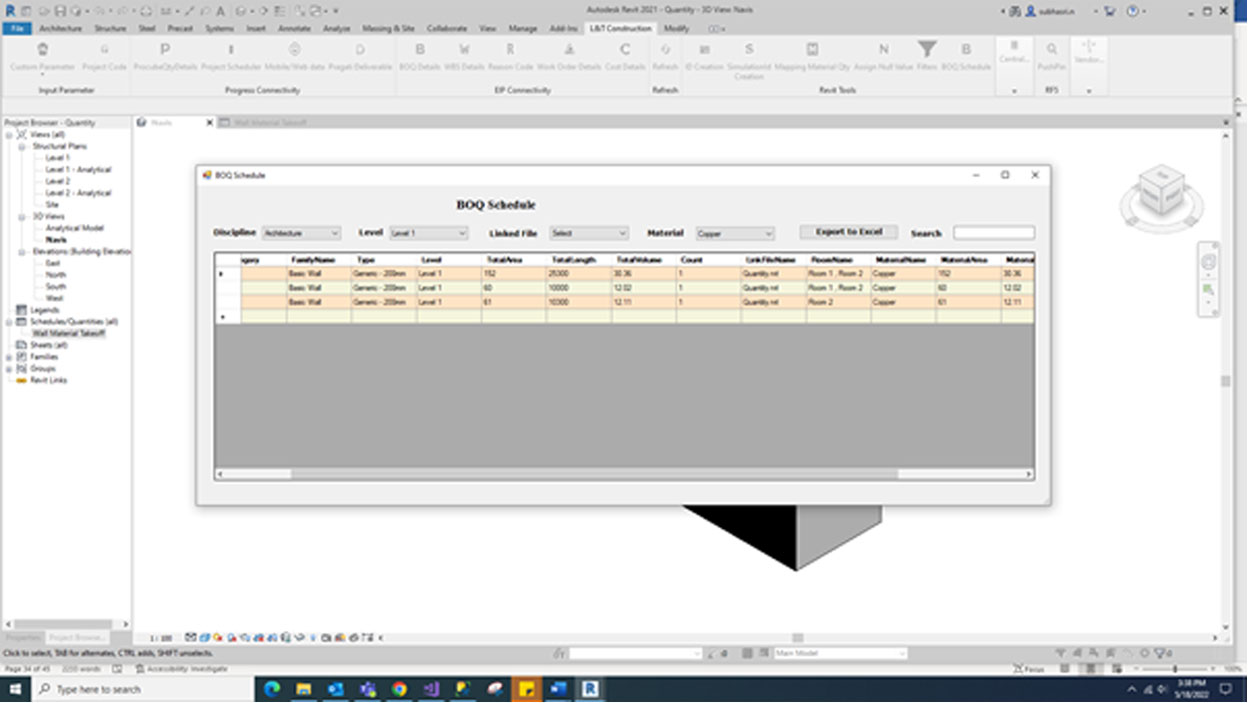
We can export to excel sheet of complete result set.
Search use three letter to find the relevant record.
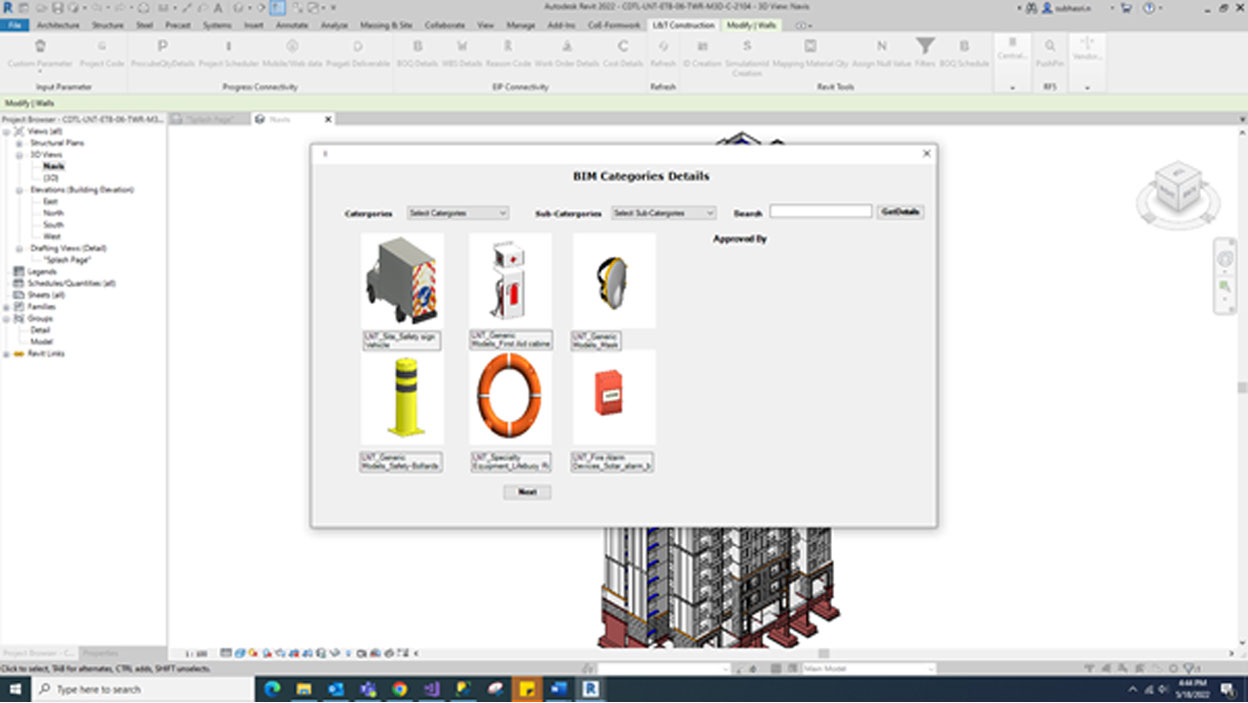
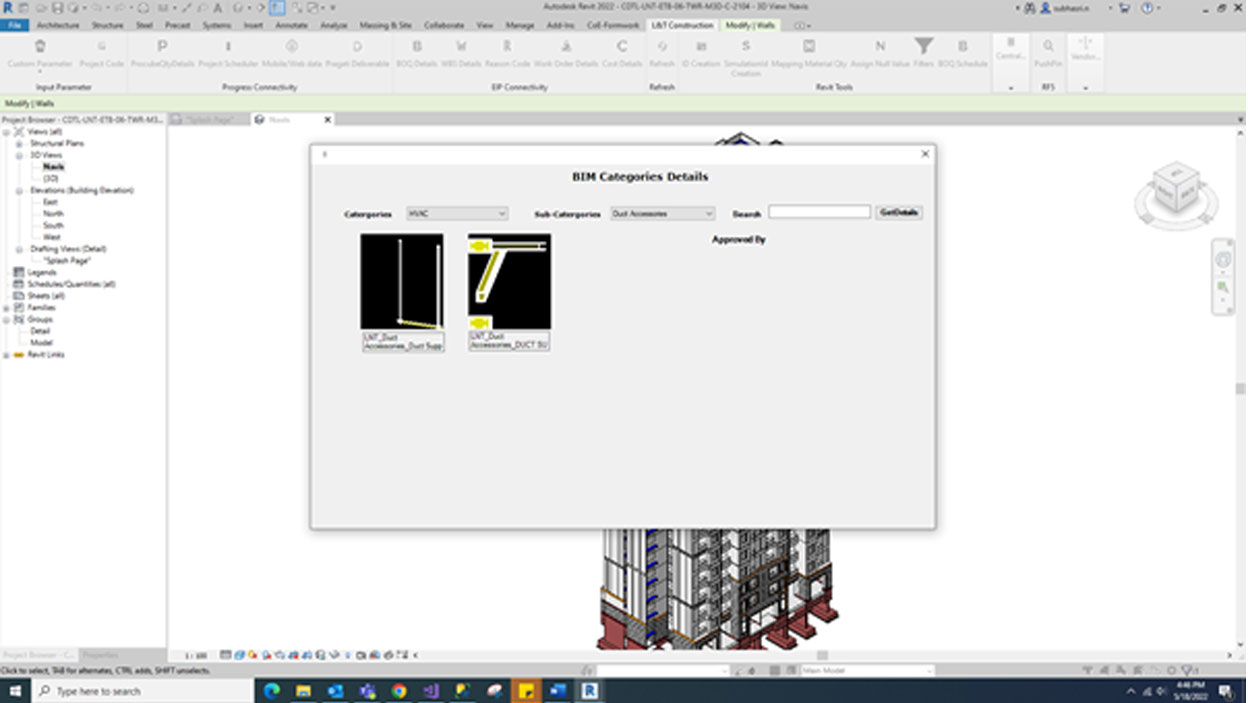
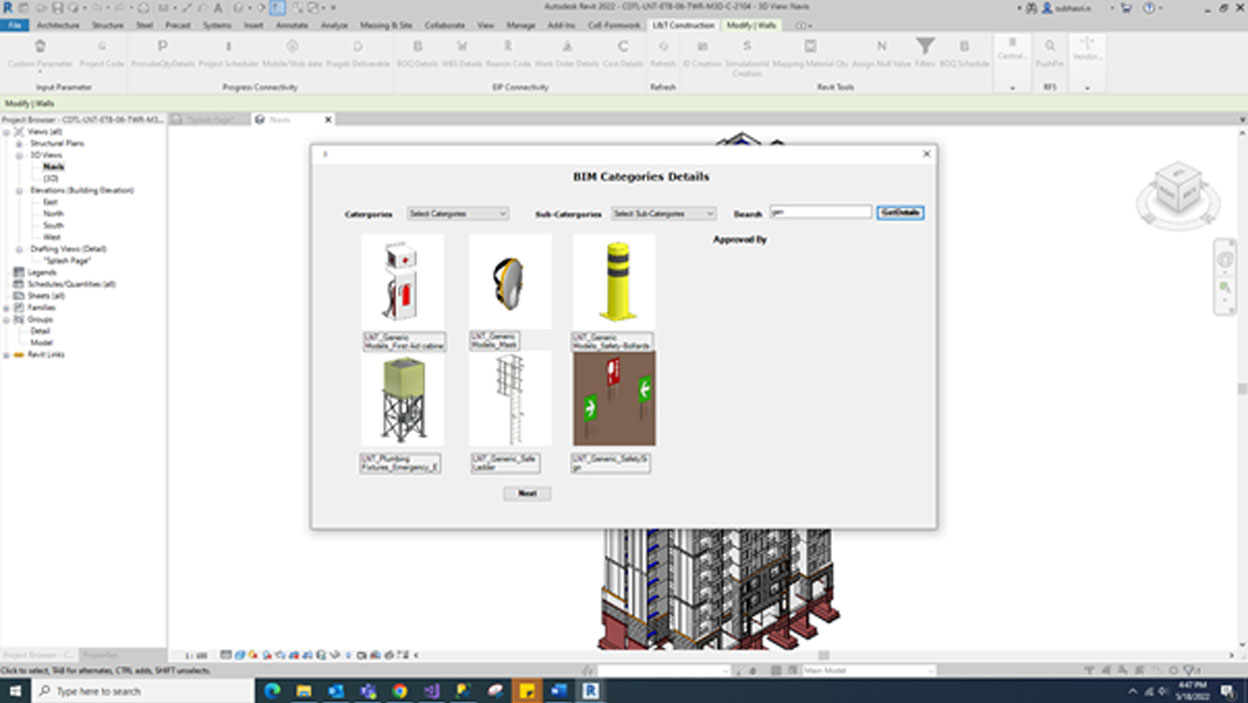
We can view the BIM Component details by categories and subcategories and Select categories wise and subcategories wise we select the component and select the component, we can view header parameter and value.

We can download the rvt file from this screen.

It shows the latest file from the database. If we need older file, we can search or filter from dropdown.
To search enter three letter and click get details. We click Get Details button this button display from matching of three letters.
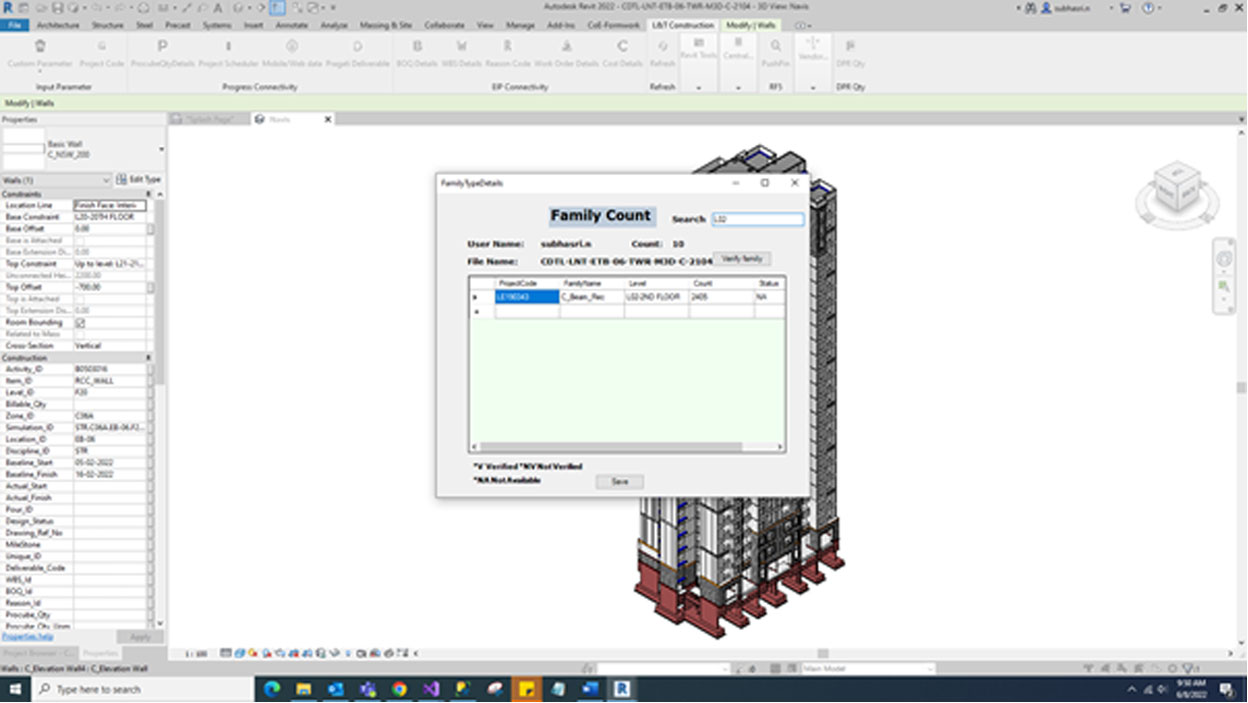
Select the model & go to central component select Family count tab we can view the family count details; it shows like below screen.
We can identify the family names in project code, level, and total family count.
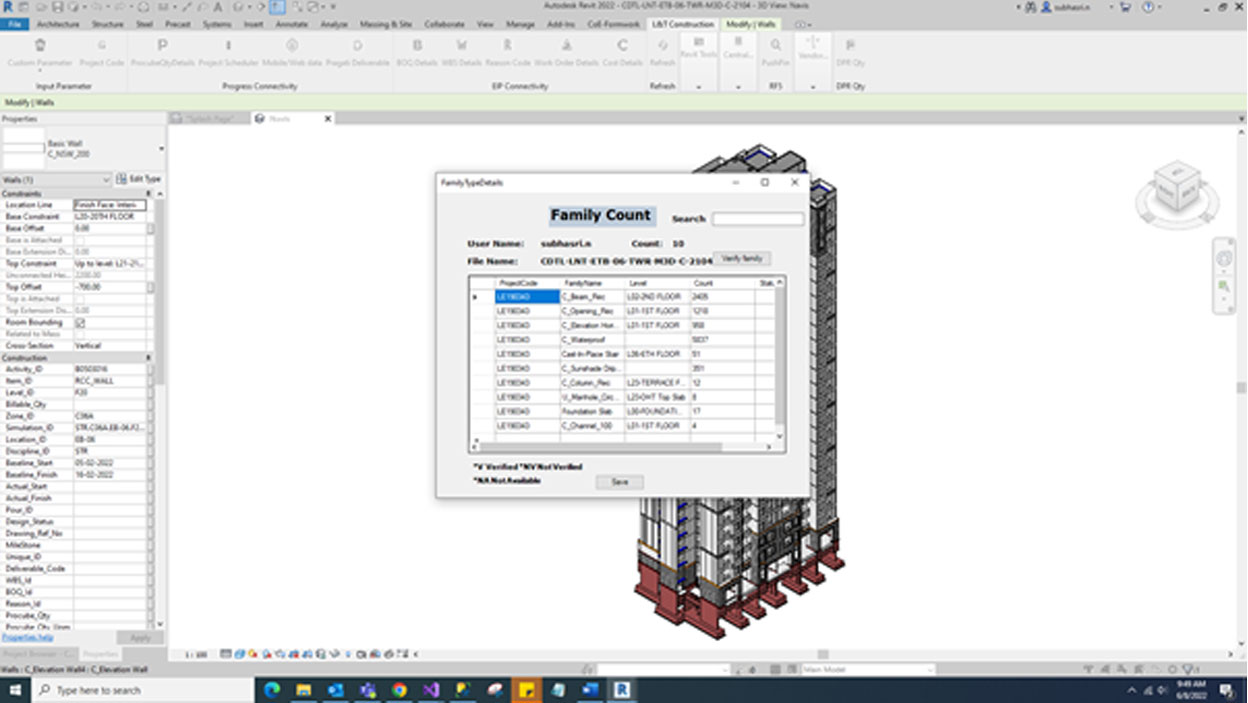
We can view level wise family using and status is null in beginning.
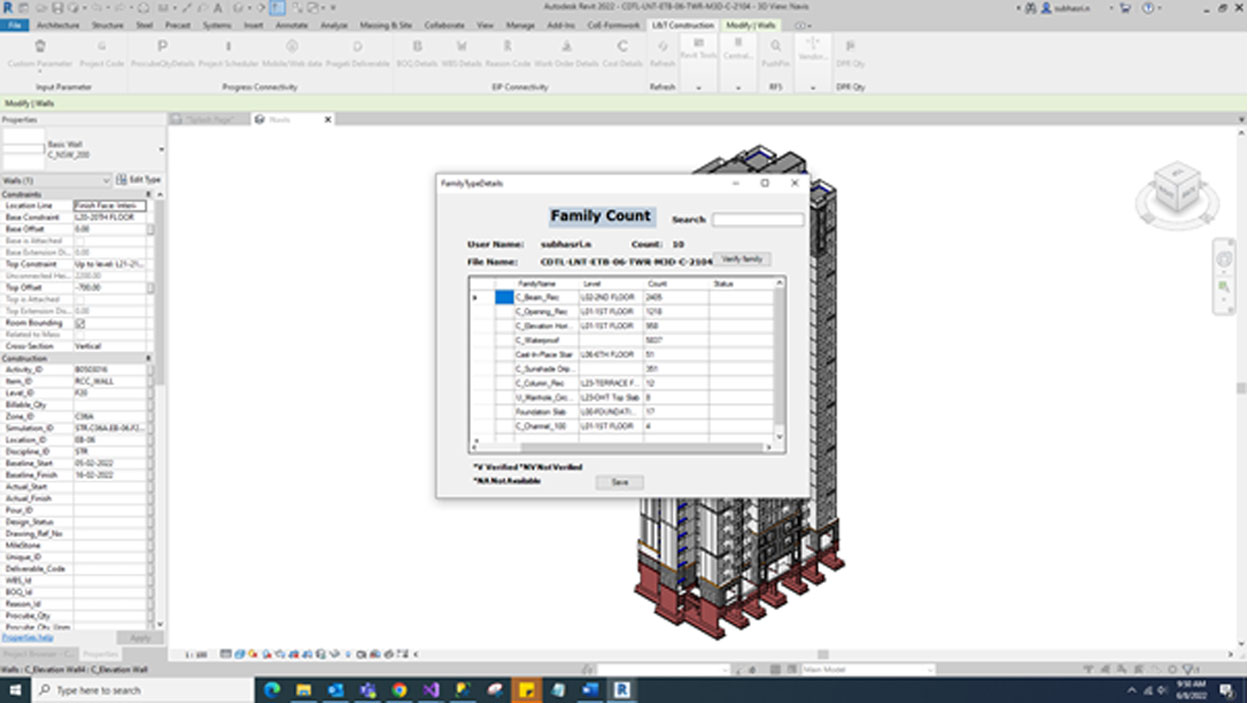
Select verify family button if family names verified in it shows in ‘V’ and not verified shows ‘NV’If not available in our database shows ‘NA’.
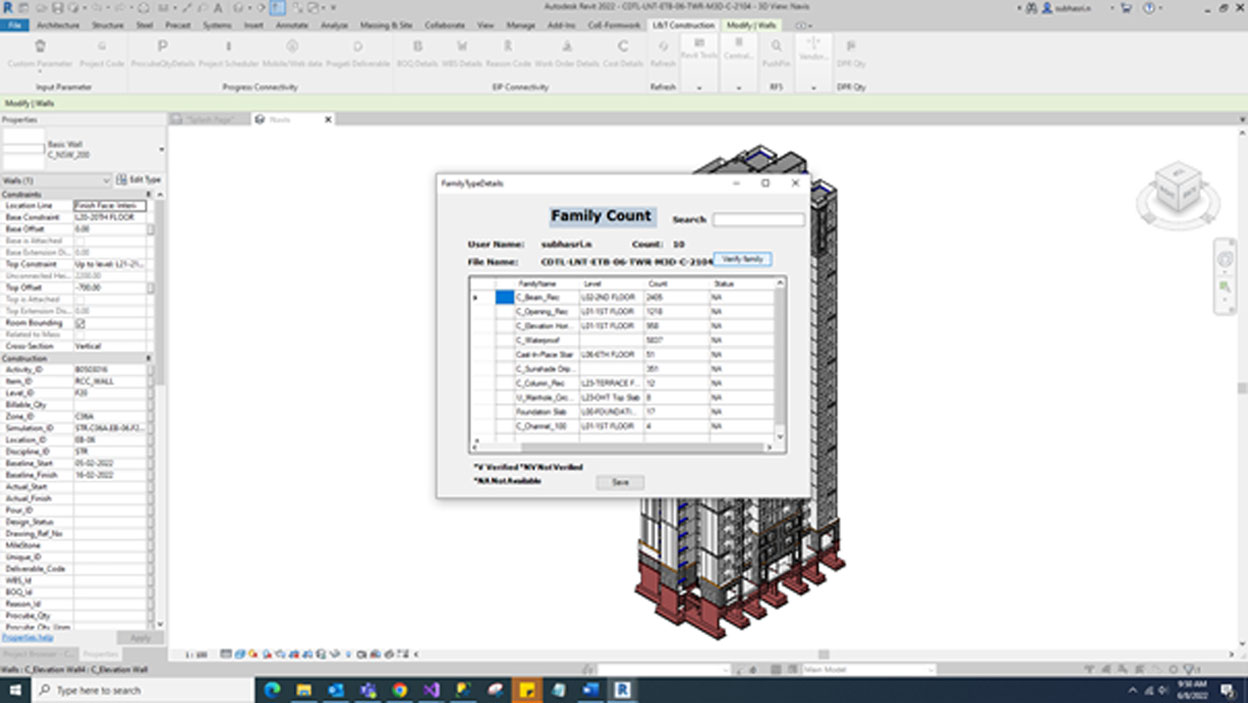
In search we can use three letter to find the content in grid we can get the family name and level values.
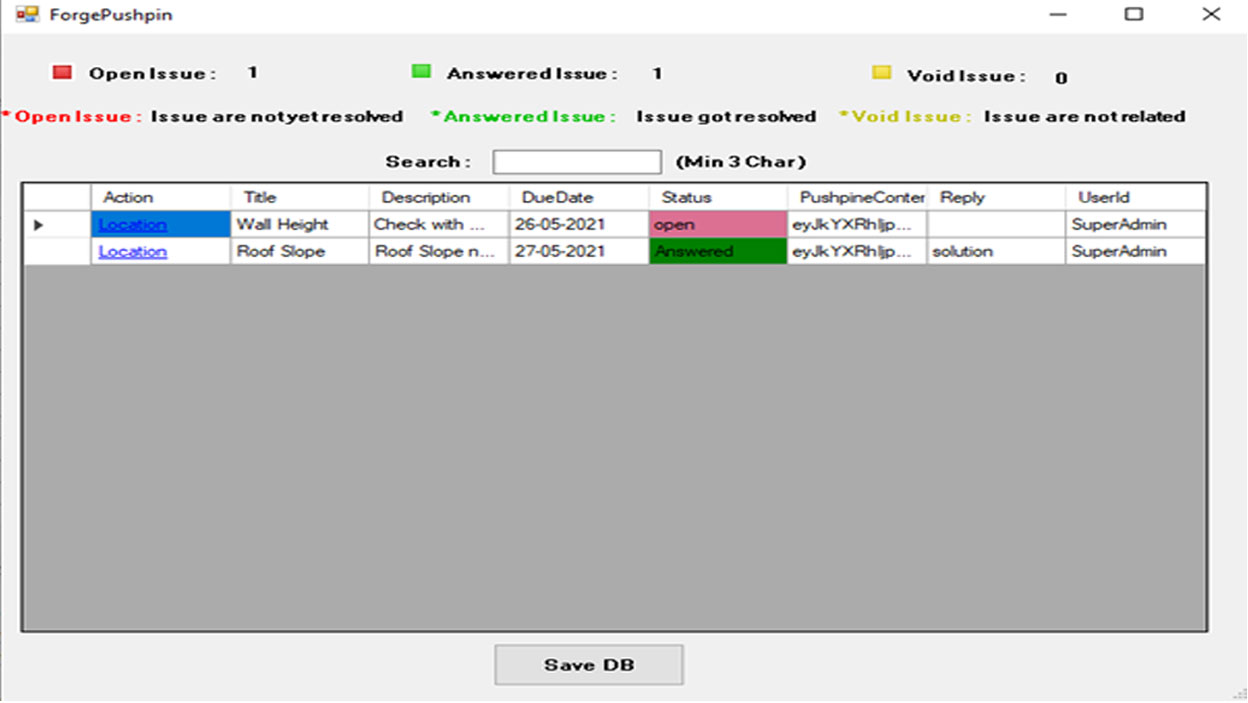
Go to RF5 tab and Select the Pushpin it shows above screen we can view queries in detail.
If we identify the open and resolved issue differentiate by colour.
We can change the status after quires answered and save to Database.
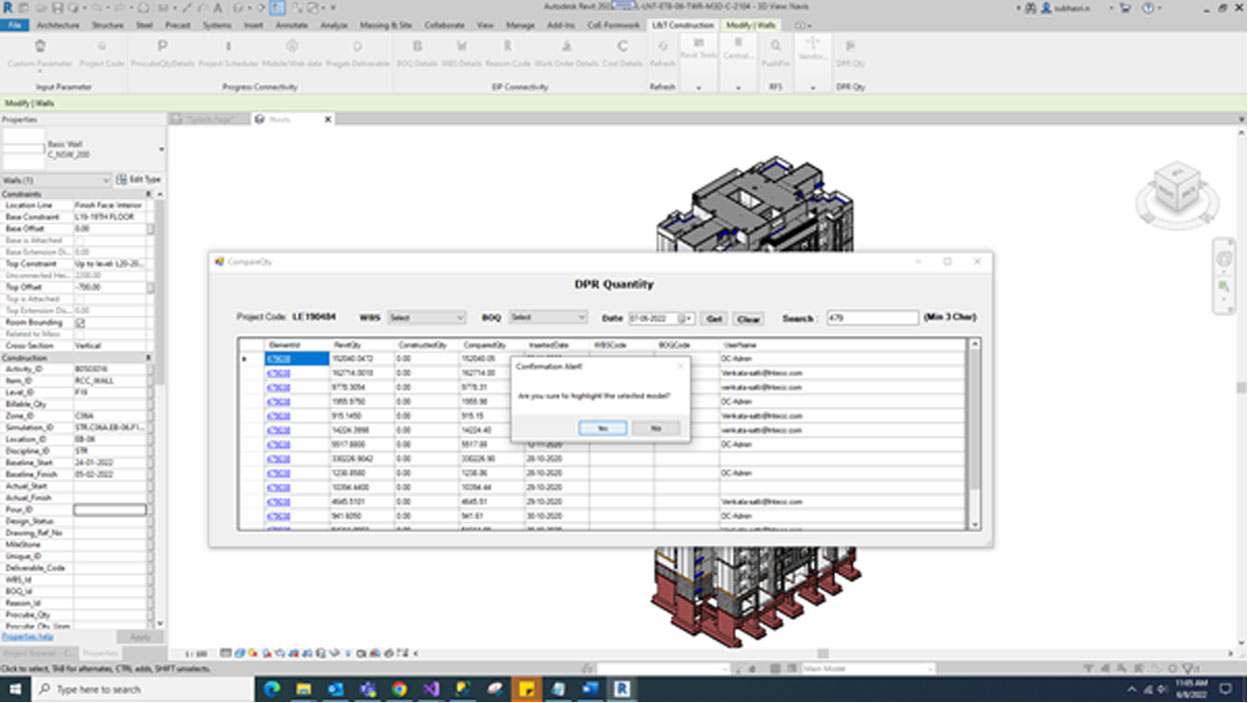
Select the model. Click DPR Qty button and this button will display the Element Id, Revit Qty, Constructed Qty, Compared Qty, Inserted Date, WBS Code, BOQ Code, Username.

In search we can use three letter to find the content in grid we can get the filter details.
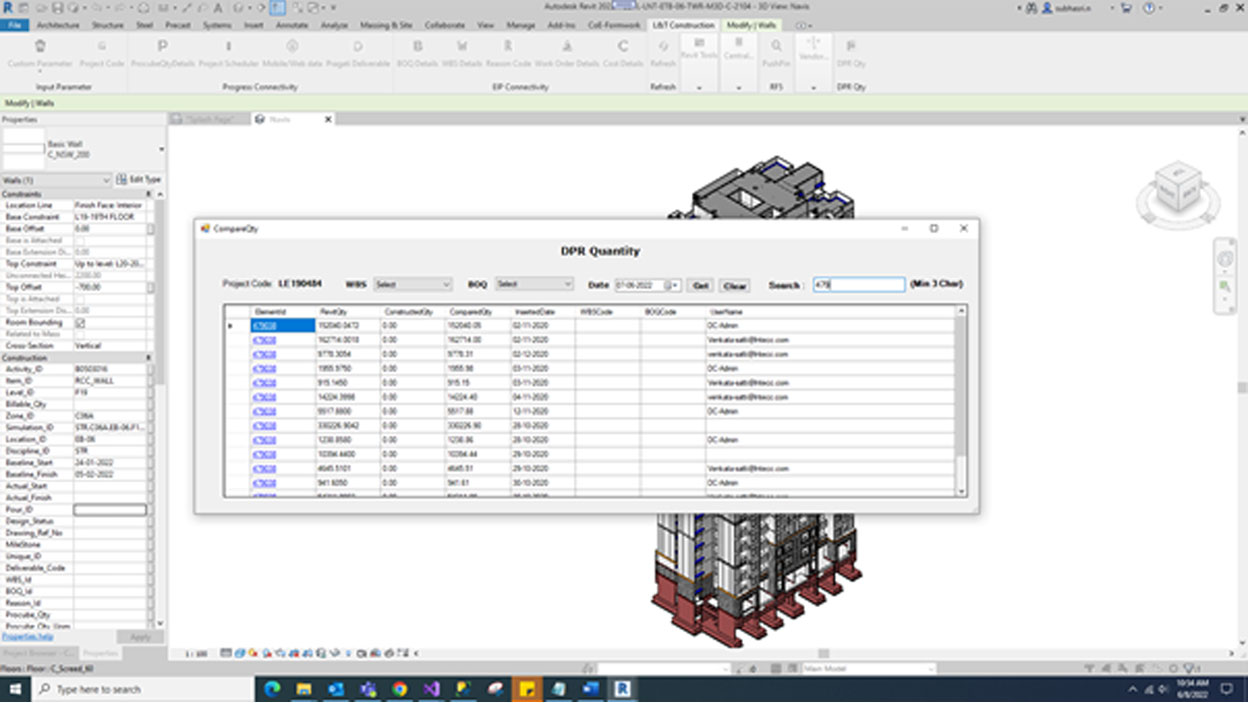
We use drop down for WBS, BOQ details to fetch record. If select the date filter, default shown today date.

For e.g.: 03-11-2020 click ‘Get’ button filter the date to fetch records.

If click ‘Clear’ button to fetch all the records from grid.
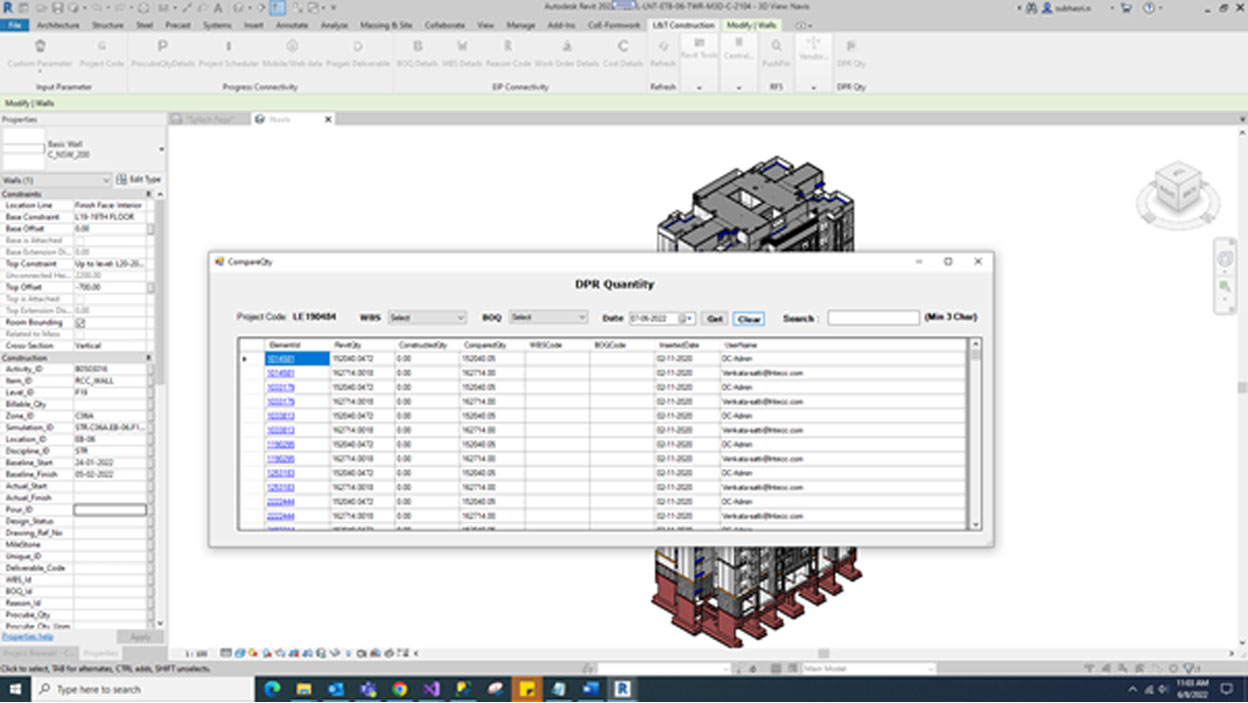
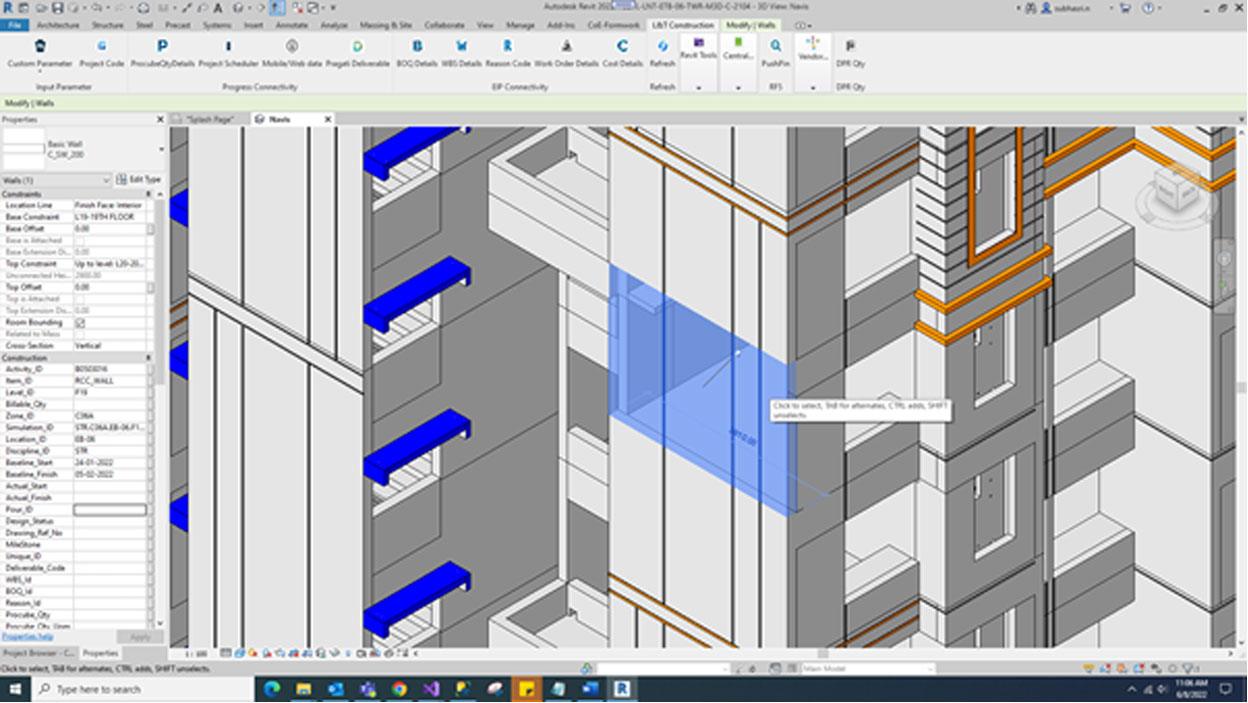
If click Element Id link to show the alert message. If click ’YES’ to highlight the specific element based on relevant model.